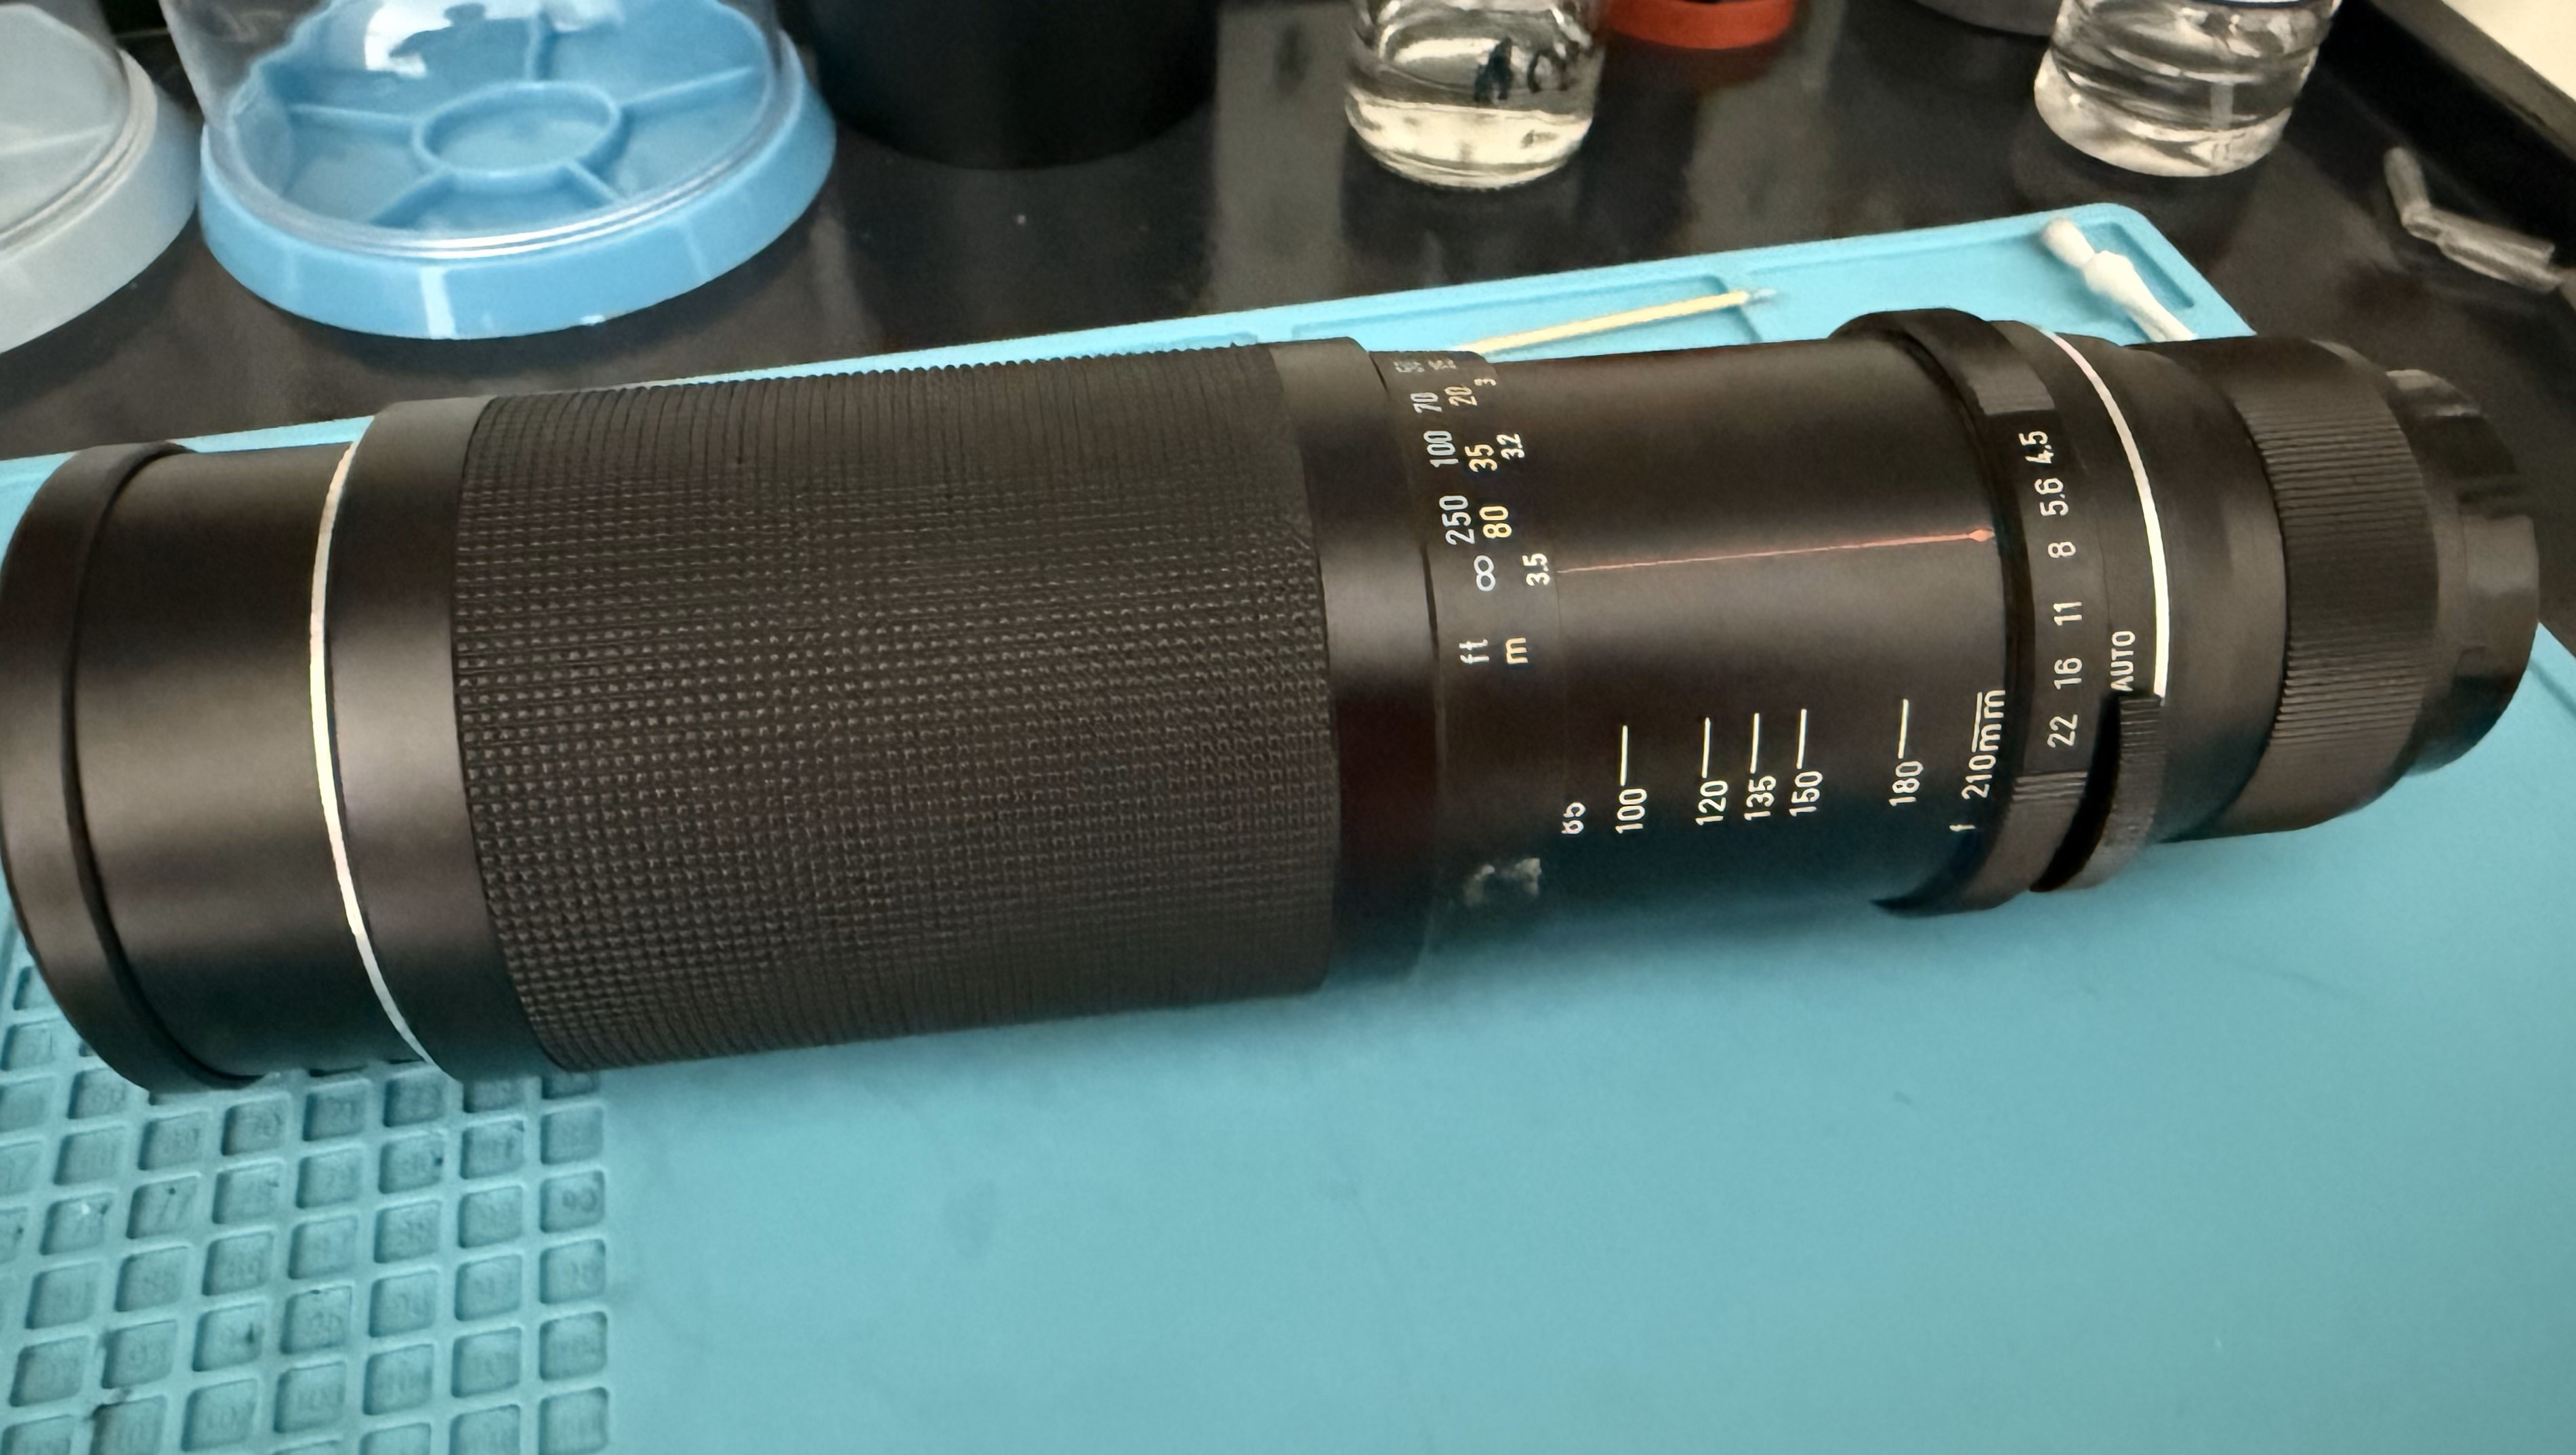
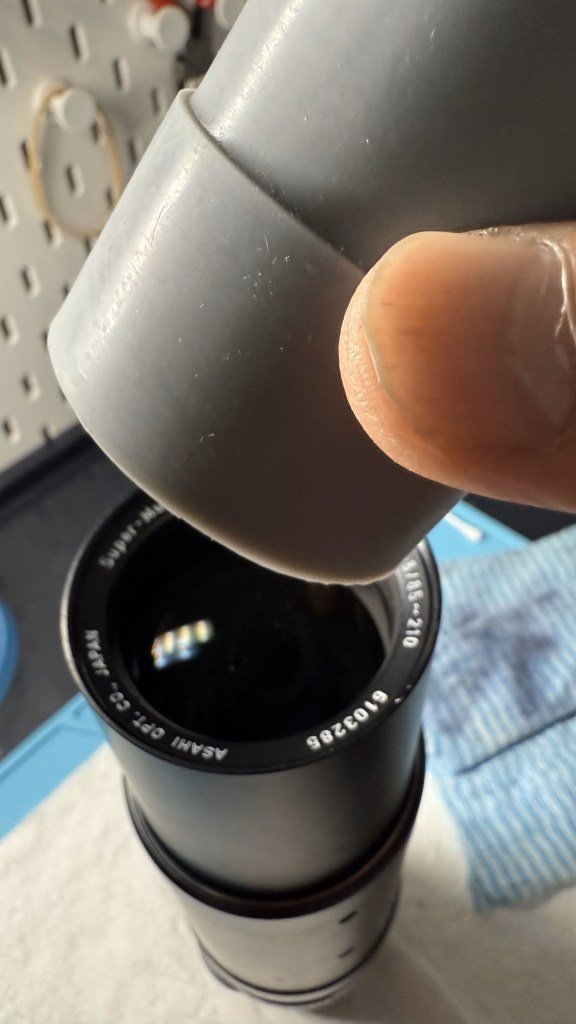
I picked up the Pentax Super-Multi-Coated Takumar 85–210mm f/4.5 zoom lens as part of a lot sale at a local antiques market. To my surprise, it was in pristine condition—barely a mark on it, as if it had spent most of its life tucked away rather than in use. The offer was too good to pass up, and the inclusion of this classic M42-mount lens felt like an unexpected bonus.
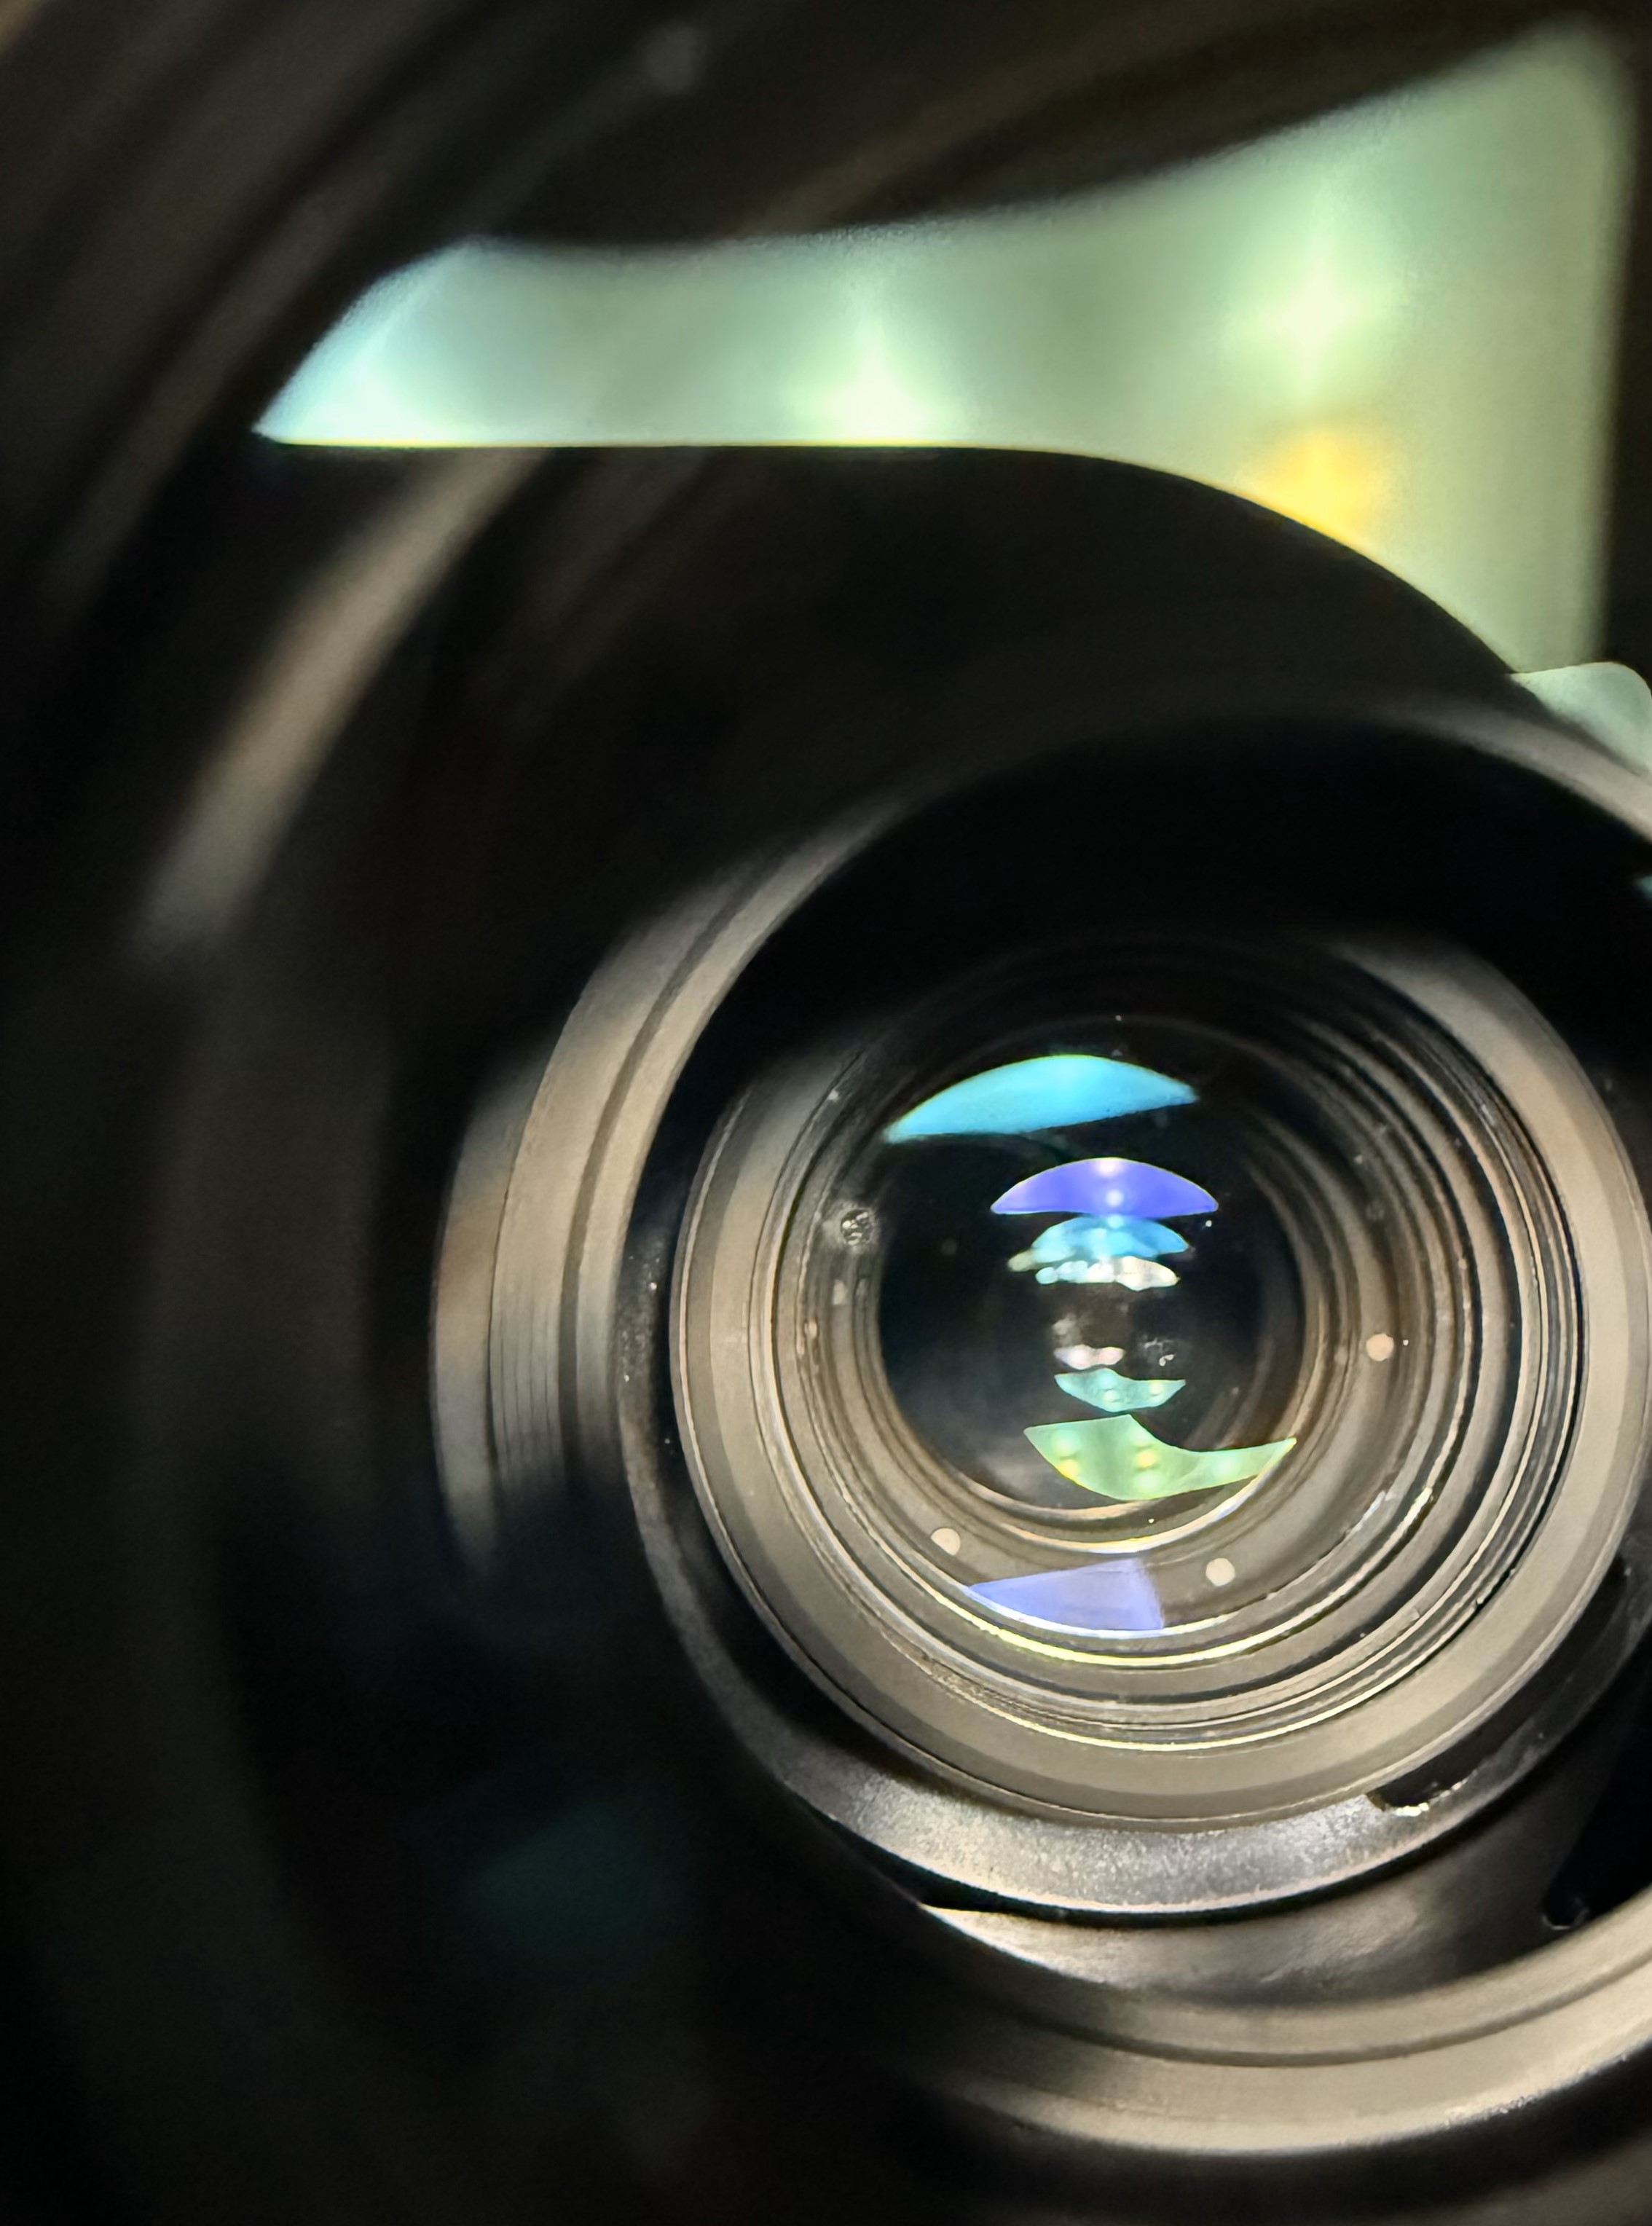
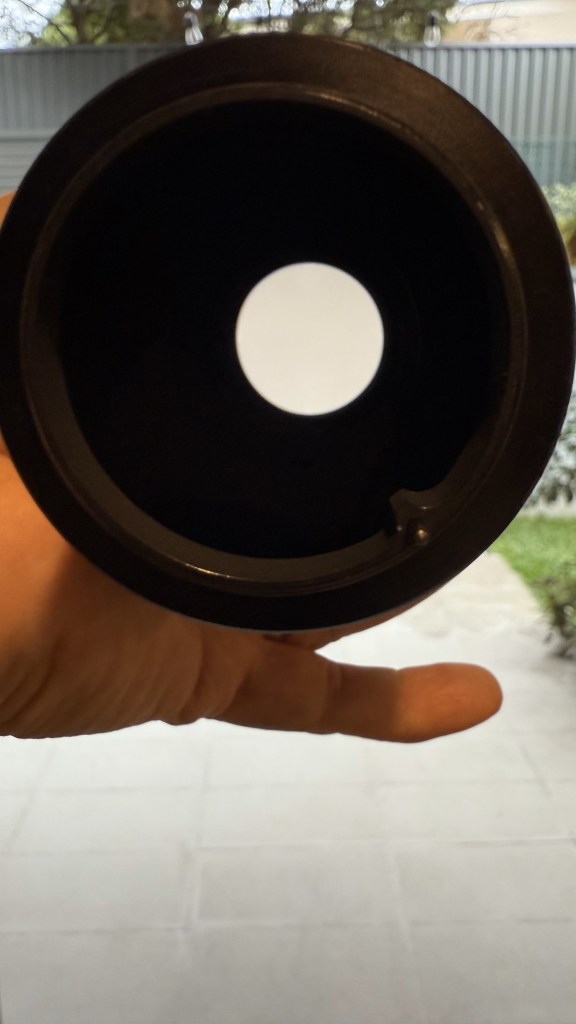
On closer inspection, though, I noticed a faint trace of fungus inside the lens elements. It wasn’t extensive and didn’t seem to affect image quality, but my inner perfectionist couldn’t let it slide. So, with a bit of free time over the holiday break, I decided to take on the challenge: disassemble the lens and give its optics a proper clean.
The only post I found online about disassembling this lens was a blog in Japanese. Thankfully, Google translated the webpage for me, although the instructions could use some improvement, especially regarding marking the lens for easy reassembly. Despite a few challenges during the disassembly process, I persevered, and after two tries, I finally managed to align the distance scale with the correct focus distances upon reassembly. This blog is here to help others with the same lens who wish to service it, sharing my journey and tips for a smoother experience!
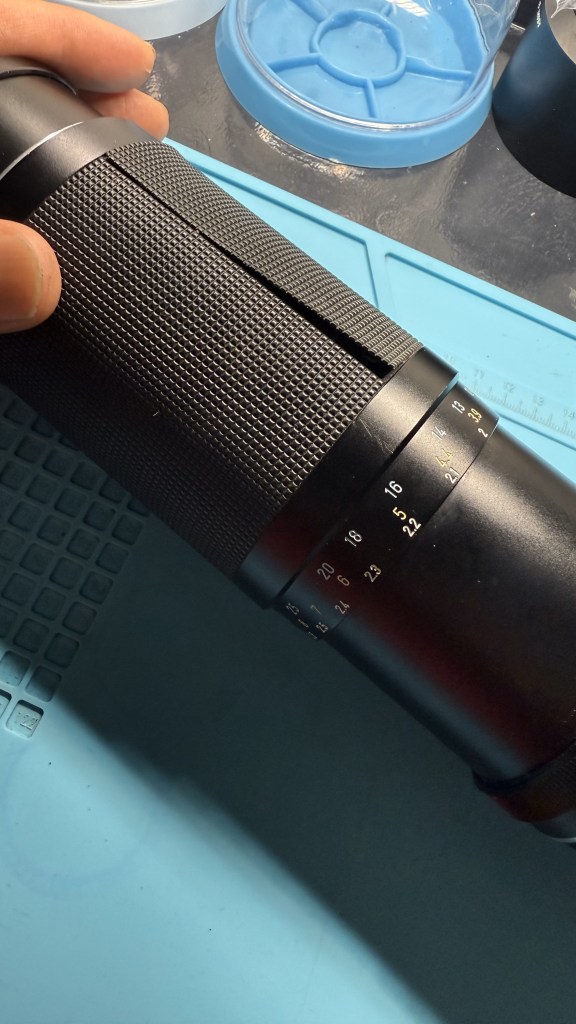
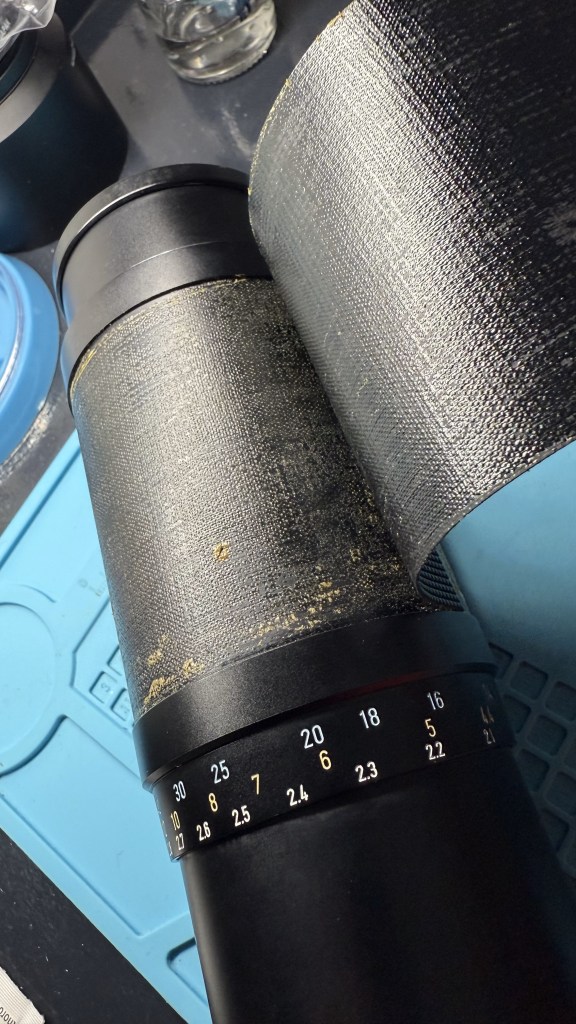
To dis-assemble, first remove the rubber lens zoom/focusing grip which is glued on the barrel. Be careful to use a blunt tool that doesn’t scratch the lens. Remove the residual glue for later re-gluing.
Set the lens at infinity focus, zoom at 210mm and aperture at f4.5. These will be your settings for re-assembly.

Once the lens is set at infinity, remove the lens name ring using a rubber grip tool to twist it anticlockwise out. Once this is removed, you can see 3 screws inside securing the front lens elements to the zoom/focusing barrel. These screws have a brass washer each. Remove those too. You will later use these screws to secure infinity focus with the front lens element group during re-assembly.
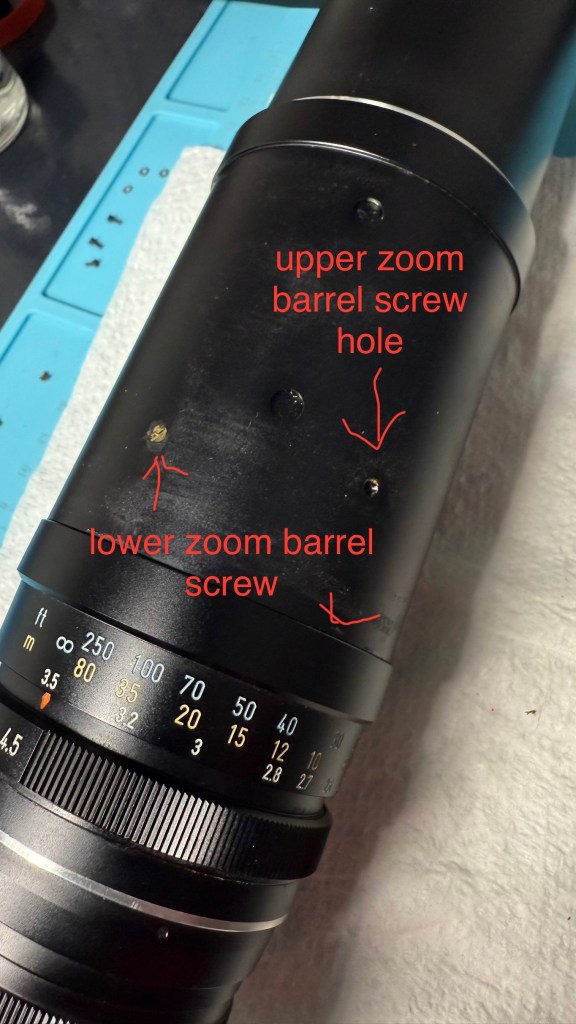
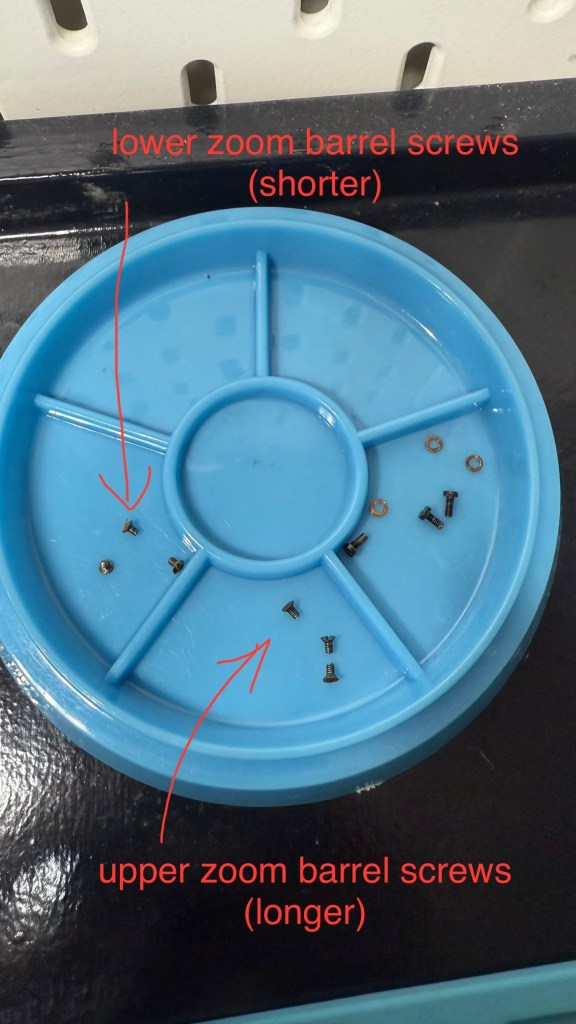
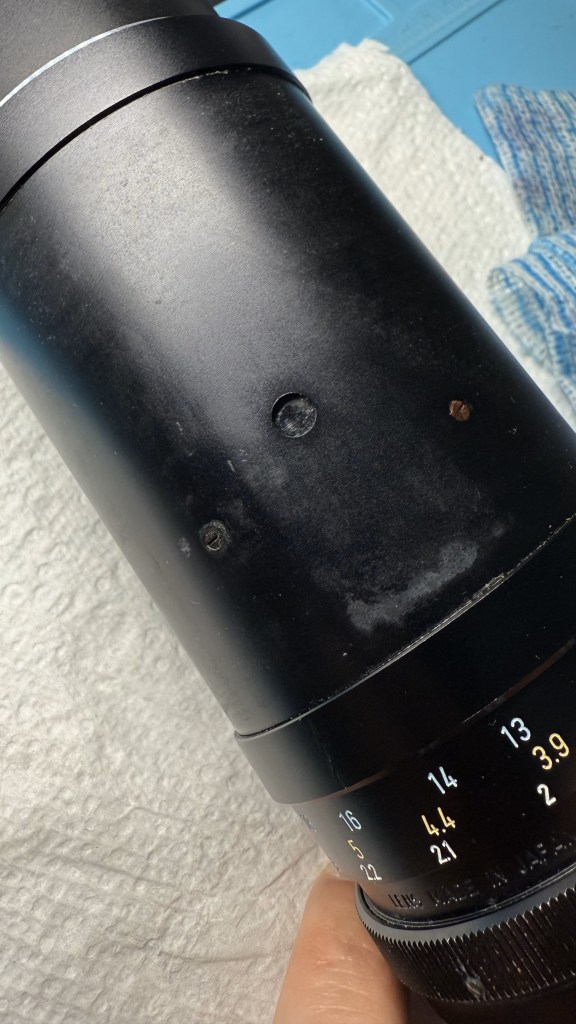
Turning your attention back to the zoom/focusing barrel again, you’ll notice 6 screws, one set of 3 closer to the front of the lens at an upper level and another set of 3 closer to the base of the lens at a lower level. First remove the 3 upper level screws. Keep them aside together, they are longer than the lower level screws. Once you have removed the 3 upper level screws, you can remove the barrel around the front lens elements by slowly pulling on it and turning the barrel at the same time. The front barrel will come out once the focusing stop screw comes free through a groove in the inner zoom tube. How the barrel with the focusing stop screw is reinserted during reassembly will determine if you are able to have a full throw of the focusing barrel or a limited throw as there are 2 grooves in the inner zoom tube to insert the focusing stop screw through. Only inserting through the correct groove will give the full throw for focusing.
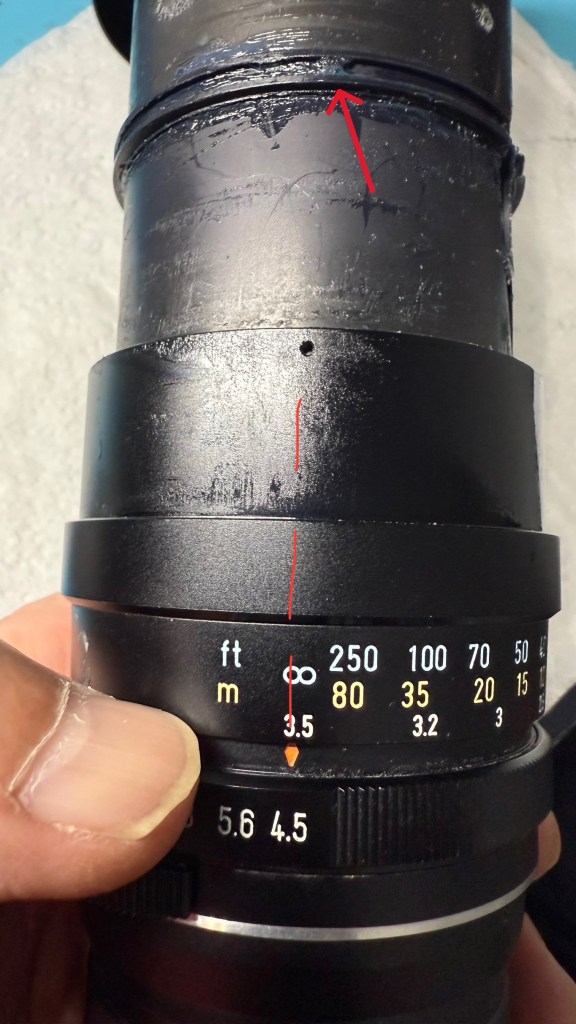

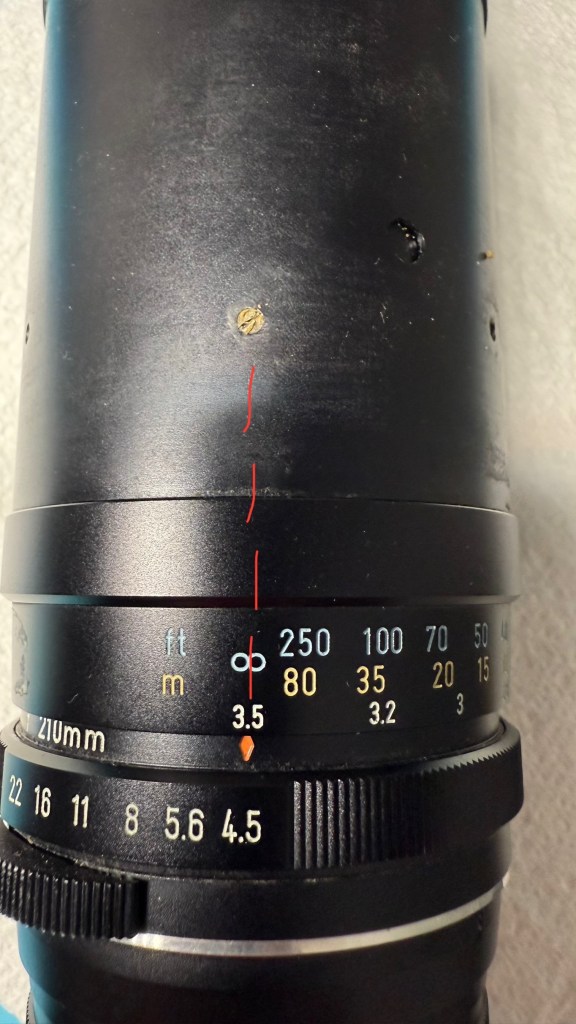
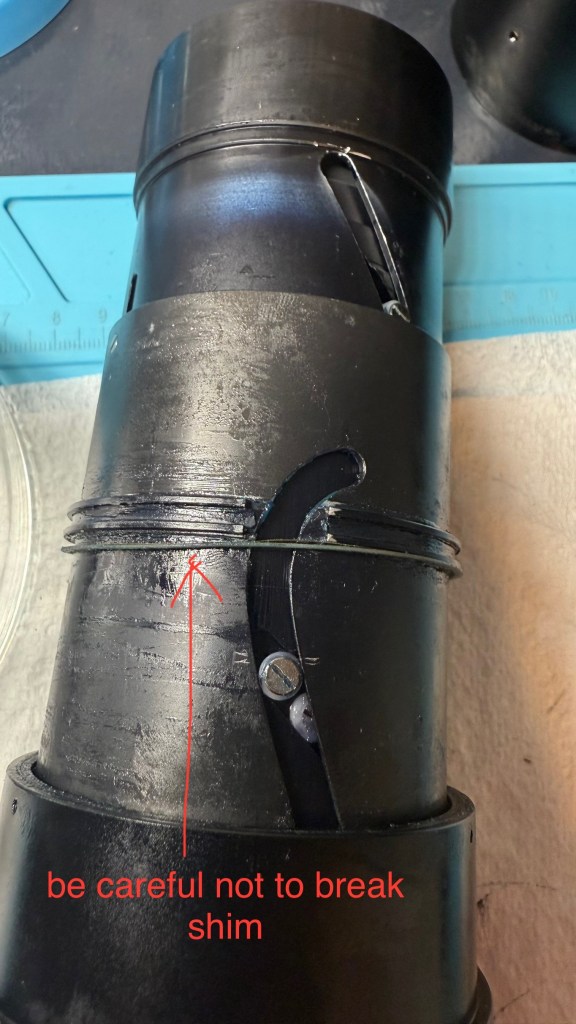
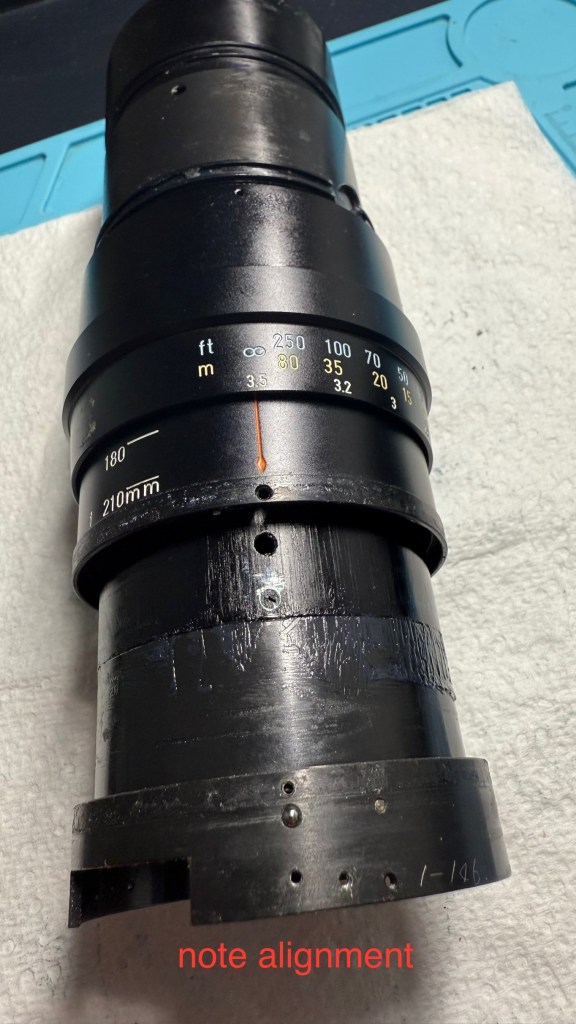
Once you remove the 3 lower zoom barrel screws, you will be able to separate the focusing distance scale barrel from the zoom/focusing barrel. At this stage you will be able to slide upwards and out the zoom/focusing barrel, revealing the inner zoom mechanism tubes (which are greased). To best work with the inner tubes, it is best to remove the grease and regrease later. Note the alignment of the focusing stop on the tube (red arrow) with the infinity mark. The stop should be aligned with infinity, otherwise you won’t be able to be able to get the distance scale aligned properly on re-assembly. I did not notice the focusing stop during initial dis-assembly because it was obscured by grease as in the picture on the left.
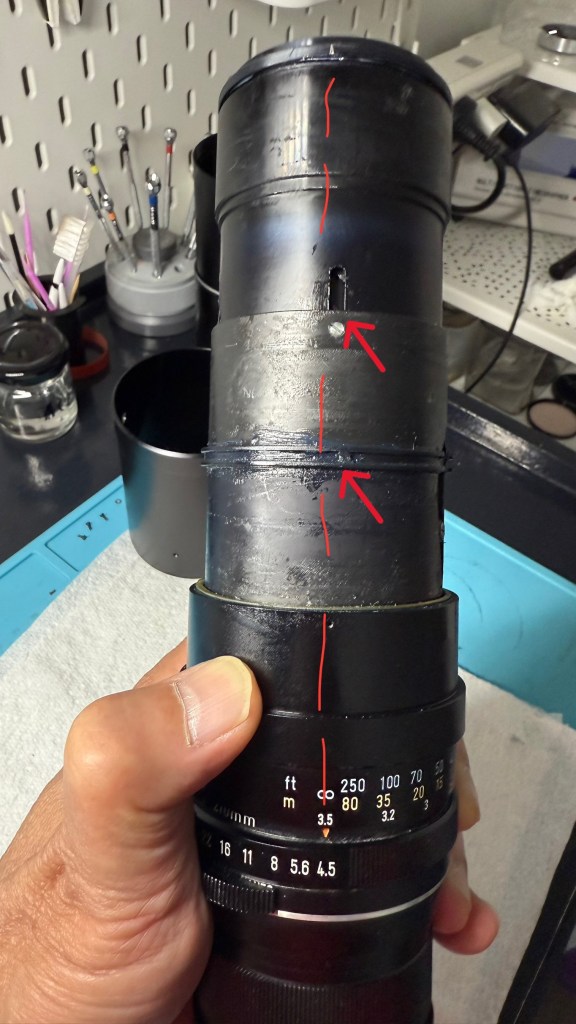
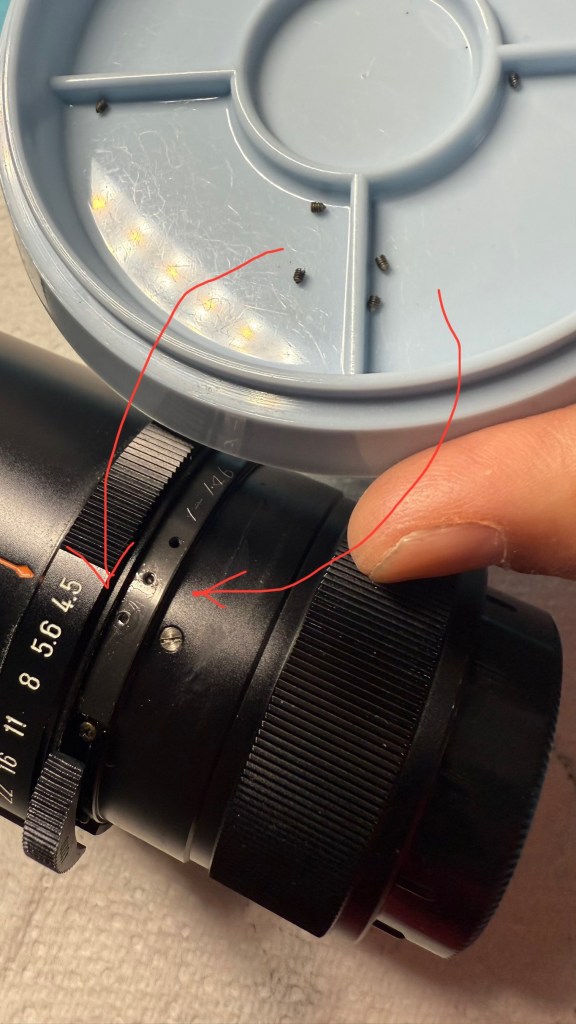
Note the alignment of the markings. This is the alignment for focus at infinity, zoom at 210mm and aperture at f4.5. Mark the position of the front element which was set for infinity focus. Note that the focus stop should be aligned. If it is not aligned, you won’t be able to get the distance scale correctly aligned properly once re-assembled. My mistake which I do not wish happen to anyone else.

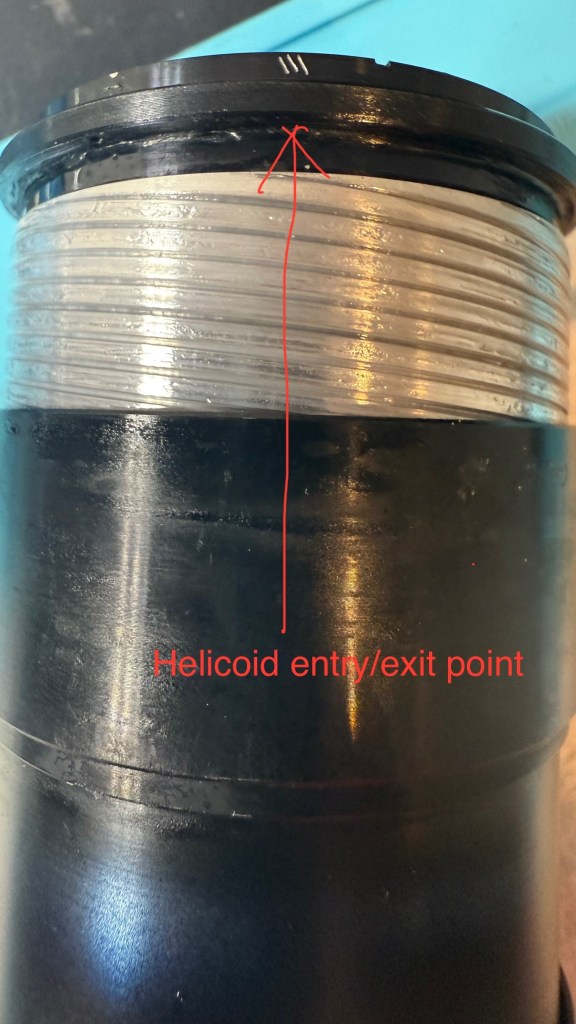
At this stage you can remove the front lens element helicoid by twisting clockwise. Mark the point of separation from barrel. In my case, the Pentax factory had already marked it with 3 linear scratches. Much angst at reassembly if you forget to do this.
Also note the 2 shims (one brass and one plastic) on the distance scale barrel. These are easily deformed or broken.


Once the front lens element is removed, you can turn your attention to the rear of the lens. Loosen the 3 holding screws for the aperture manual/auto indicator ring and remove the ring.
Next remove the six screws (in 2 sets) holding the aperture setting mechanism barrel. Note that the screws are slightly different in lengths. I separated them out accordingly. Also remove the aperture screw before you can separate out the aperture setting mechanism barrel.
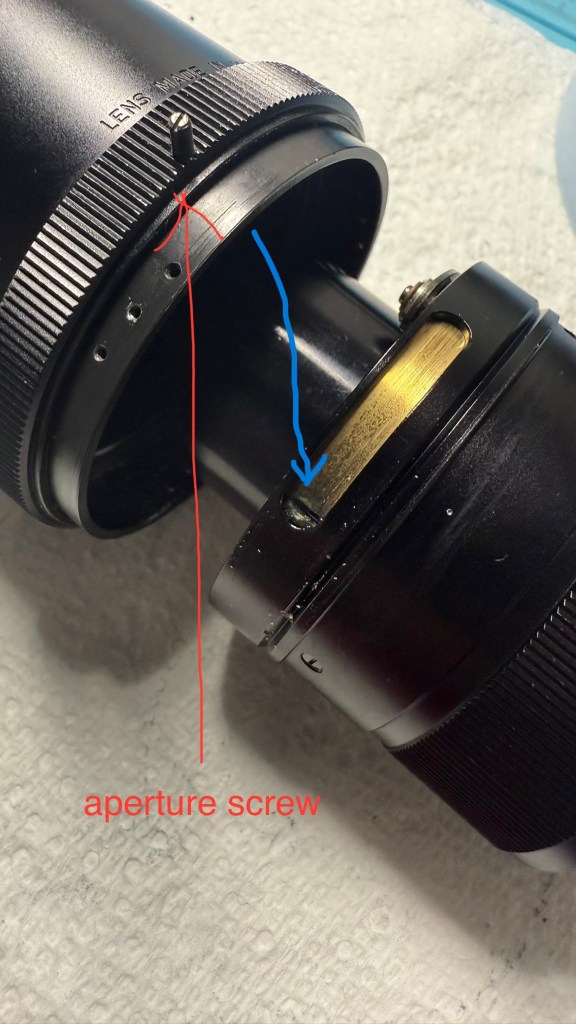
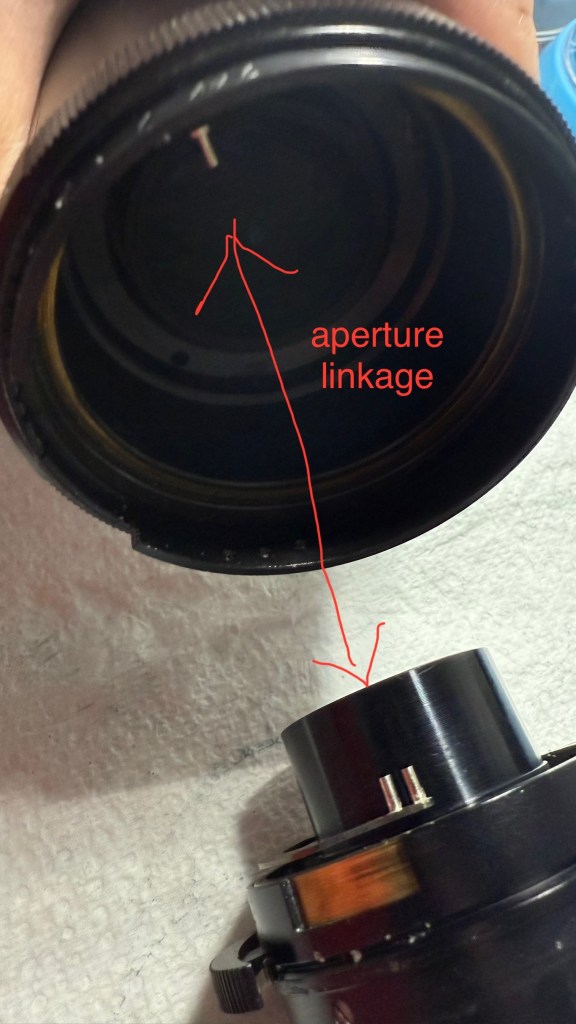
Note that the aperture screw should fit into the groove in the brass section (blue arrow). This will turn the aperture mechanism to set the aperture. Note how the aperture prongs link up with each other to work the aperture blades located in the rear element lens group.
When re-assembling, turning the aperture screw in too deeply will cause the aperture setting ring to be too tight. So, turn to the correct depth to ensure smooth aperture ring rotation and set the screw with some lacquer.
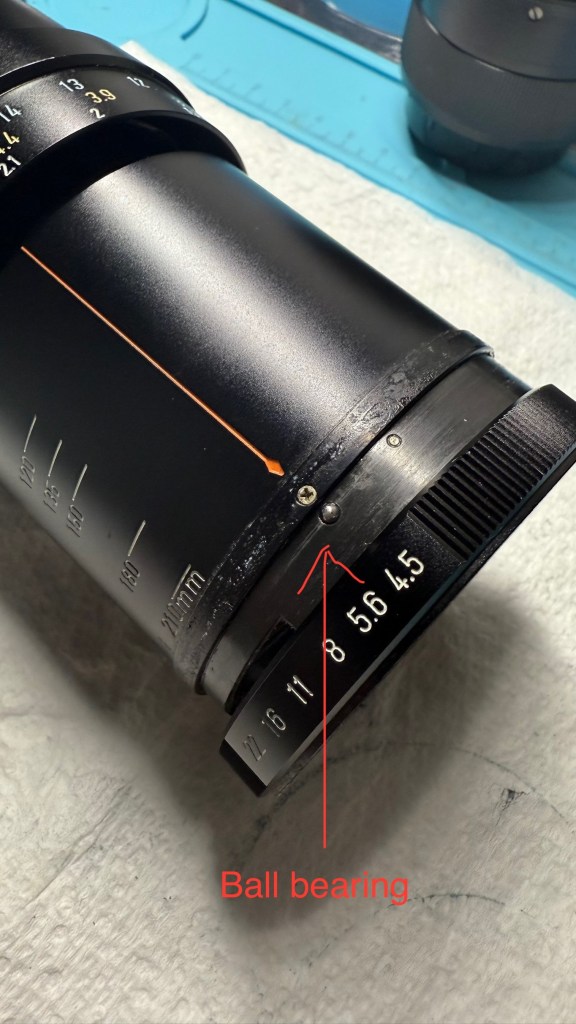
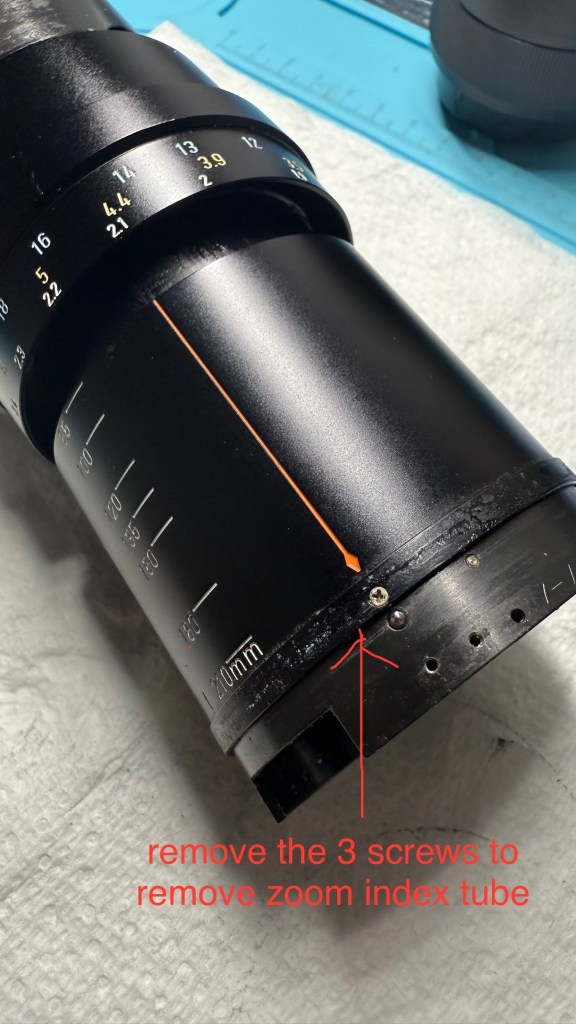
Next slowly ease out the aperture ring, making sure that the ball bearing does not fly into space. Remove the 3 screws to free the zoom index tube.

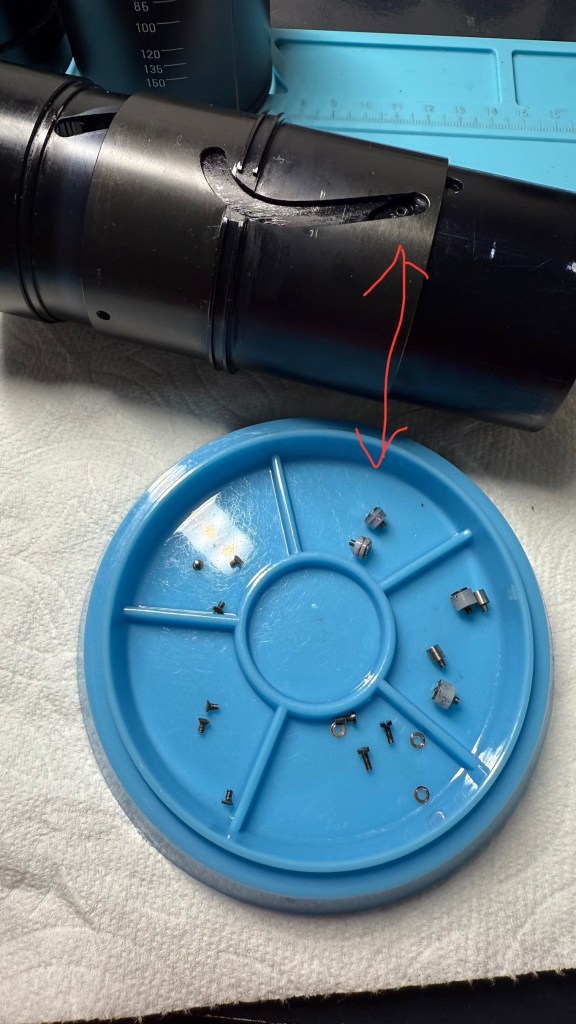
After moving the zoom index tube up, you will see another set of 3 screws which hold the rear element lens group and aperture housing in place. Note the alignment as you remove the rear element lens housing.

After the rear and front lens elements are removed, all the external lens tubes can be removed and you are left with the zoom mechanism tubes and zoom lens elements. Remove all the screws holding the zoom lens elements to separate out the pieces, taking care to note the lens orientation, where all the screws fit and how the tubes are aligned. This is where I made my mistake when re-assembling, as I secured the outer tube 180 degrees wrongly and the focusing stop screws were not aligned properly causing misalignment with the distance scale toward the end of re-assembly.

Re-assembly is just putting everything together methodically and carefully in reverse order, taking time to check alignment at each step.

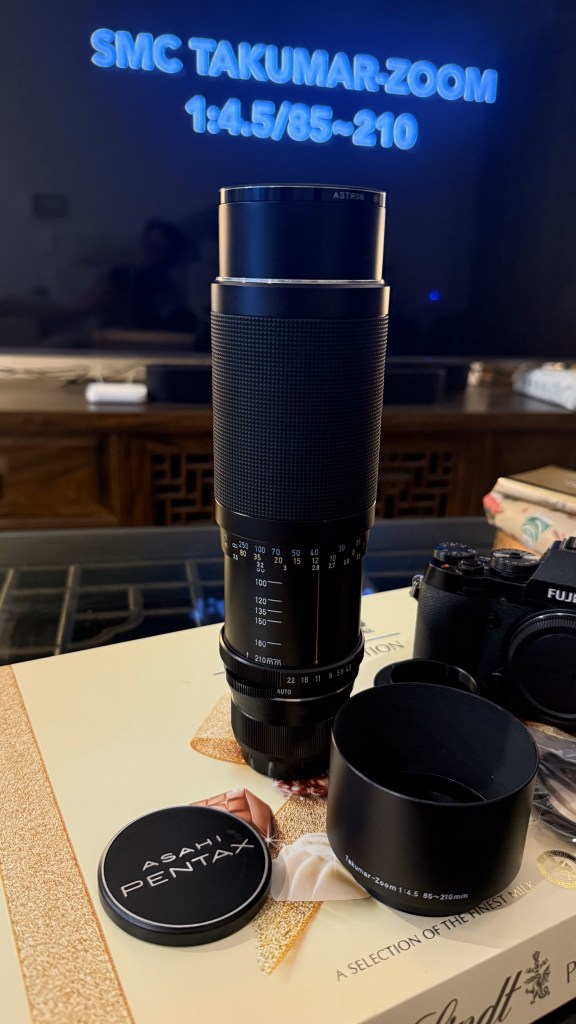
The Pentax Super-Multi-Coated Takumar all nice and clean. This one came with its original case, lens hood, close-up filter, lens cap and rear cap. A good collector’s item.
Thanks for visiting.
