Disassembling the Asahi Takumar 135mm f3.5 (Pre-set v.1) Lens

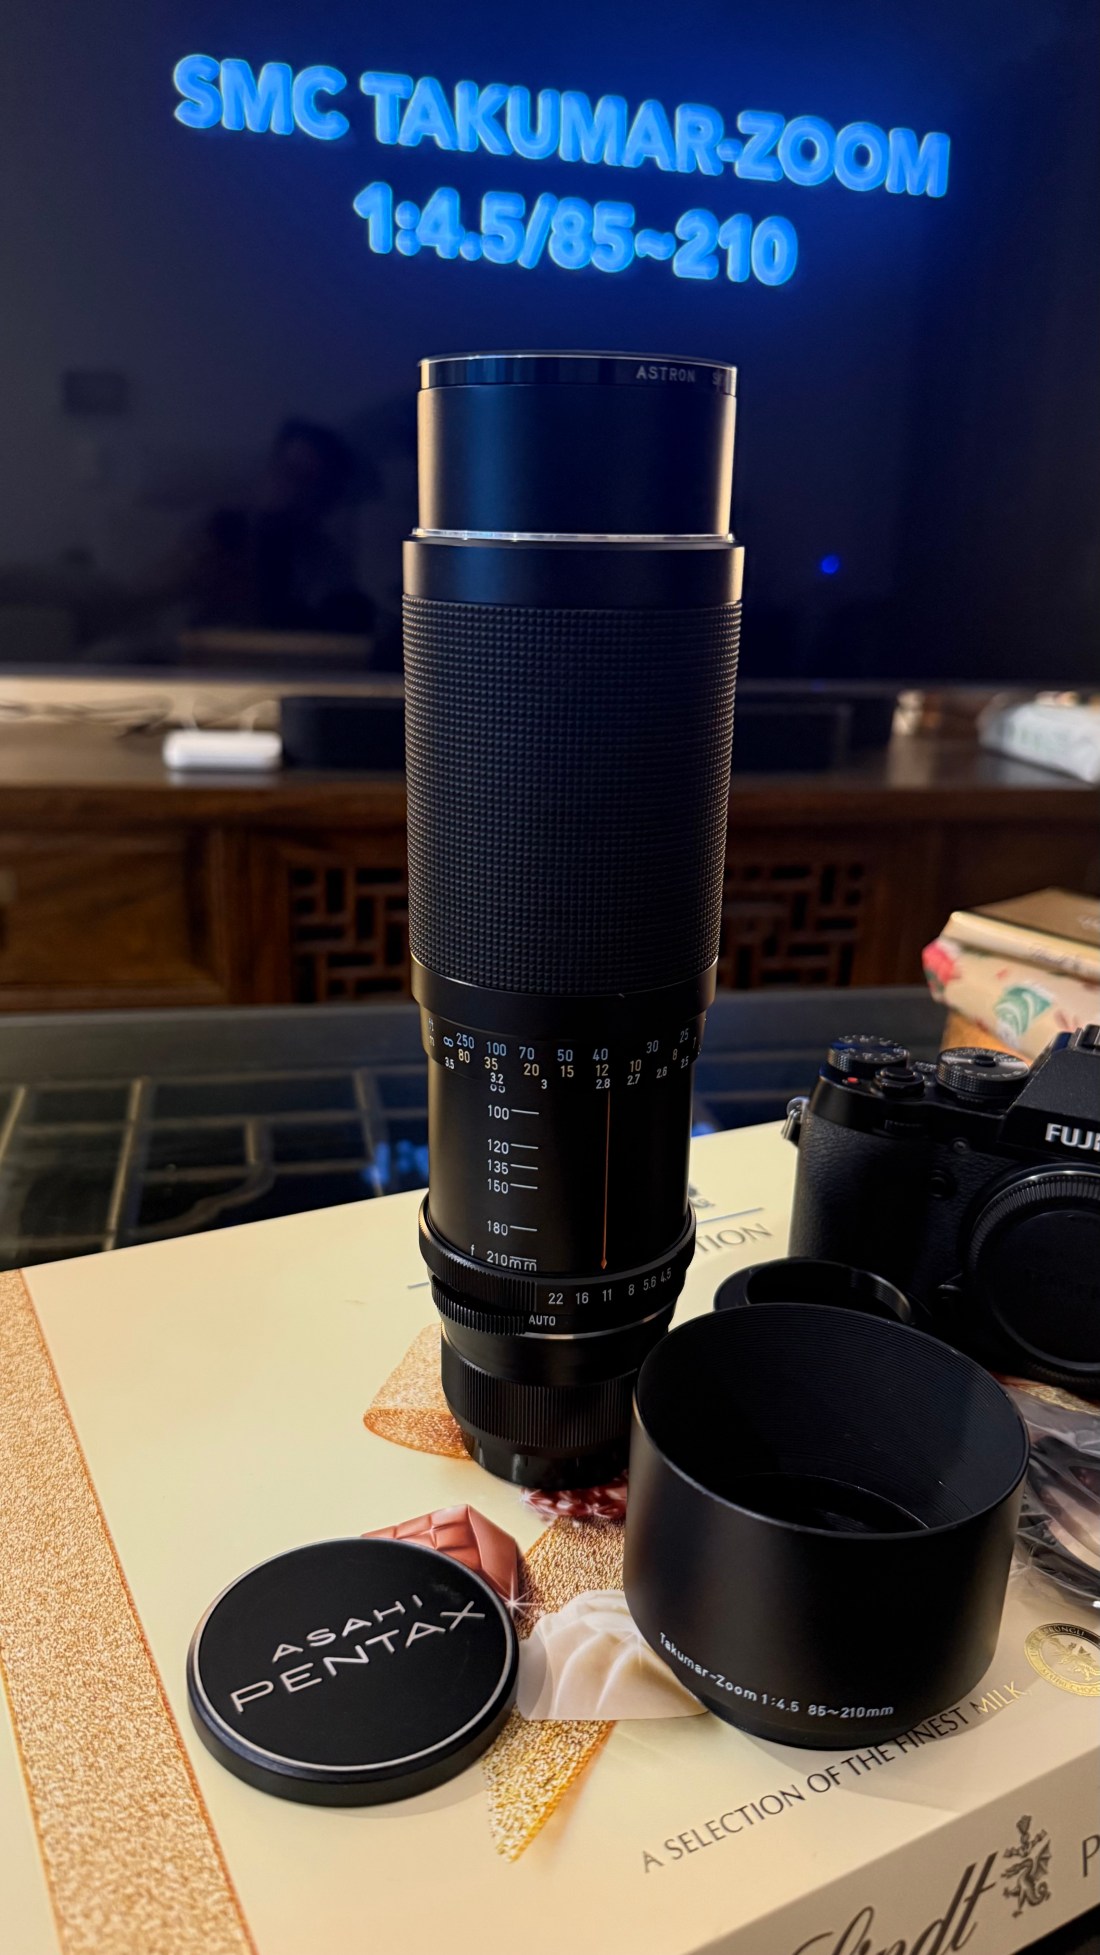
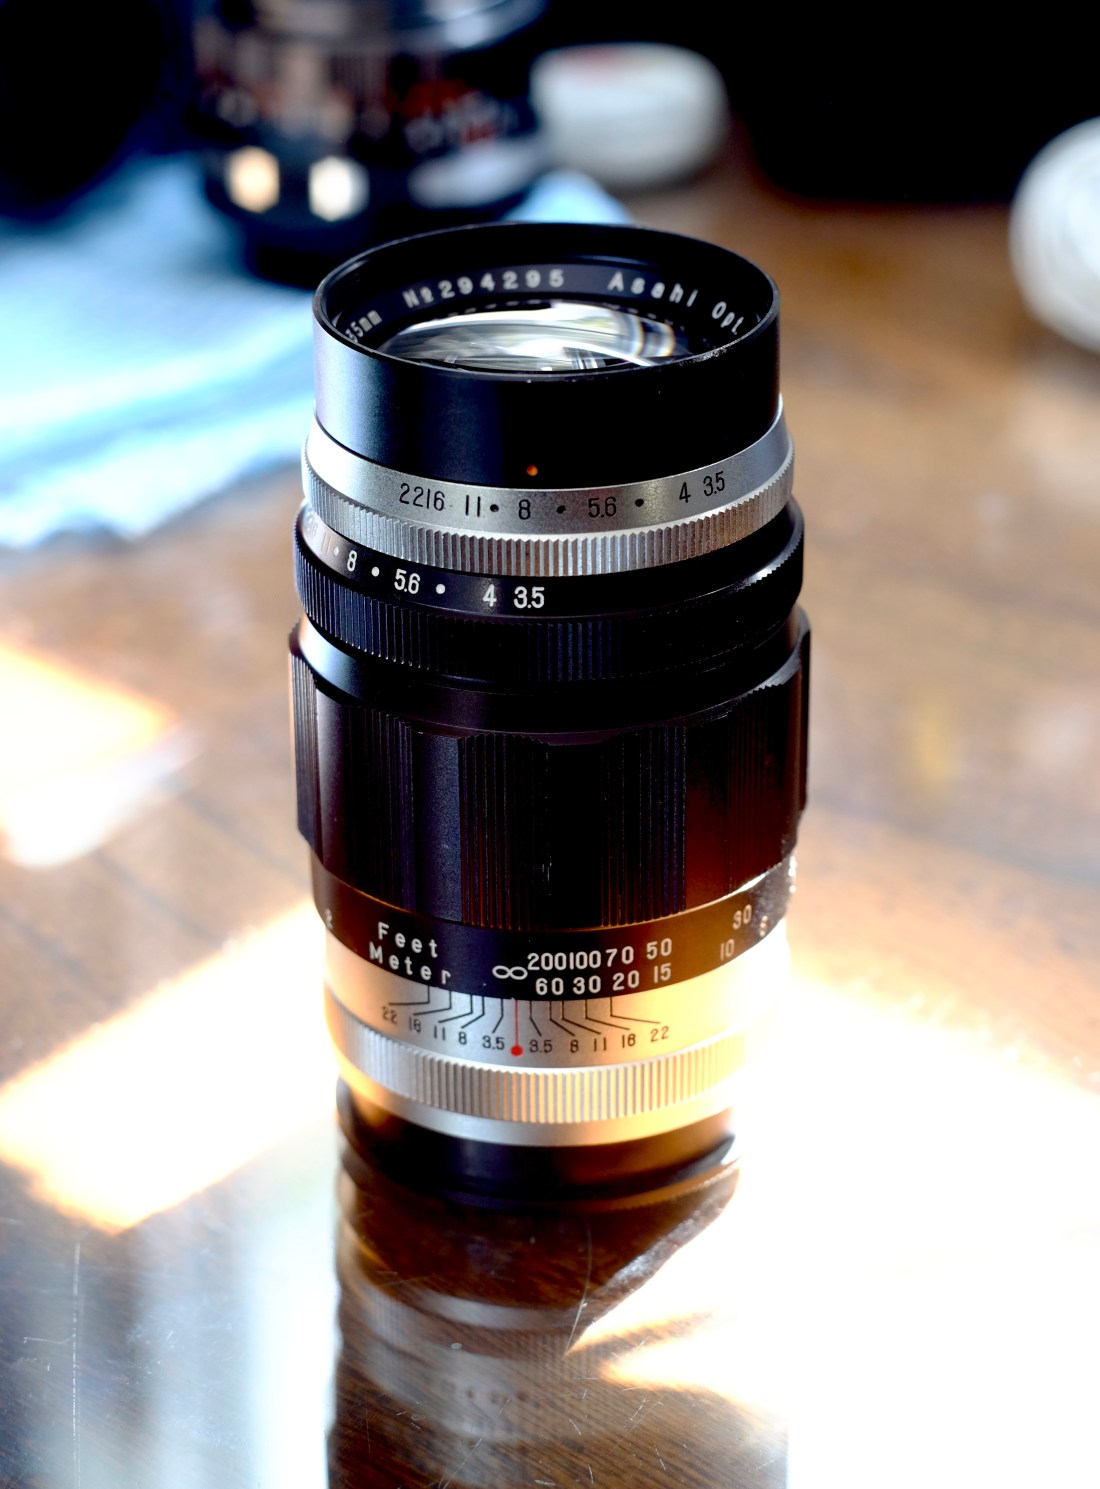
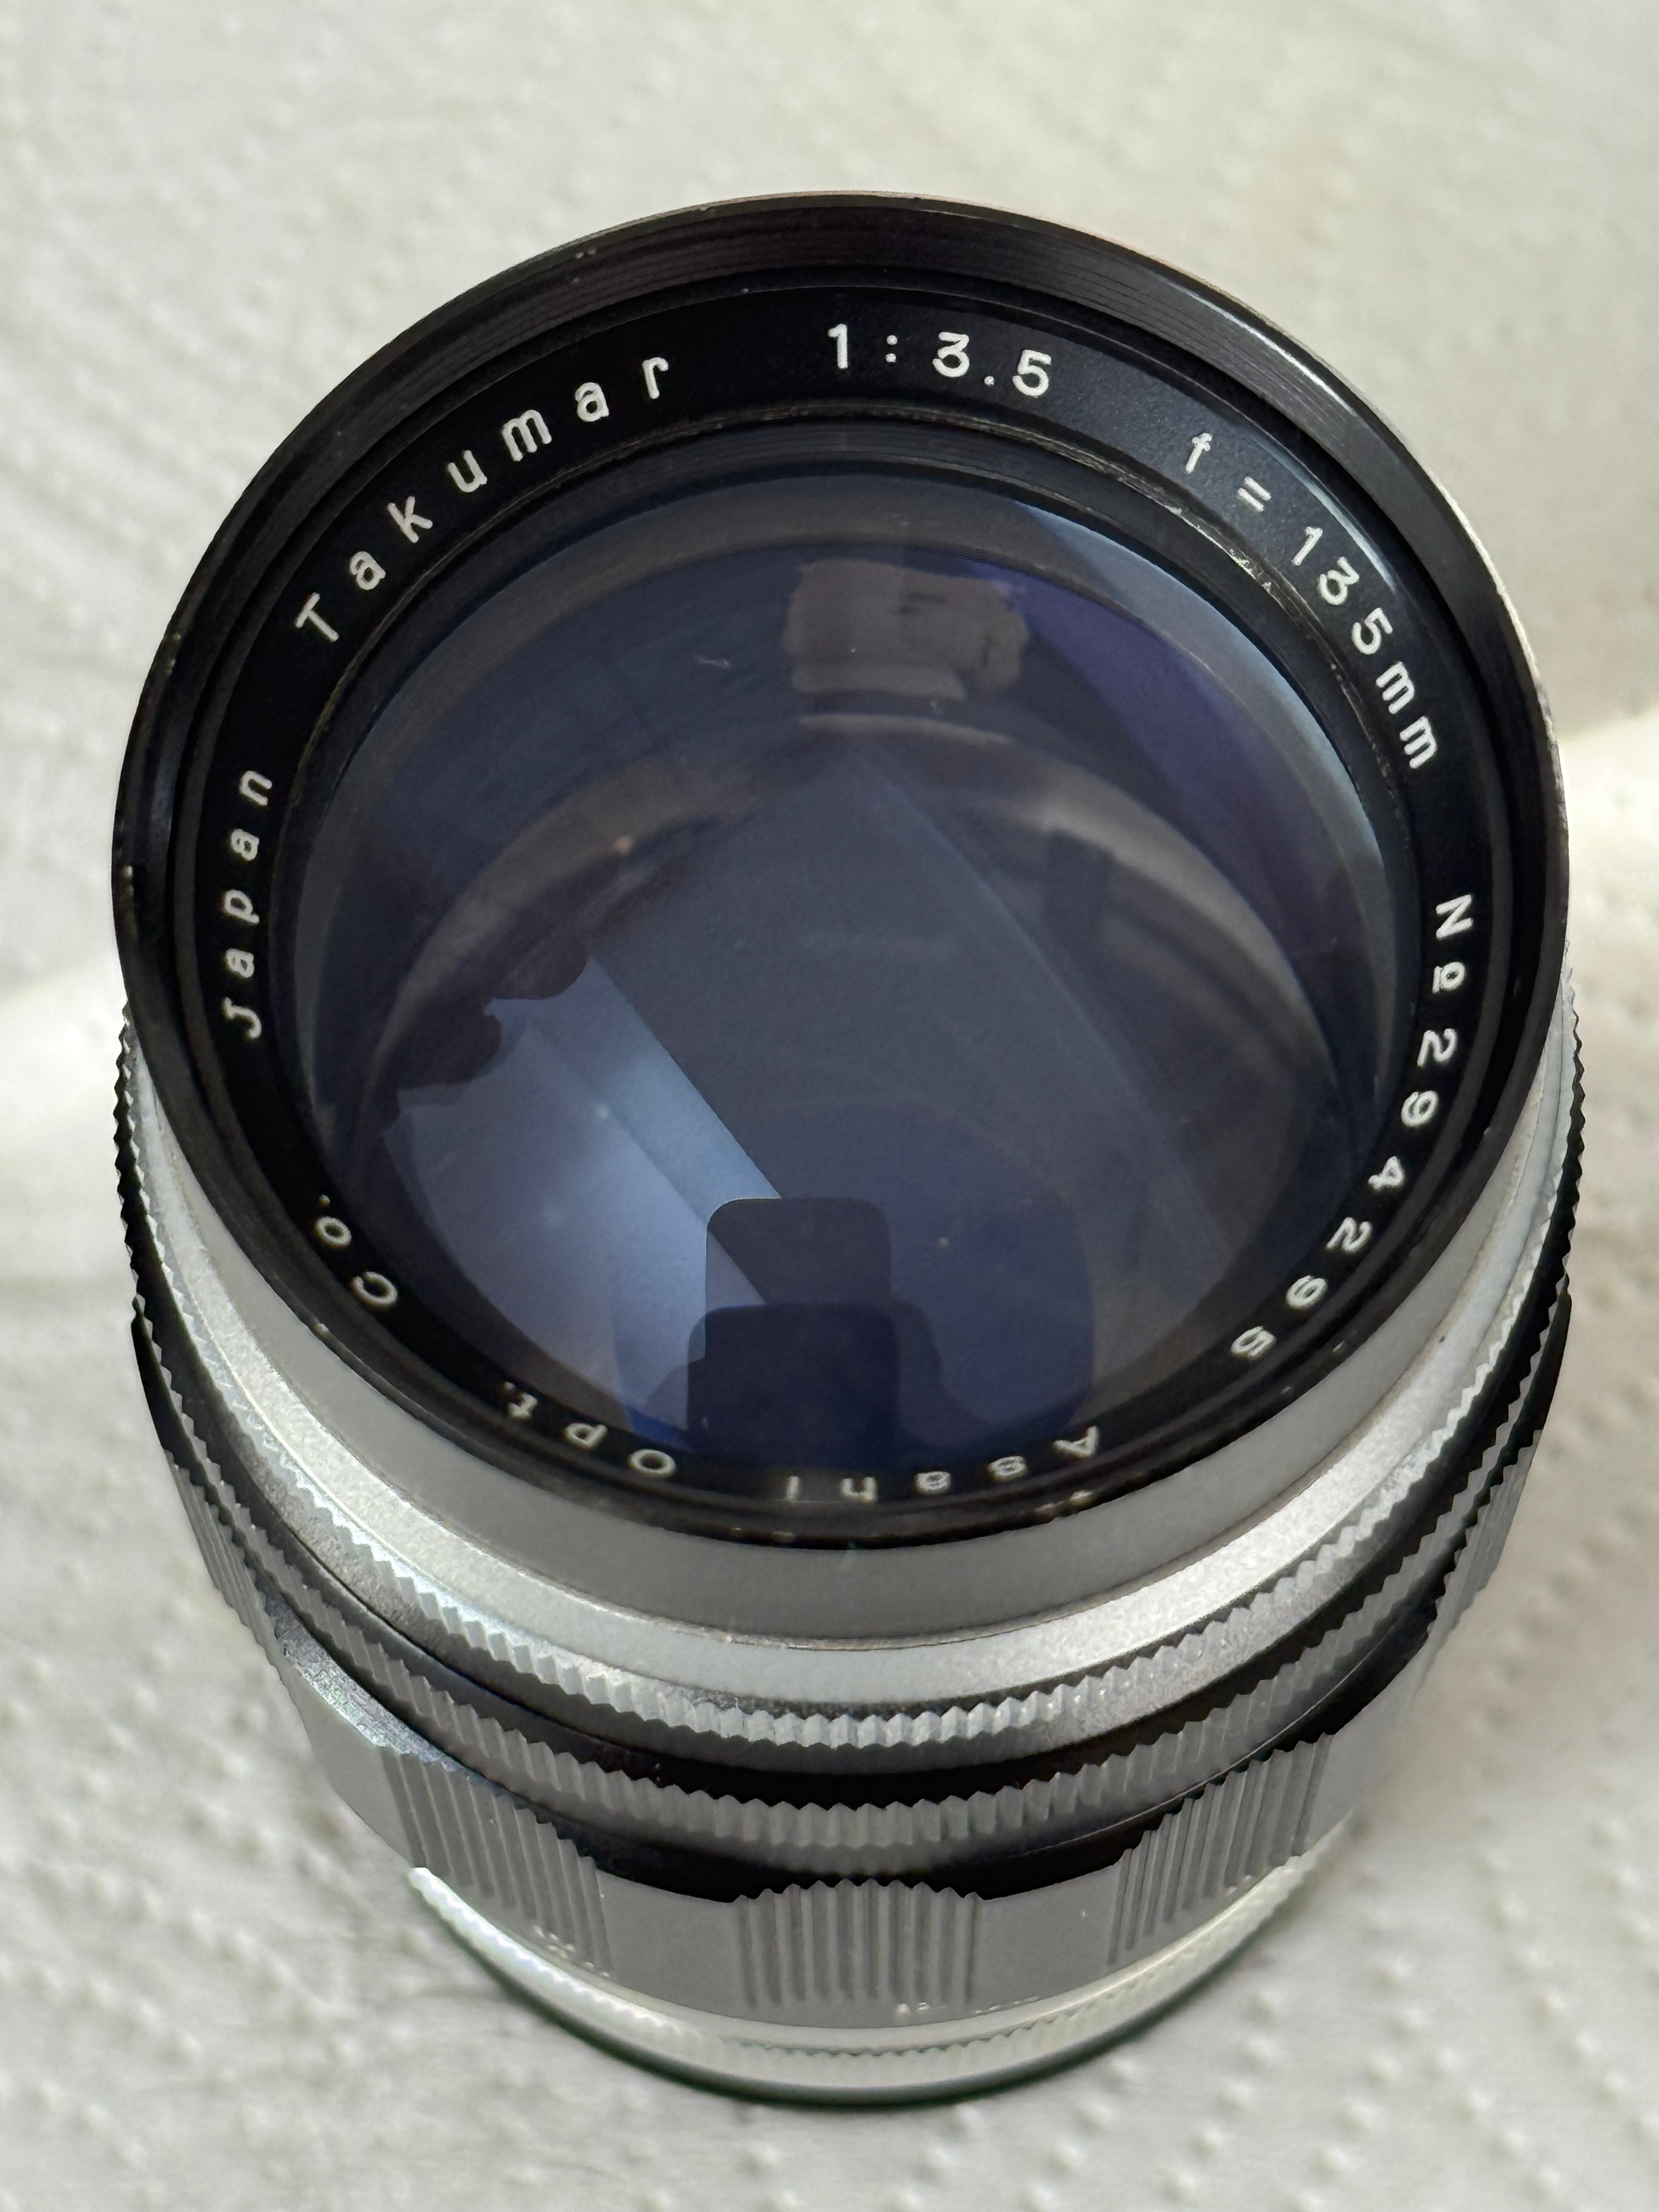
I picked up a near-mint vintage Asahi (Pentax) 135mm f/3.5 version 1 lens from Lucky Home (LH) Cameras, tucked away in the Miami Bayside Bangpu area of Bangkok. The place is a treasure trove of old and vintage Japanese cameras and lenses—though the pricing seems to depend entirely on the day you visit. When I dropped by on a Thursday, they were advertising a 70% discount across the board. Whether that’s a genuine deal or just a clever marketing ploy, I couldn’t resist. The lens was in beautiful condition, and at that price, it felt like a steal.

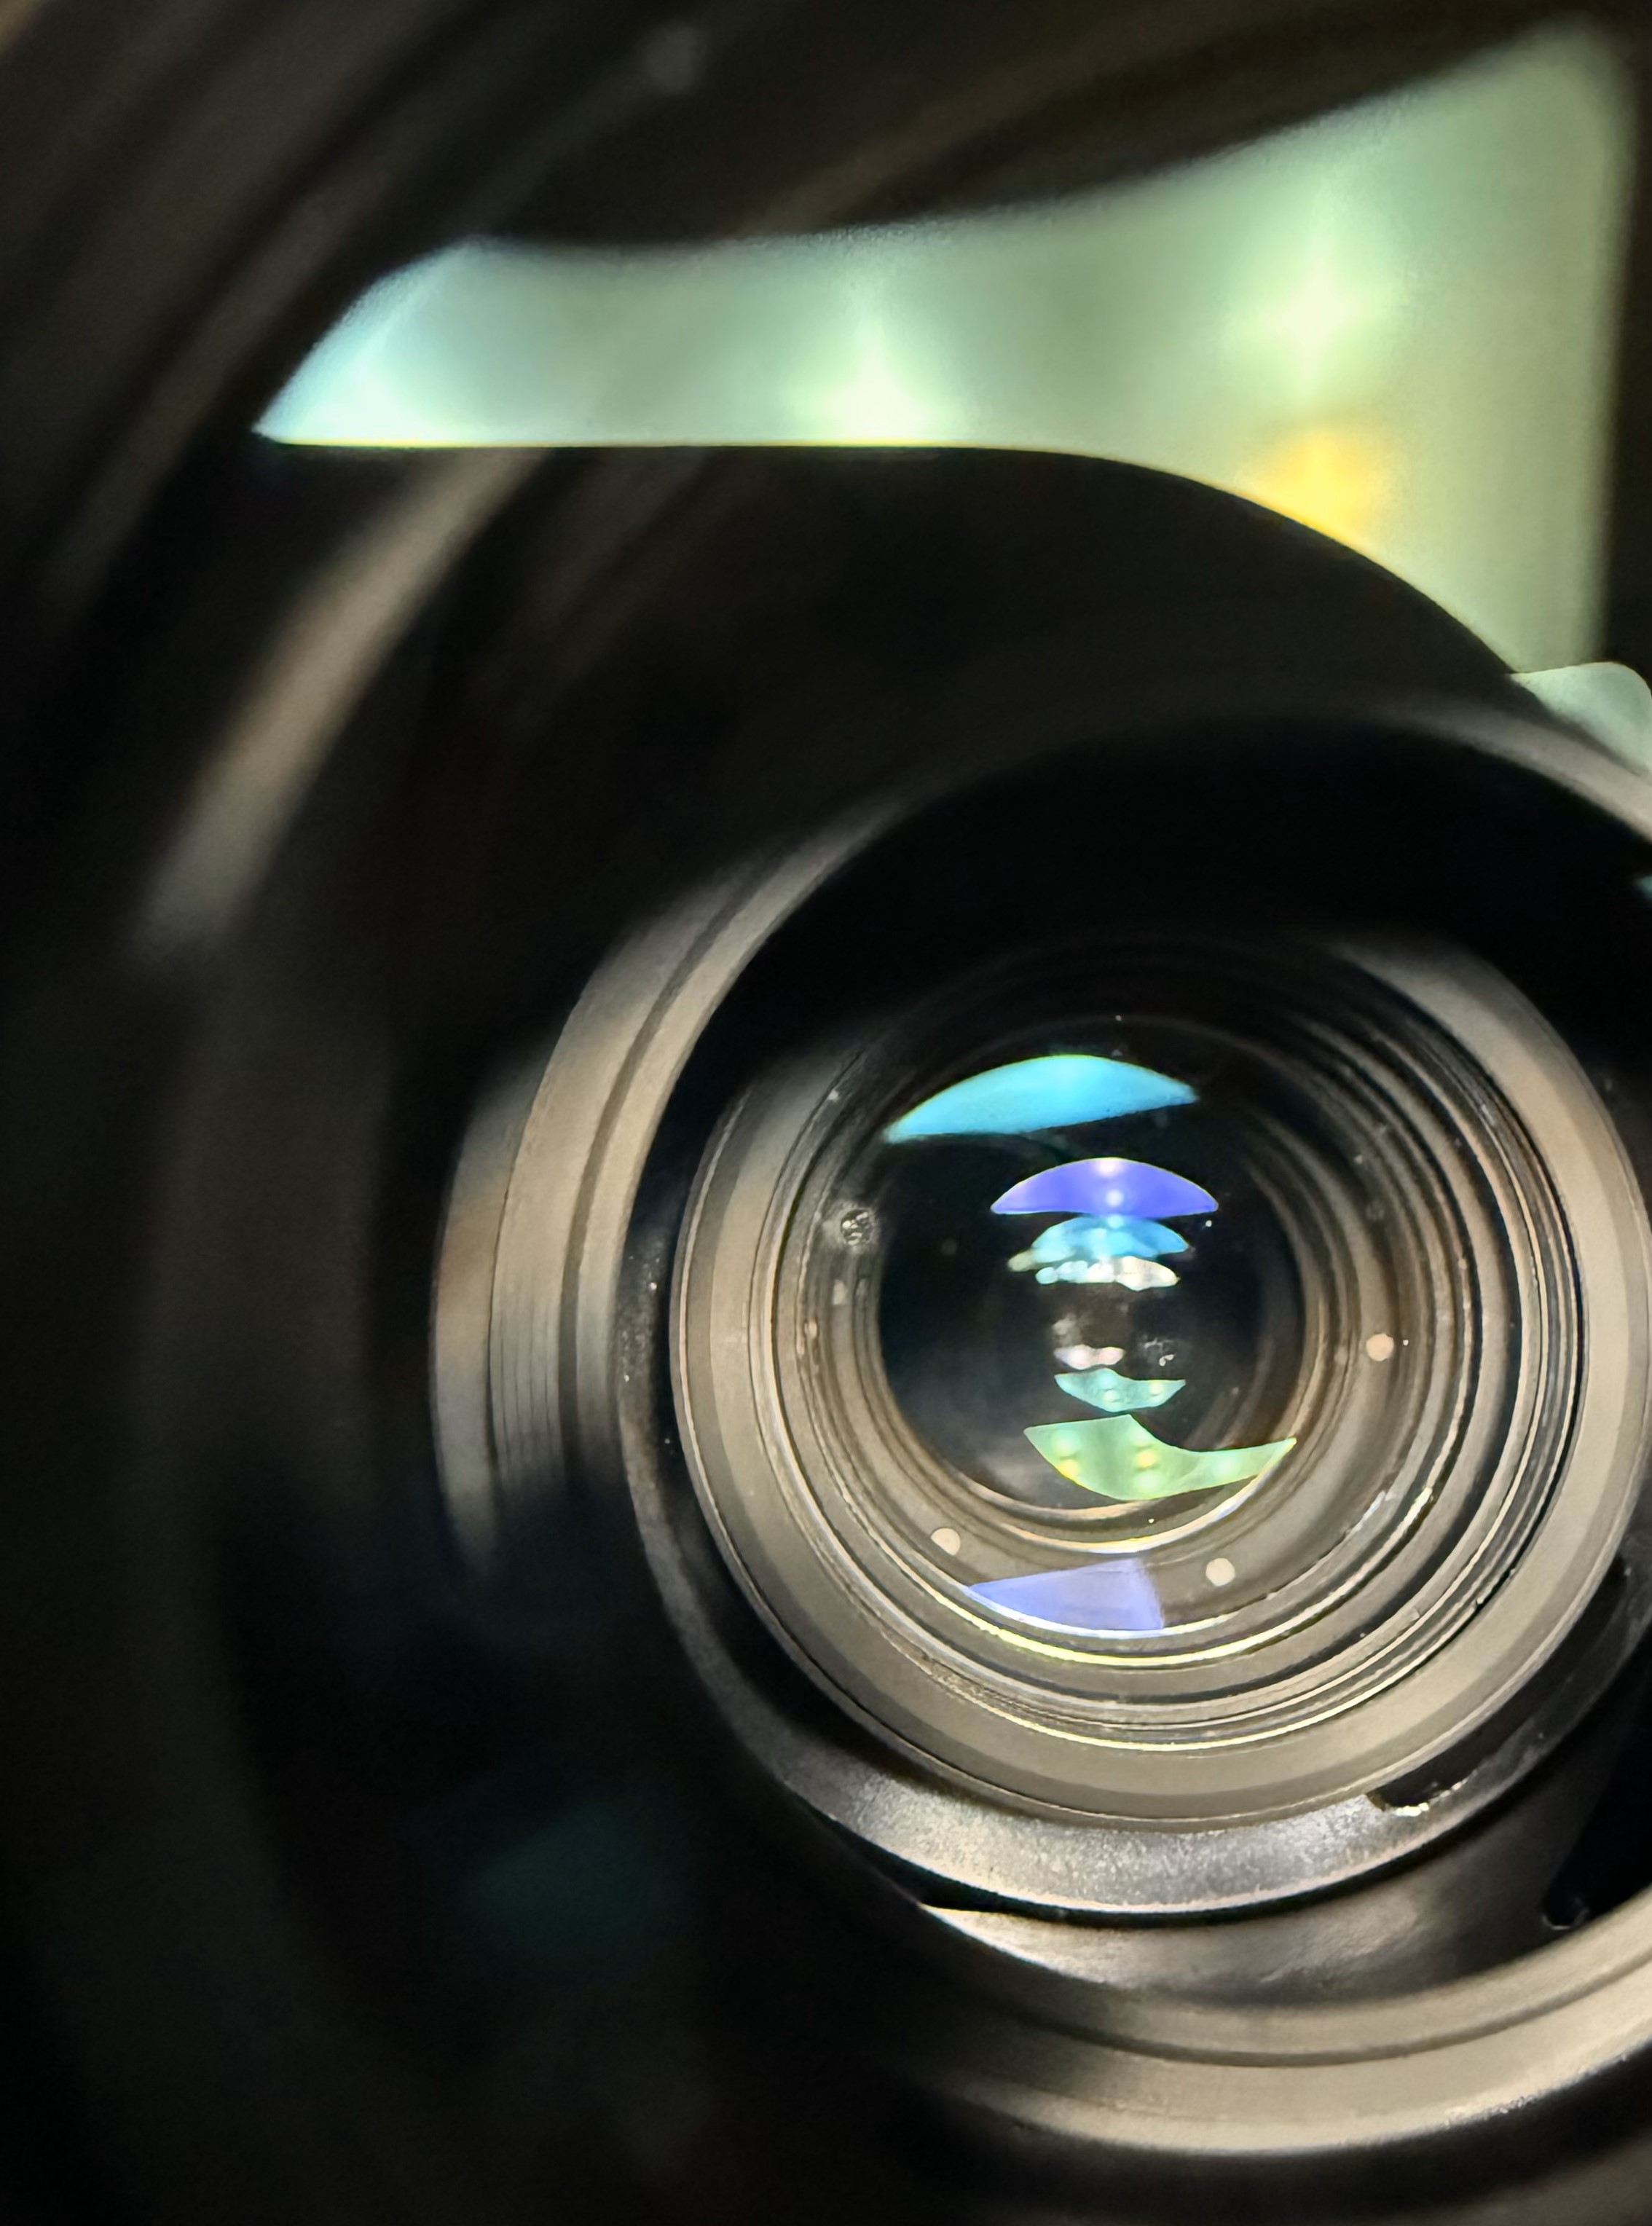
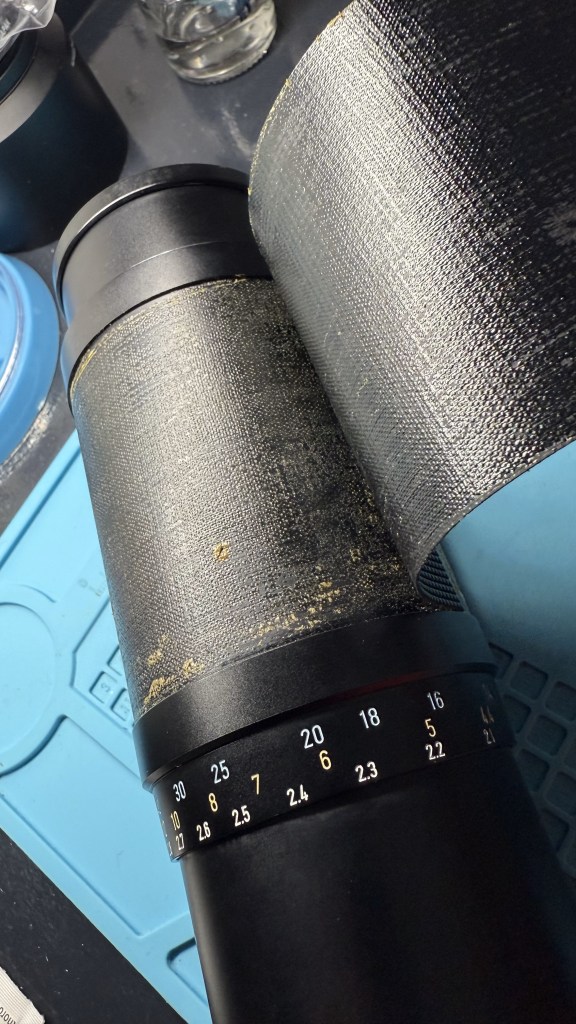
I snagged this Takumar lens for just 600 Thai Baht after the discount—roughly USD 18. A total steal, if you ask me. For a 65-year-old piece of glass, it was in surprisingly good shape: nearly mint, with only a hint of fungus and a slightly stiff focus ring. I scoured the internet hoping to find a disassembly guide, but came up empty-handed.

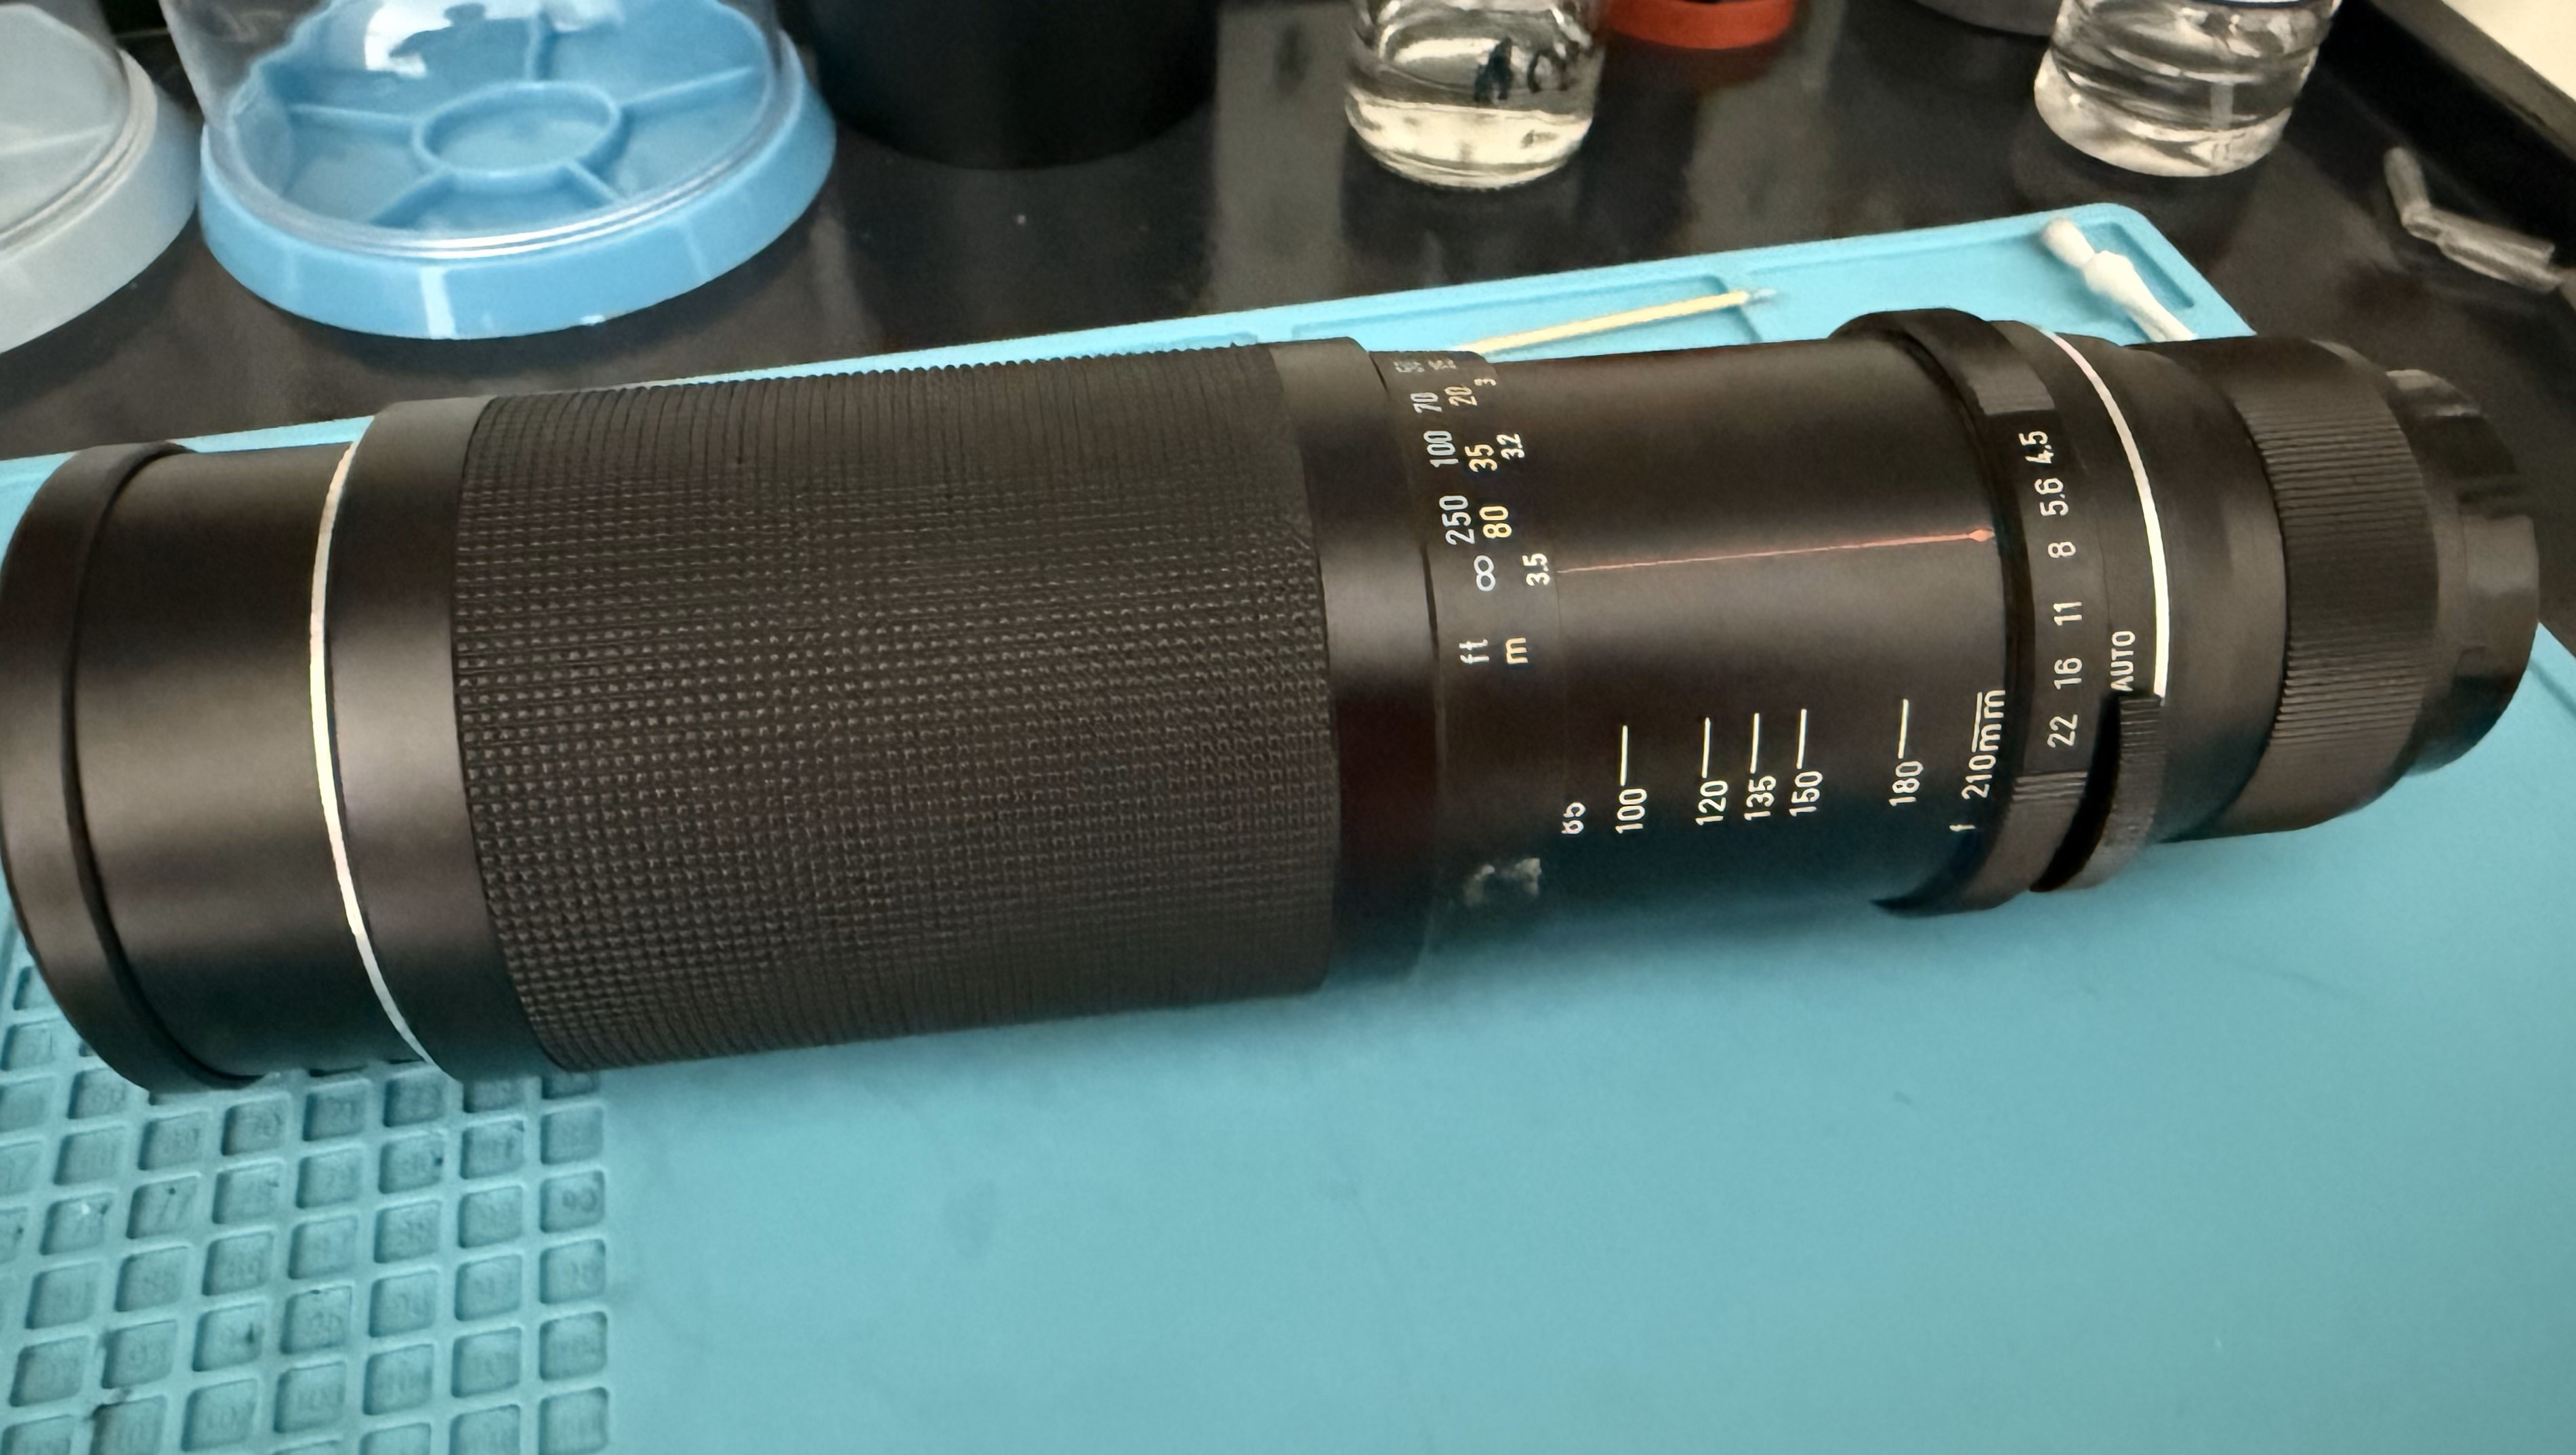
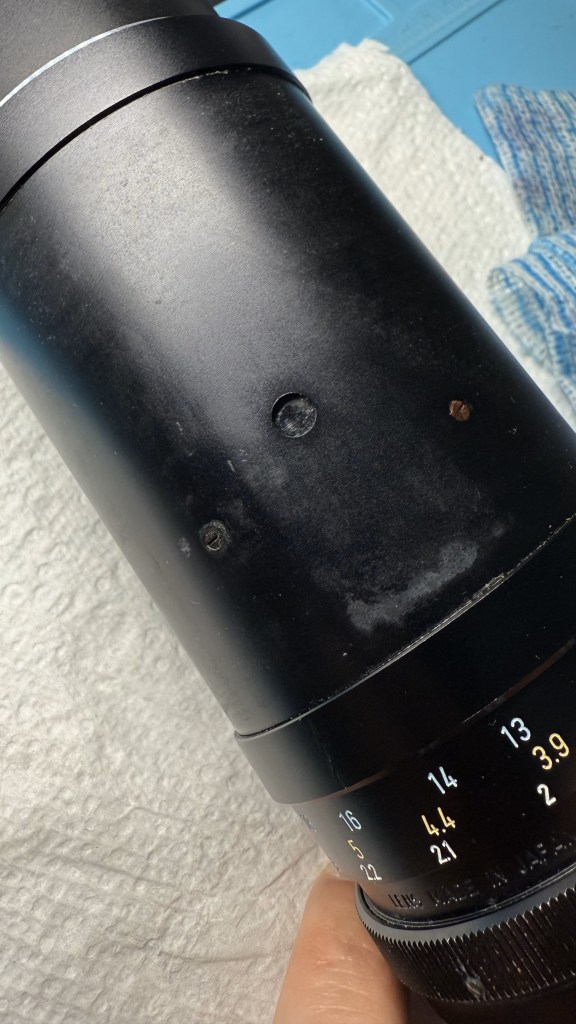
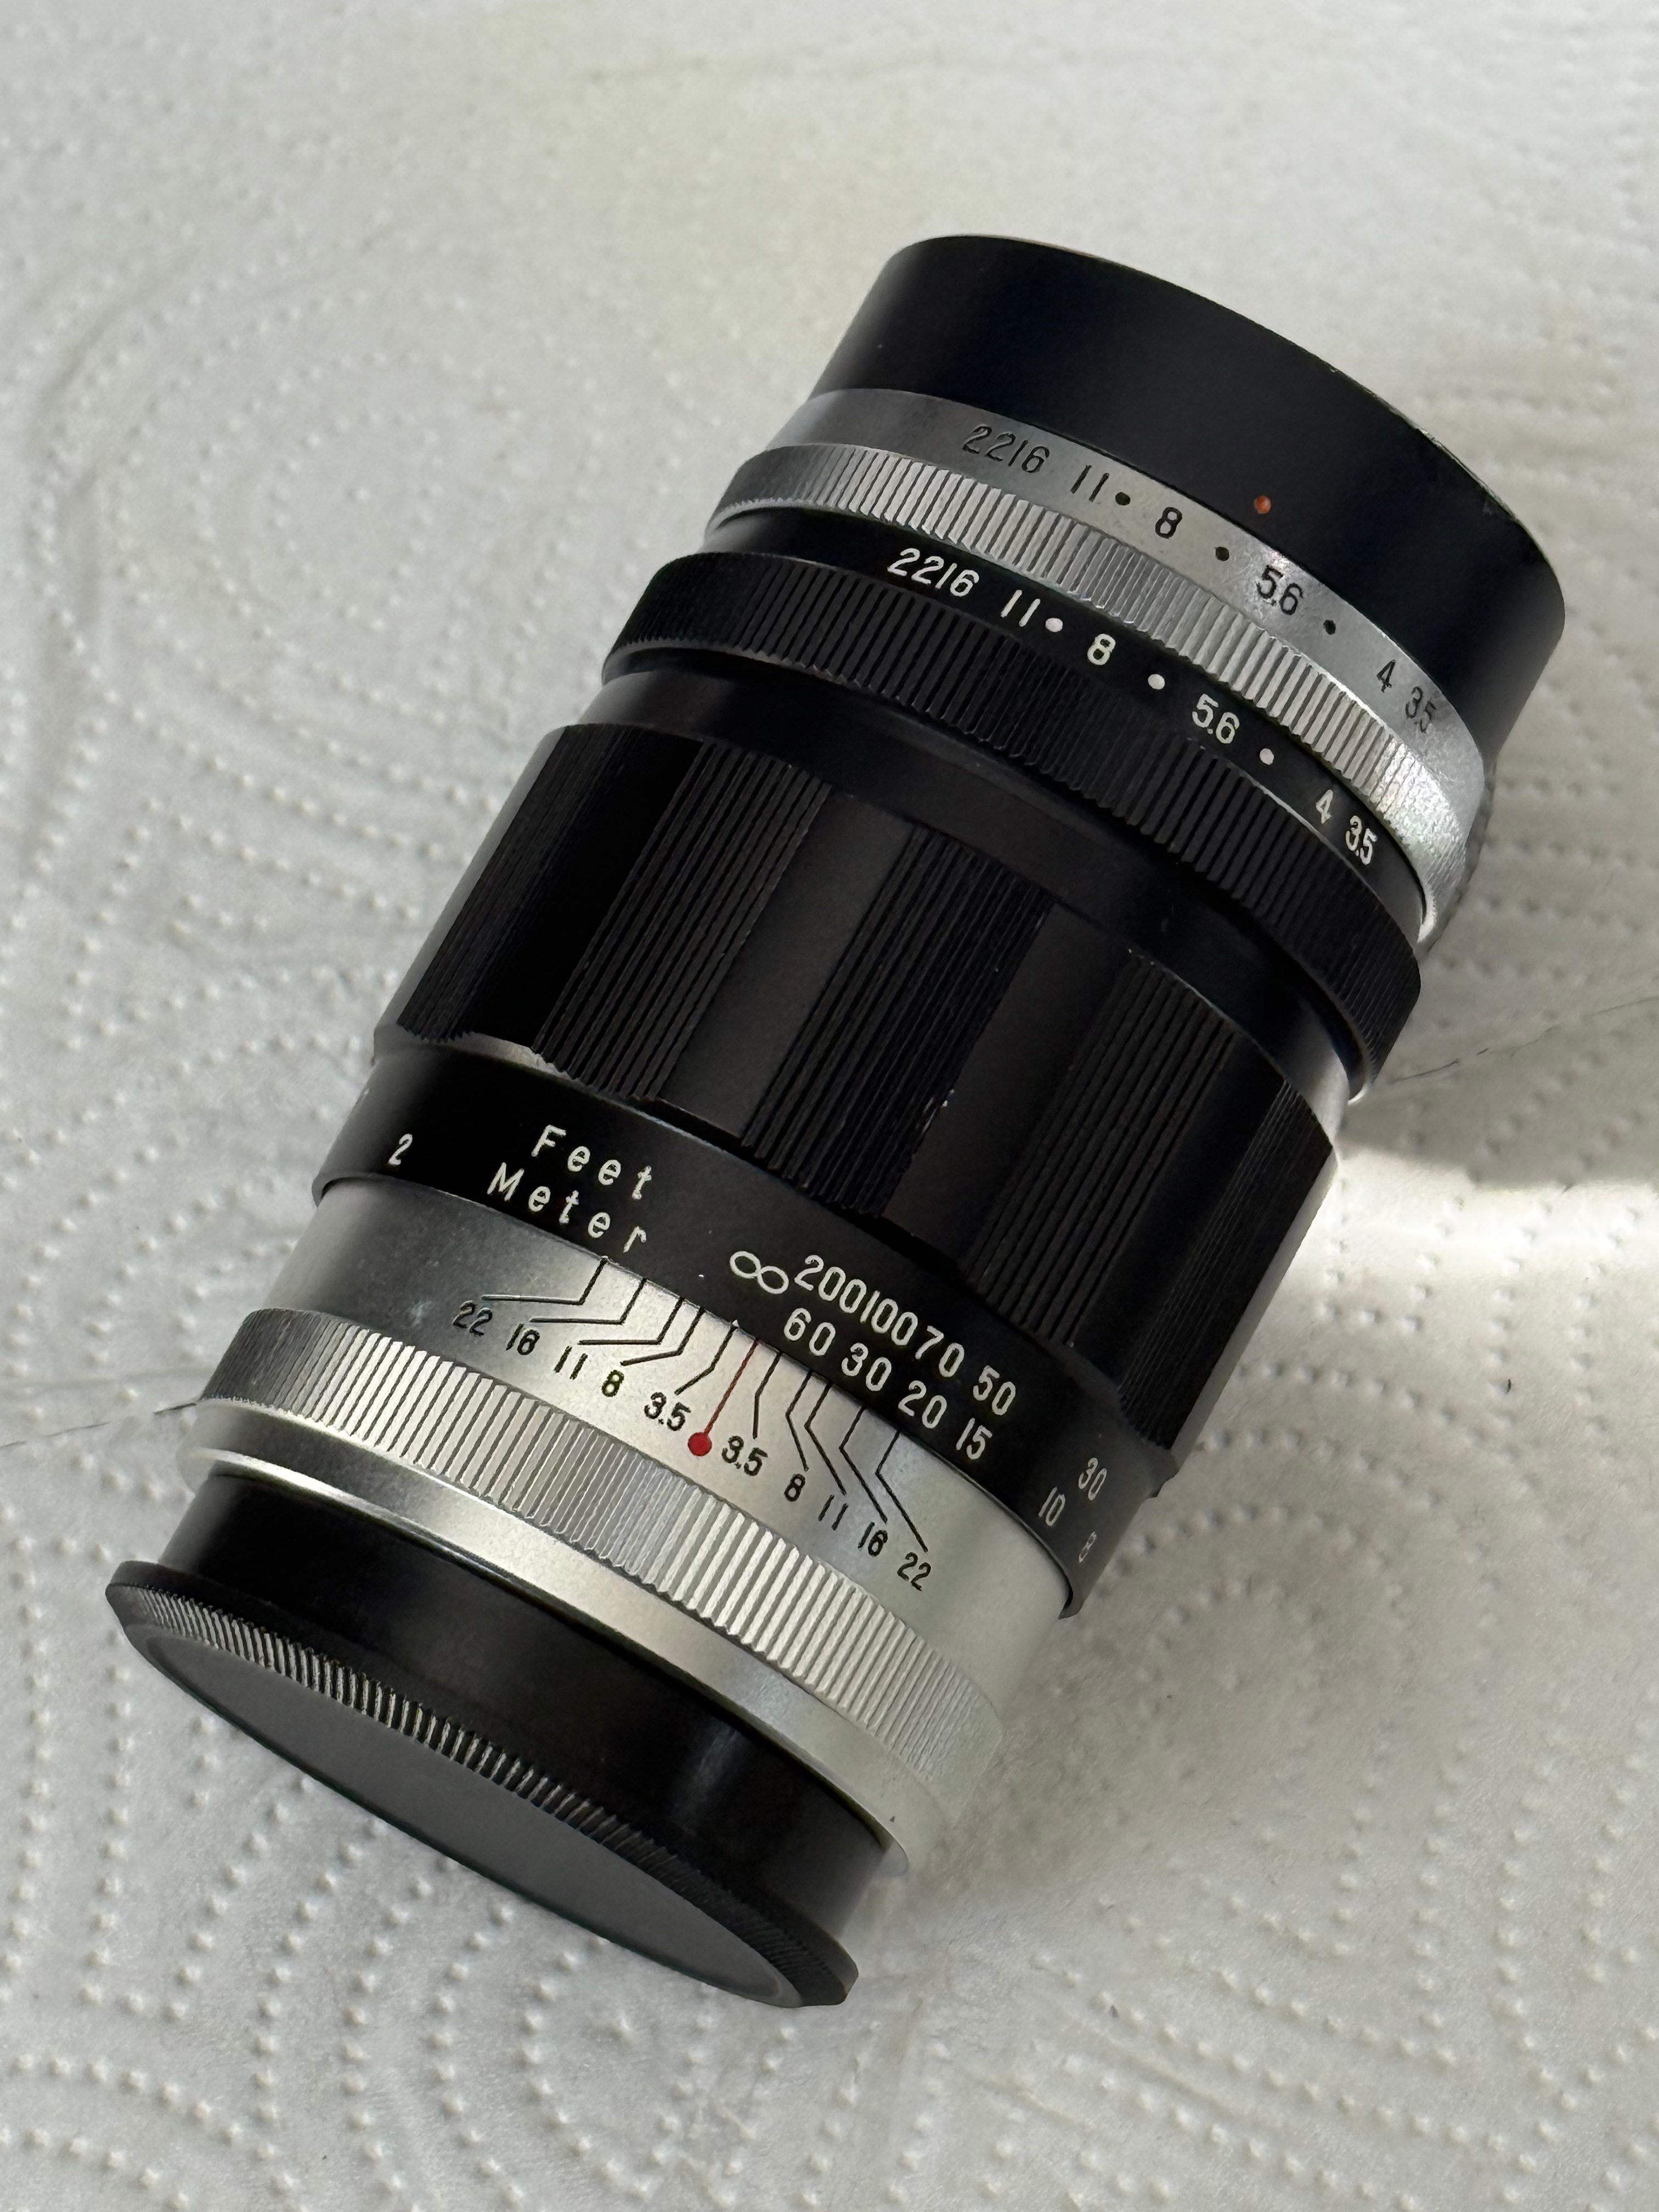
The build quality is impressive—classic Takumar craftsmanship. No visible screws anywhere on the barrel, save for three tucked away at the rear mount. It’s the kind of lens that feels like it was engineered to last generations.

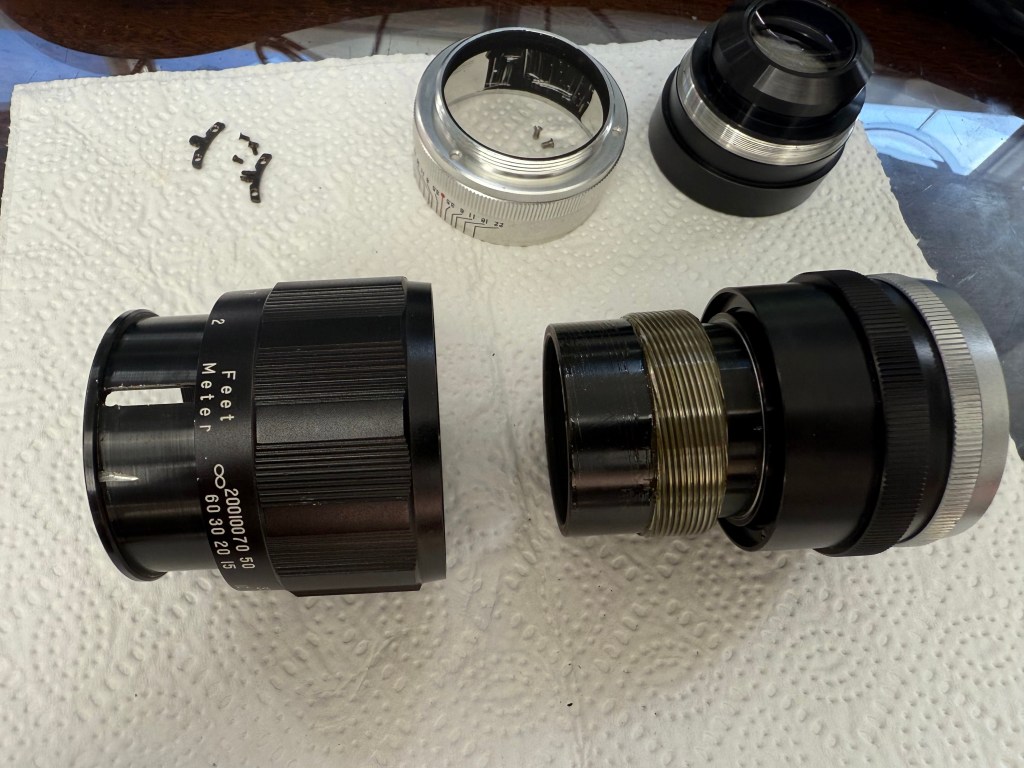
Removing the front elements is straightforward—just unscrew the entire front element group.

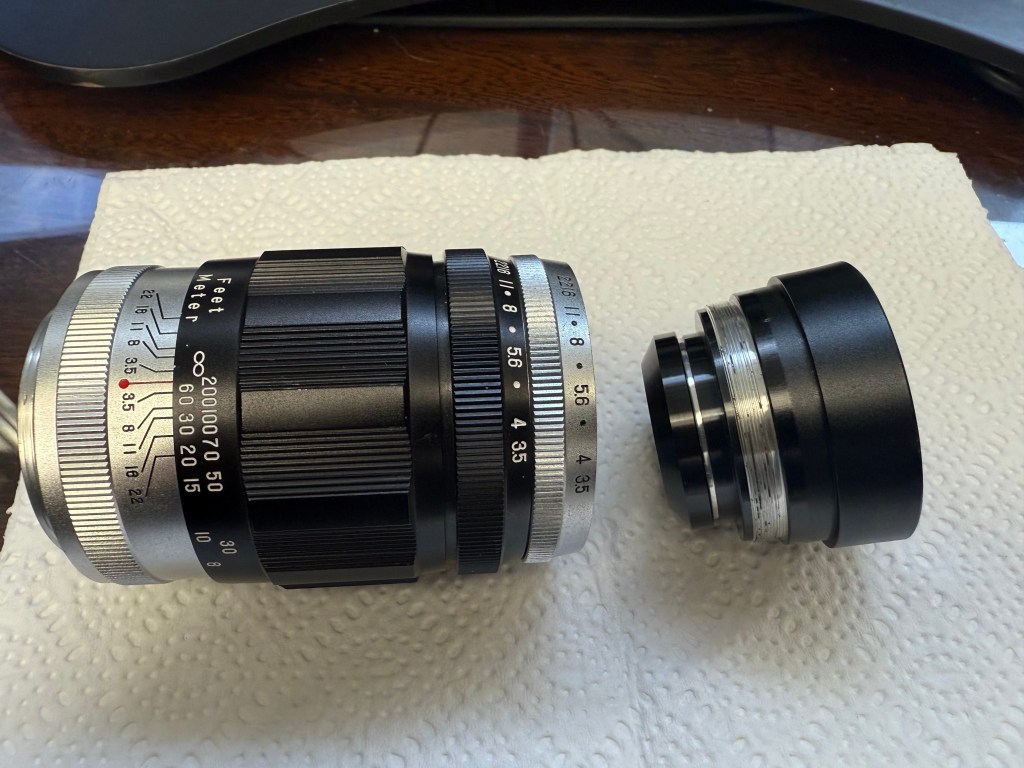
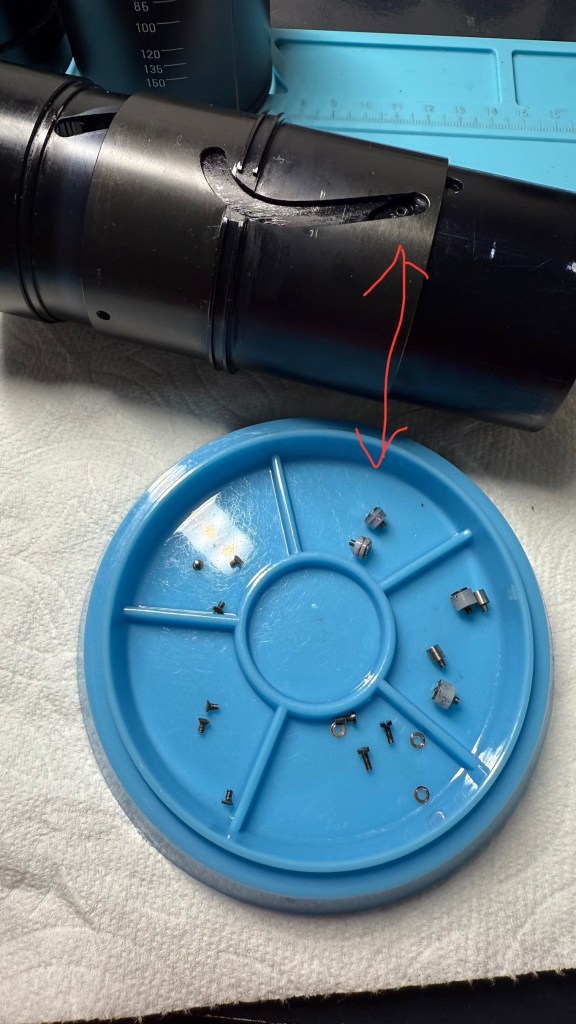
Next, detach the rear lens mount assembly by unscrewing the three visible screws located around the rear section. Once removed, the entire mount should lift off cleanly, giving you access to the internal components.

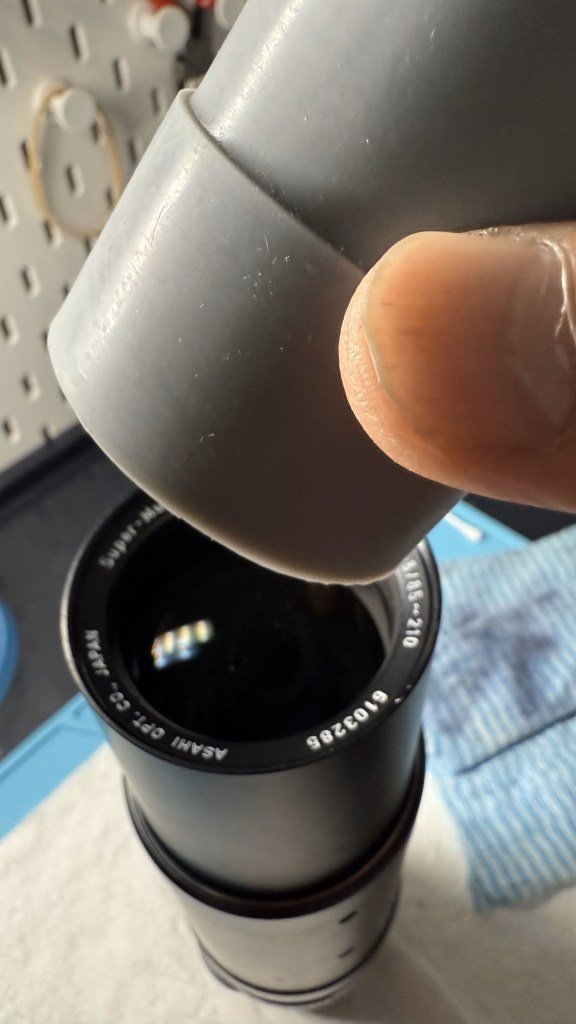
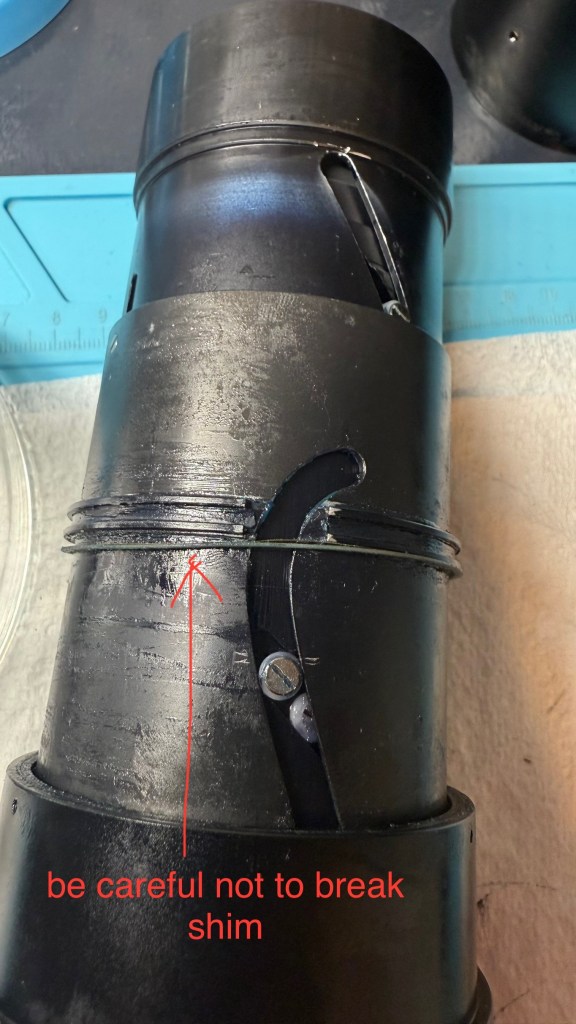
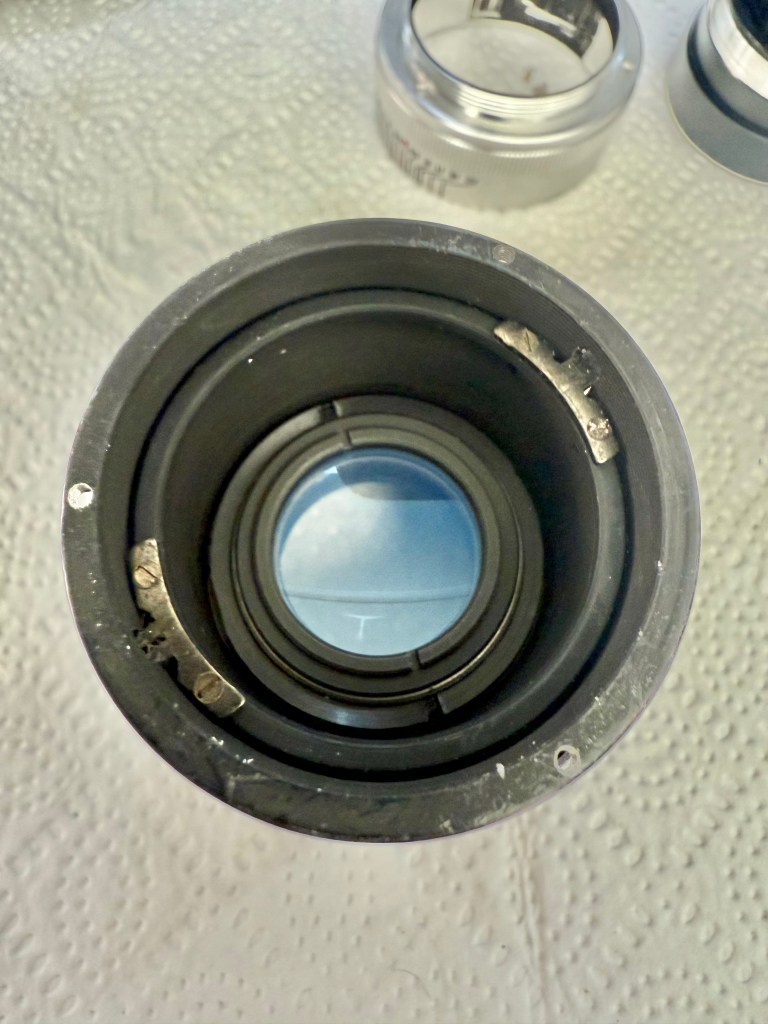
To remove the front pre-set aperture assembly, you’ll need to unscrew the two helicoid guide pins now visible from the rear. These guides secure the focusing mechanism and must be taken out to allow the aperture assembly to rotate out free. I chose not to remove the rear lens elements, as they were already clean and in excellent condition.

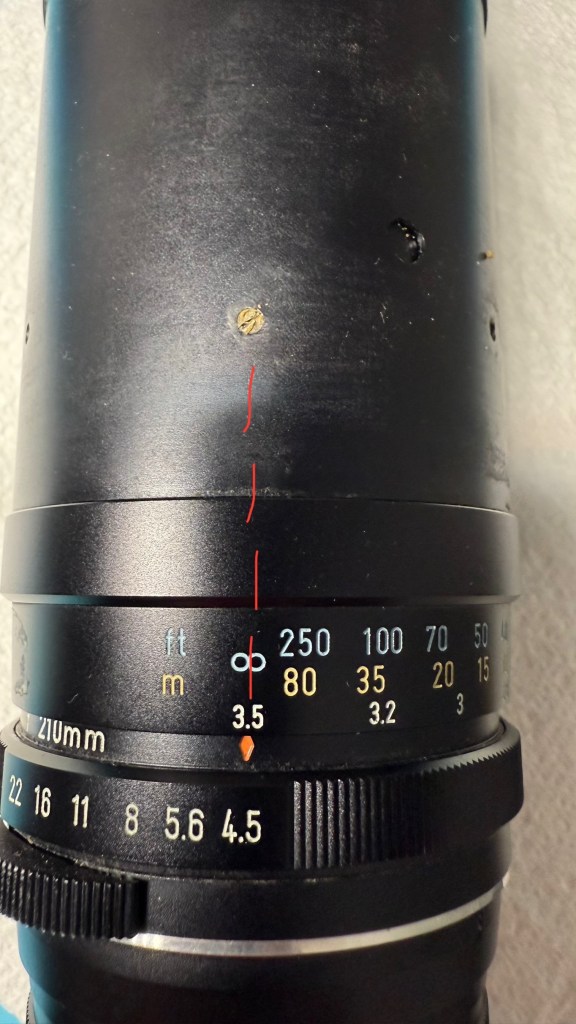
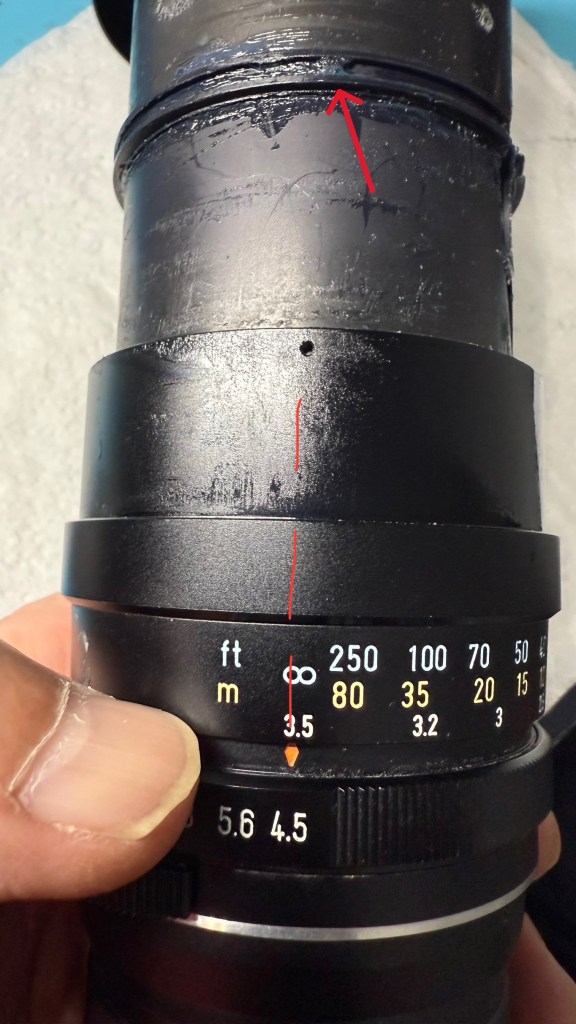
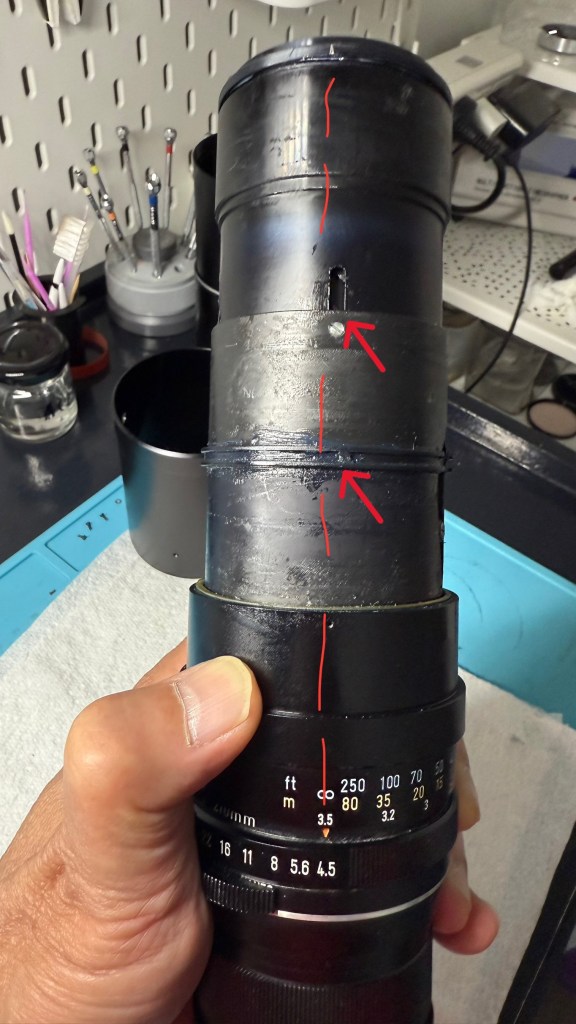
Before removing the helicoid guides, I carefully marked their positions to preserve infinity focus. I rotated the focus ring to the infinity setting, then scratched two faint reference lines where the tops of the guides aligned. These marks will serve as crucial alignment cues during reassembly, helping ensure the lens maintains proper focus calibration.

When removing the helicoid guides, make sure to note which guide fits into which groove. Each guide is slightly different, though the reason behind this design choice isn’t immediately clear. It might have been for fine-tuning focus alignment or simply a quirk of the manufacturing process. Either way, keeping track of their original positions is essential for smooth reassembly and accurate focusing.

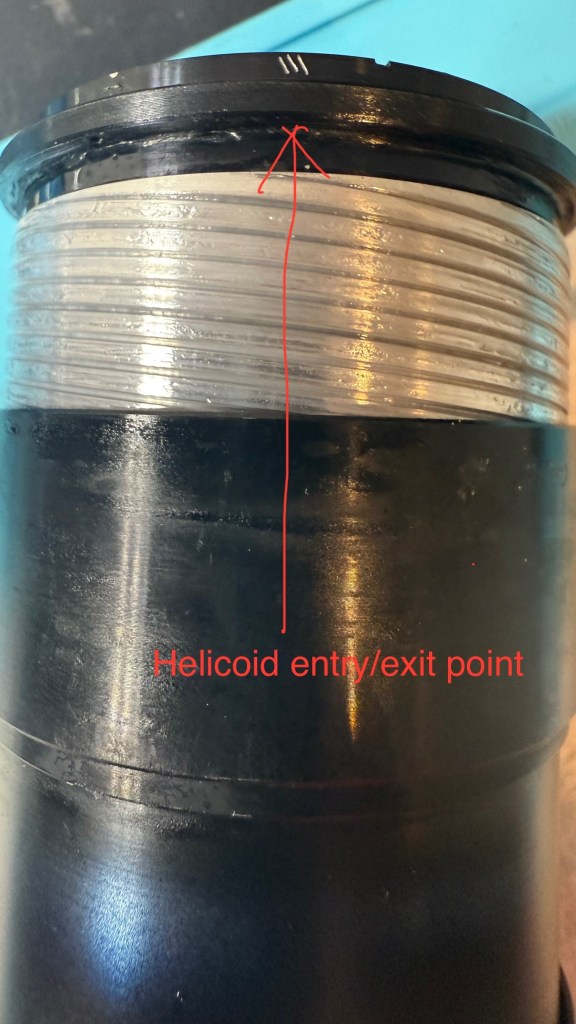
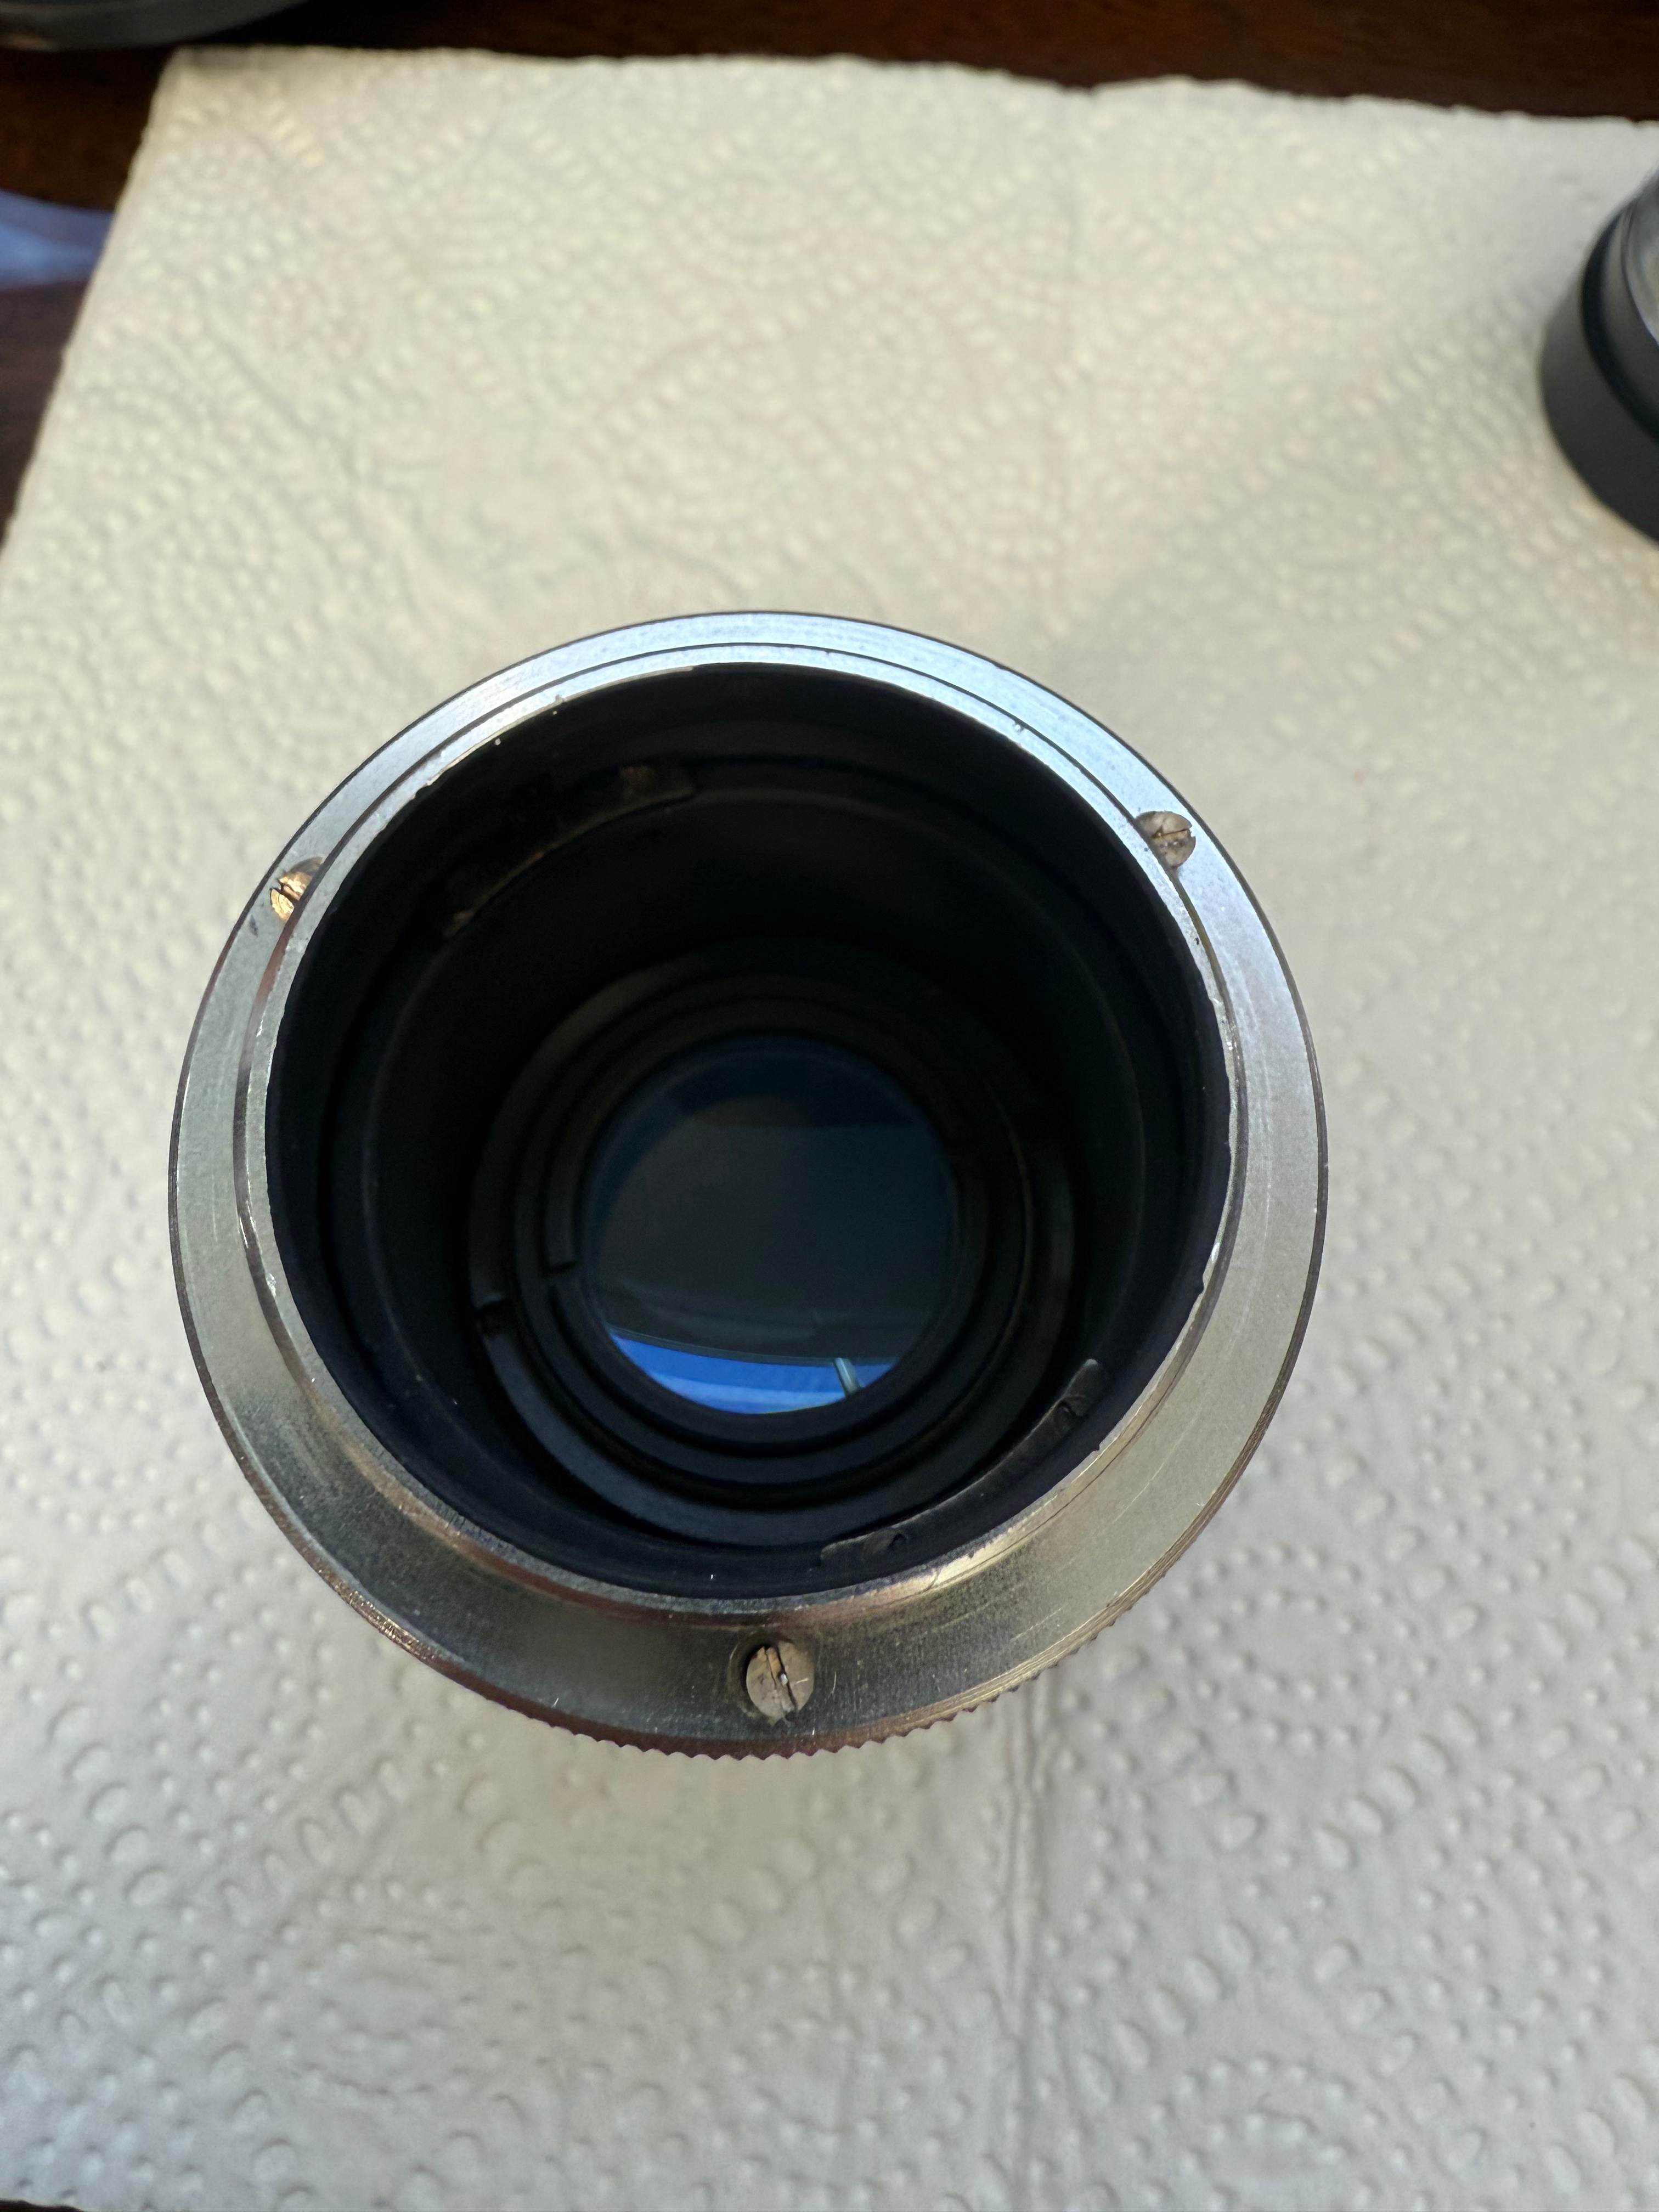
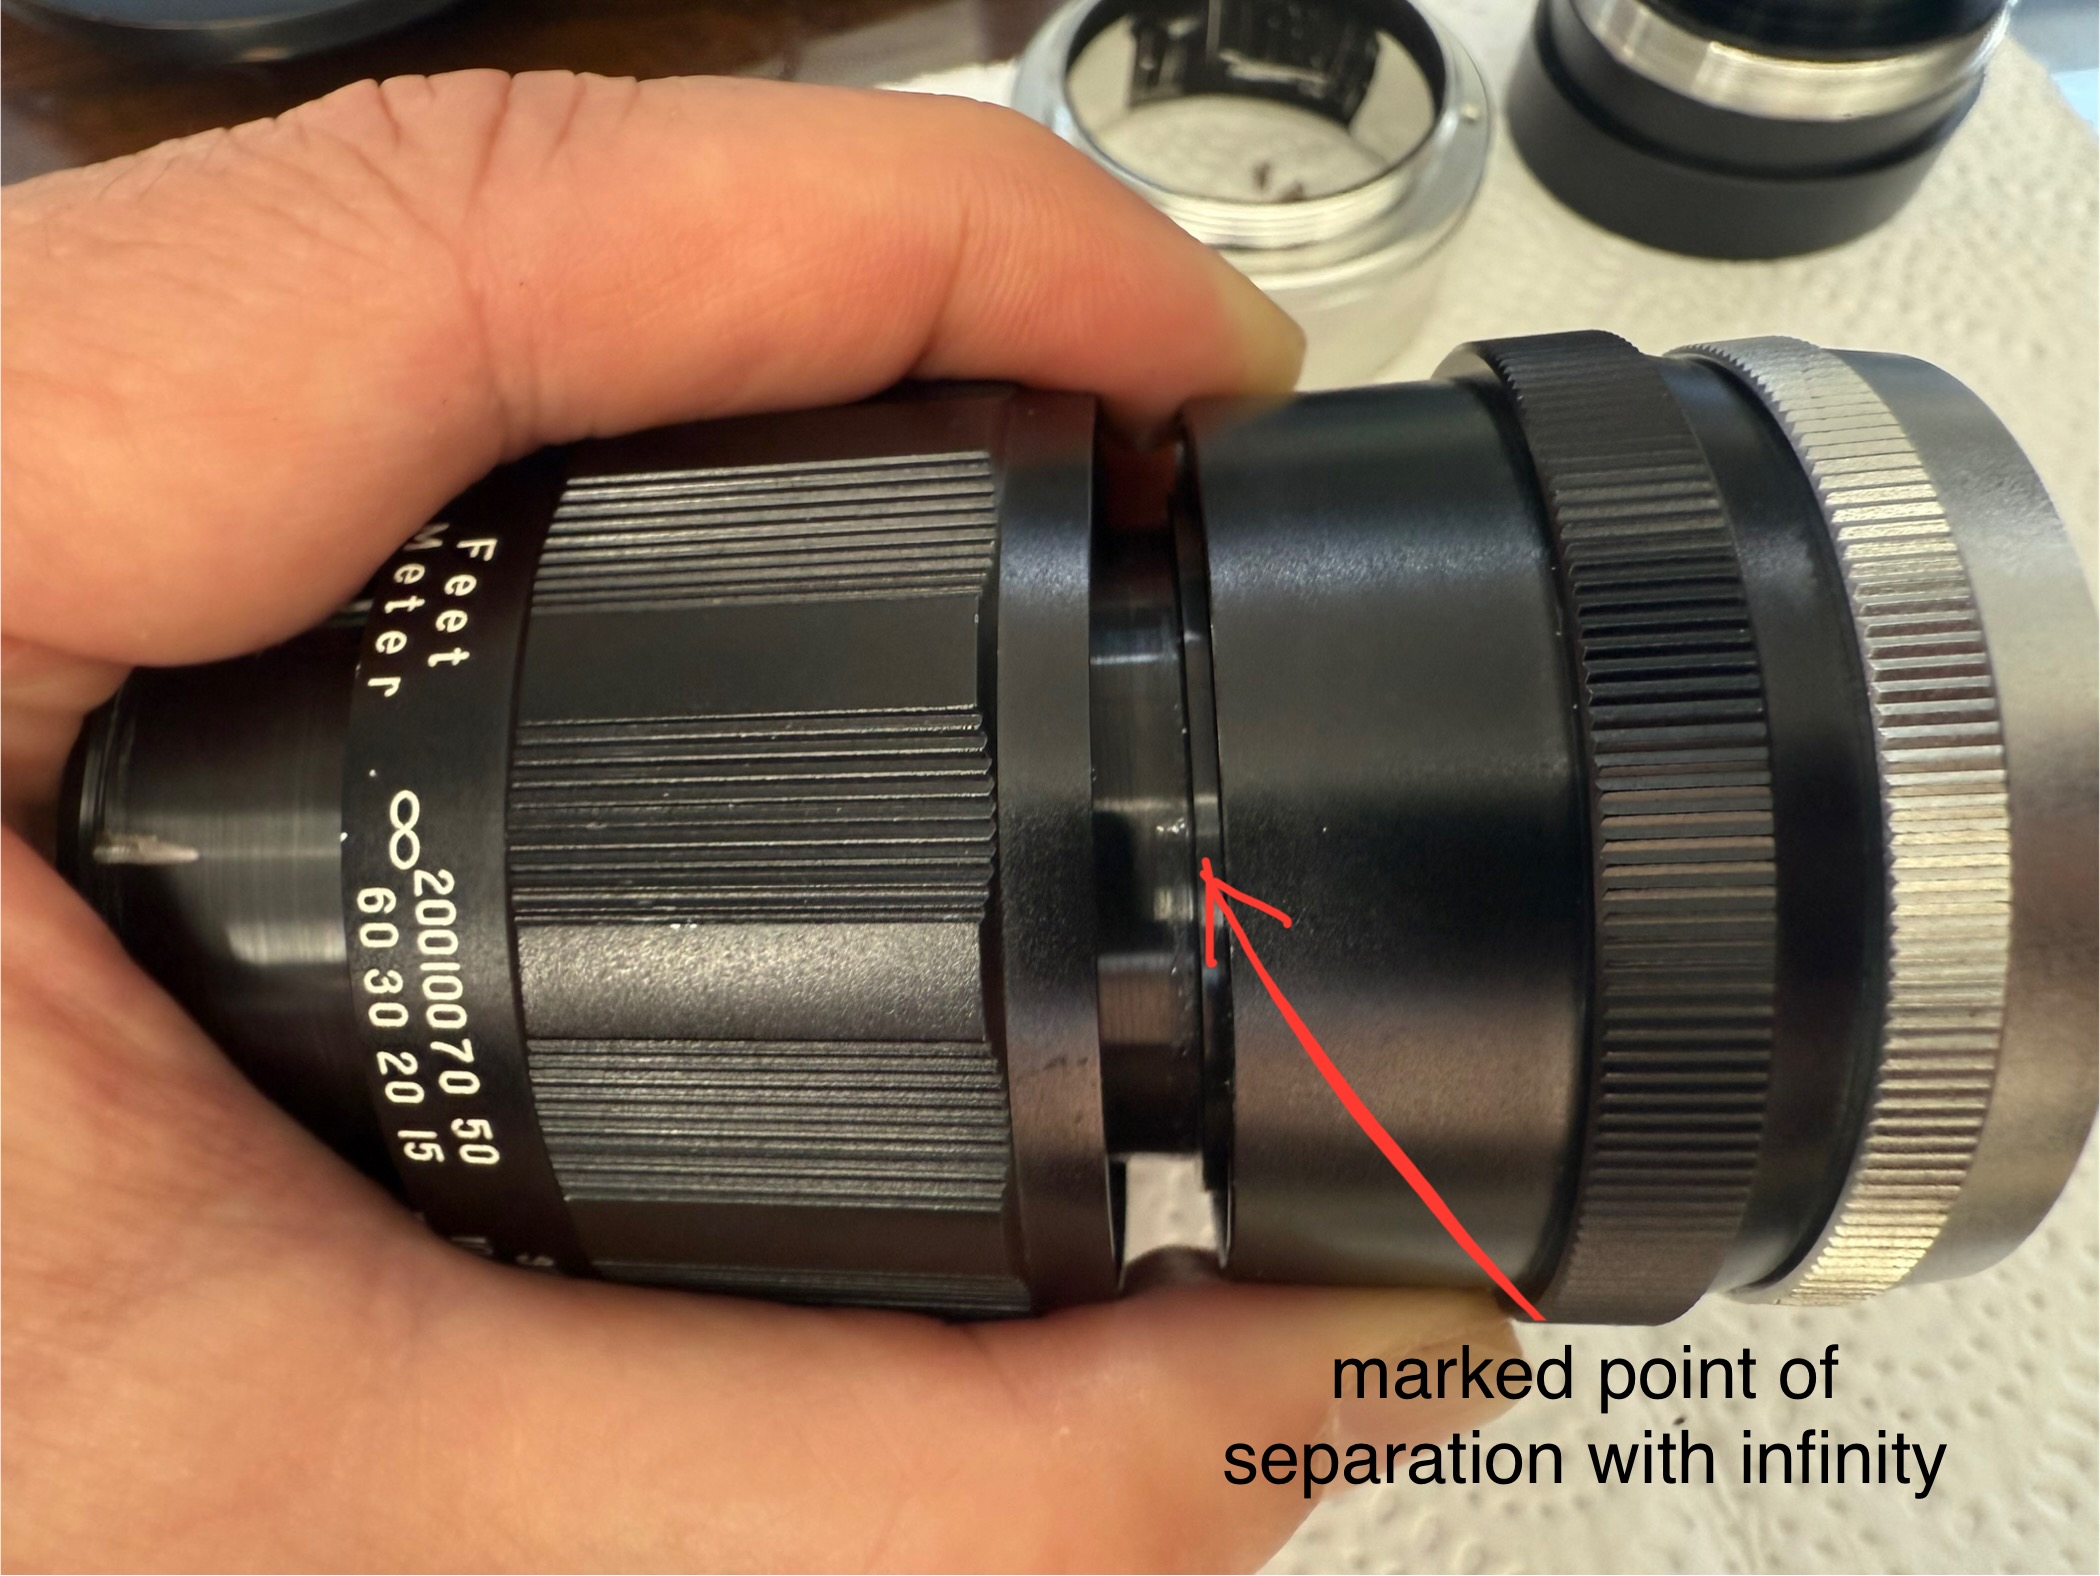
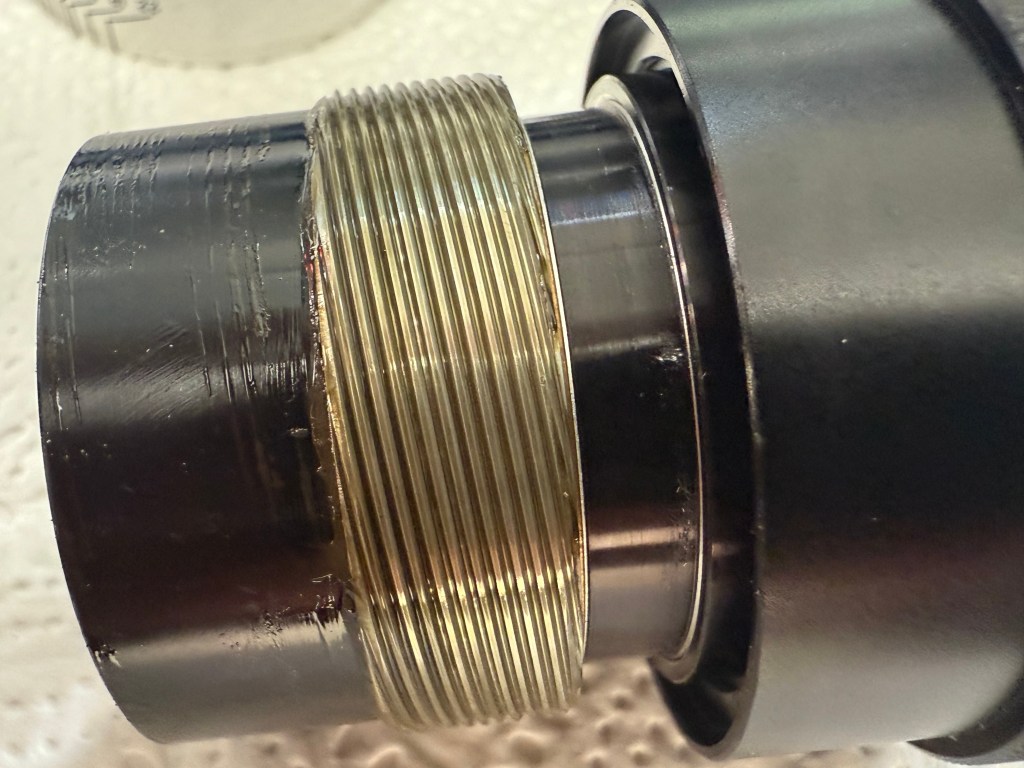
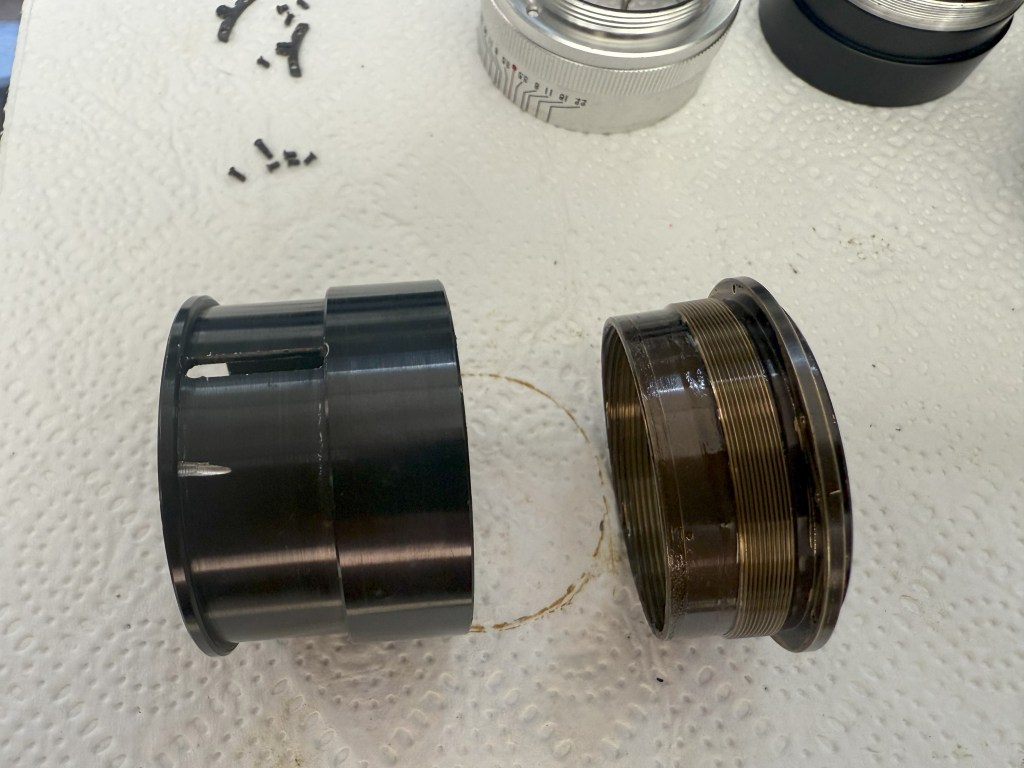
Finally, the aperture housing can be separated from the focusing mechanism. However, before you disengage the helicoids, it’s absolutely critical to mark the exact point of separation. A small scratch or reference line will ensure you maintain the correct orientation during reassembly. Without this, you risk misaligning the helicoids—since they can thread together in multiple configurations, but only one will restore proper focus calibration. Skip this step, and you’re in for a frustrating reassembly process.

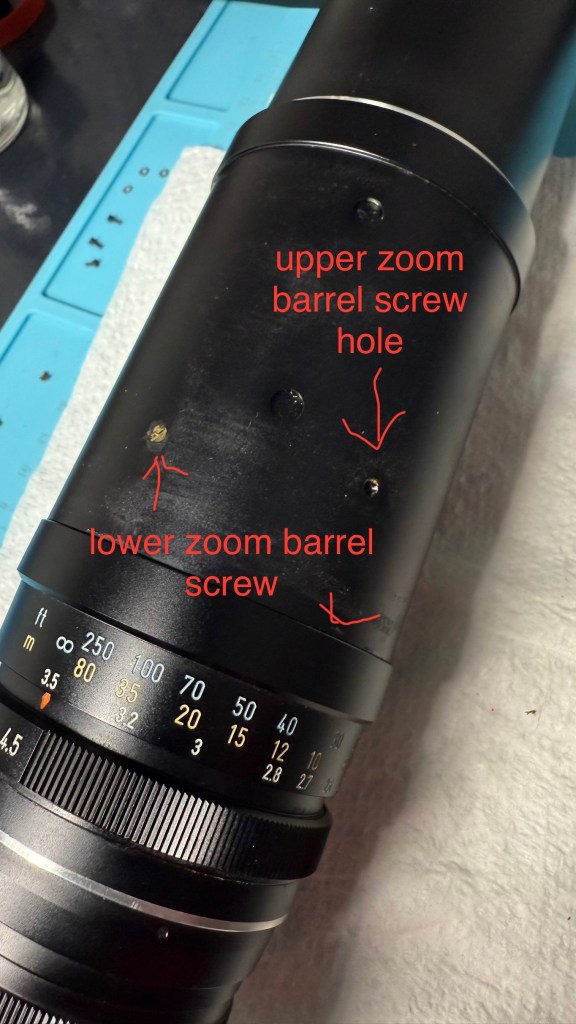
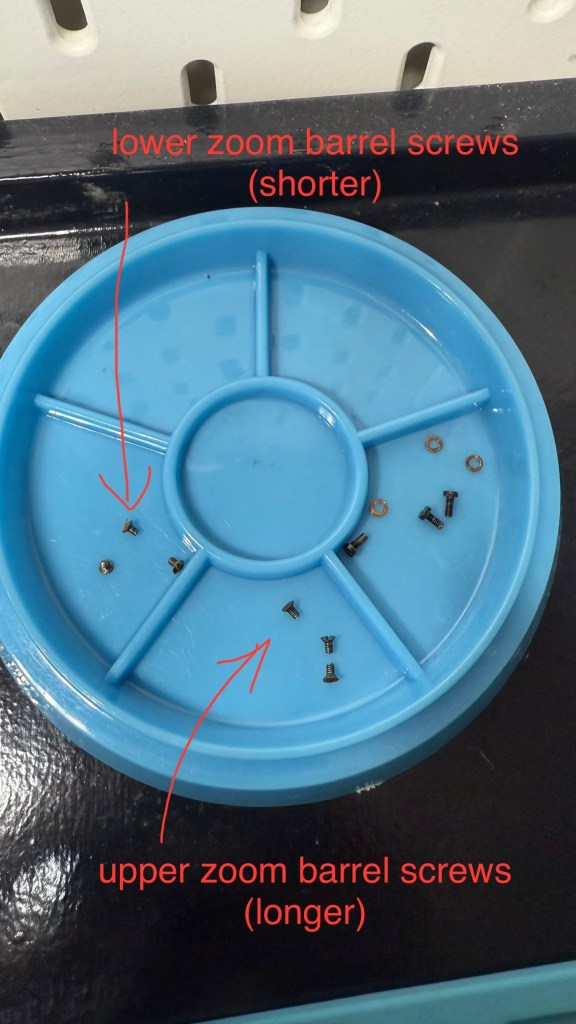
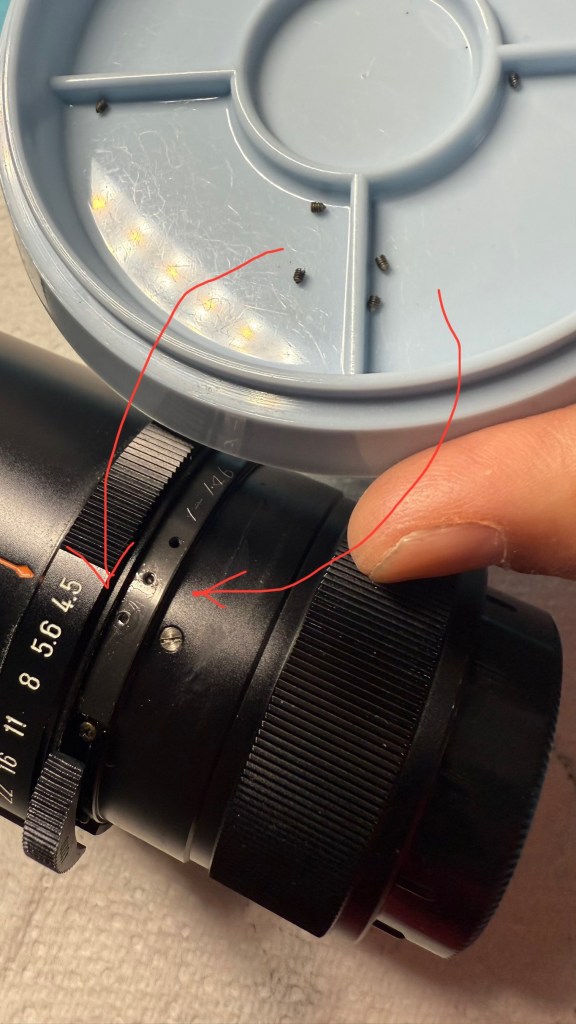
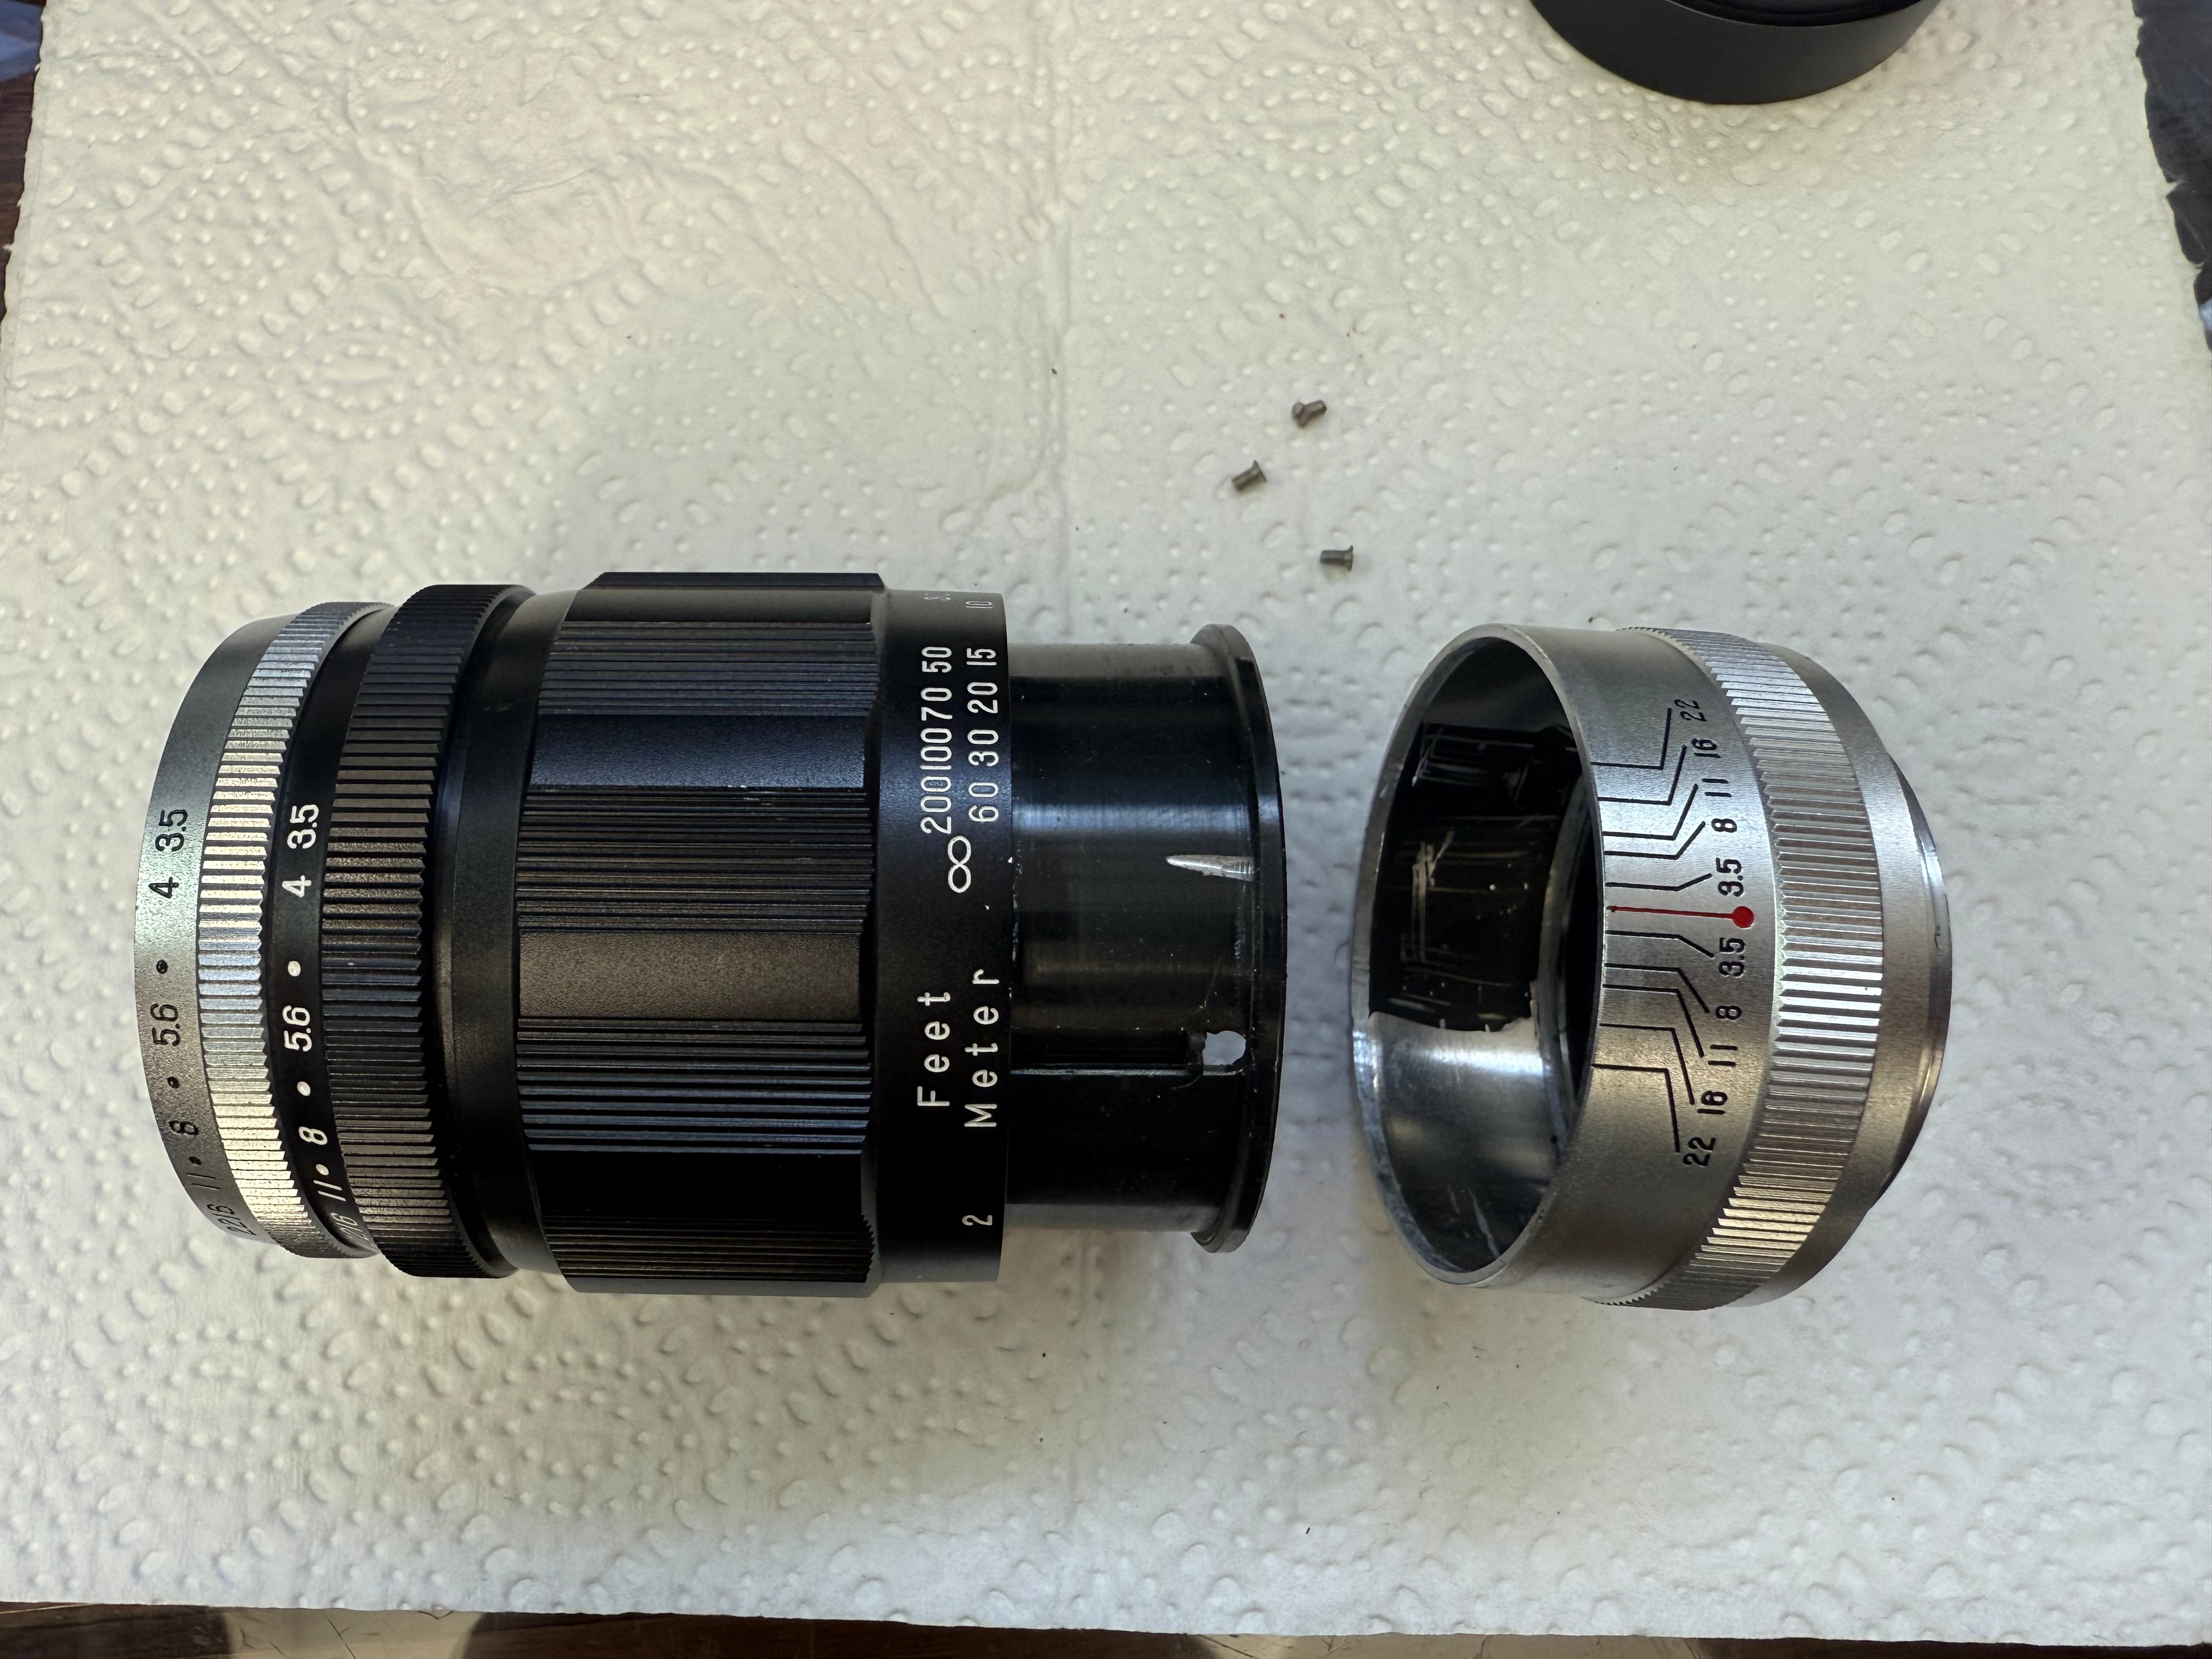
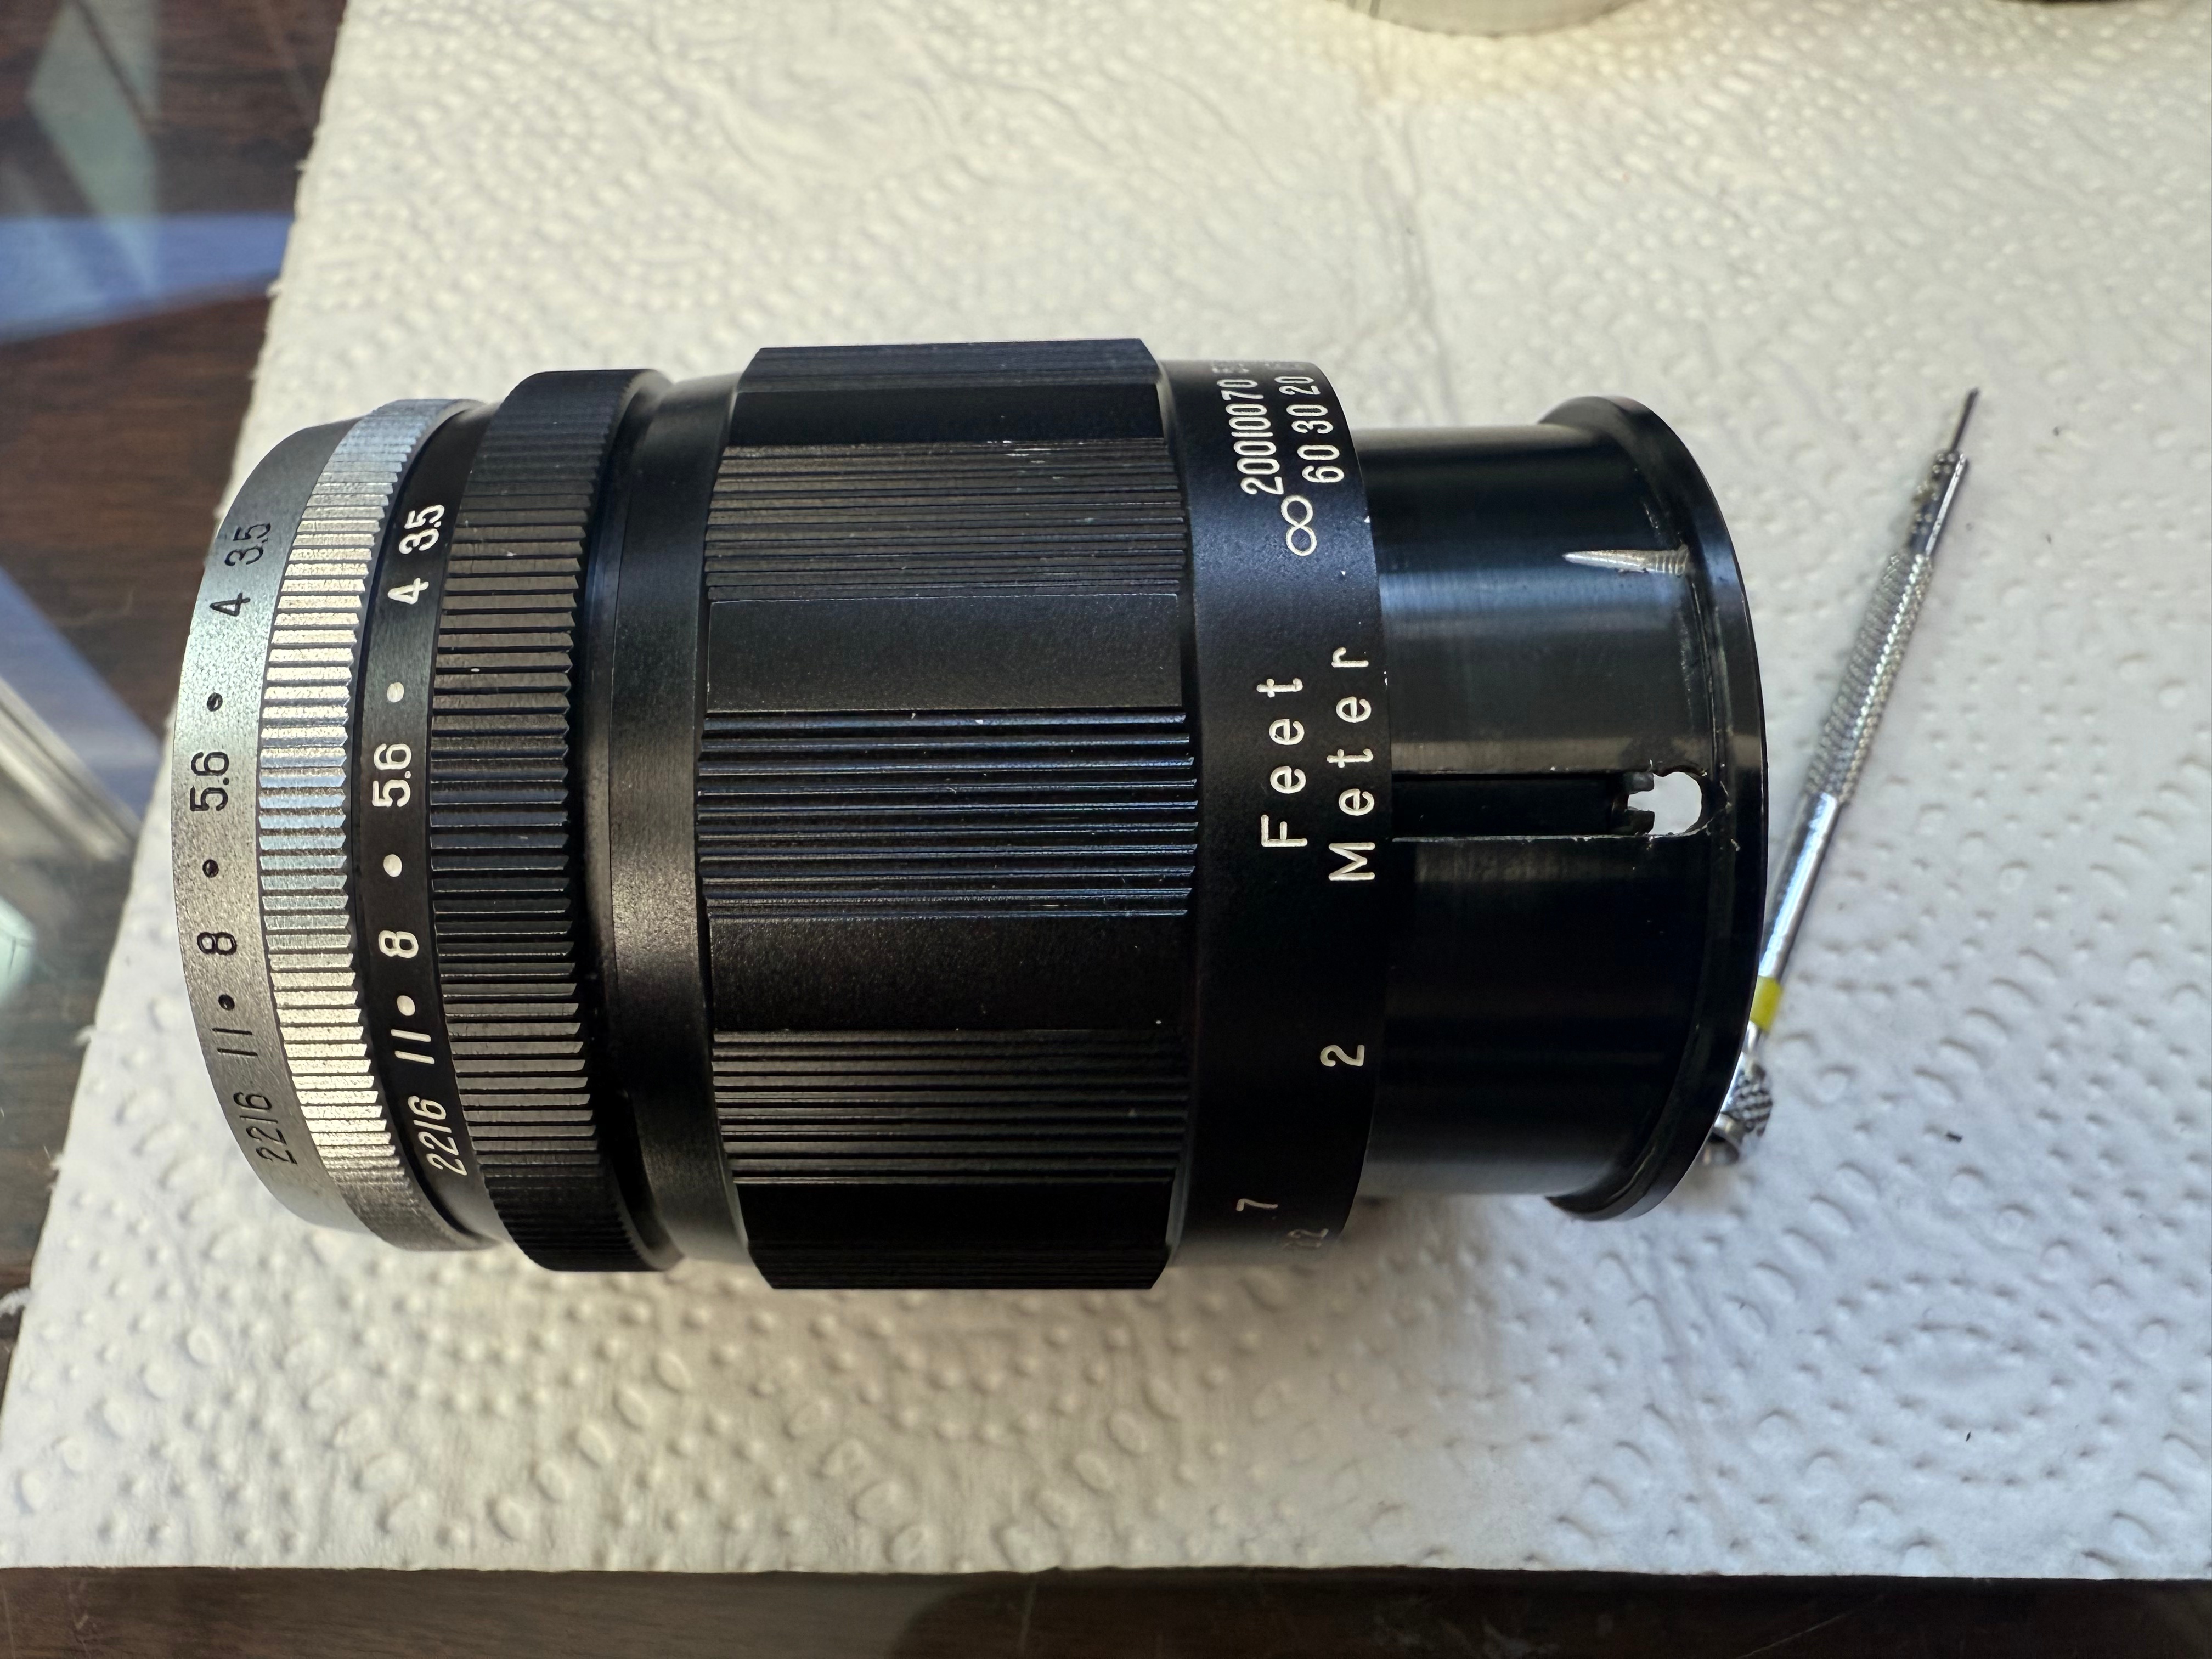
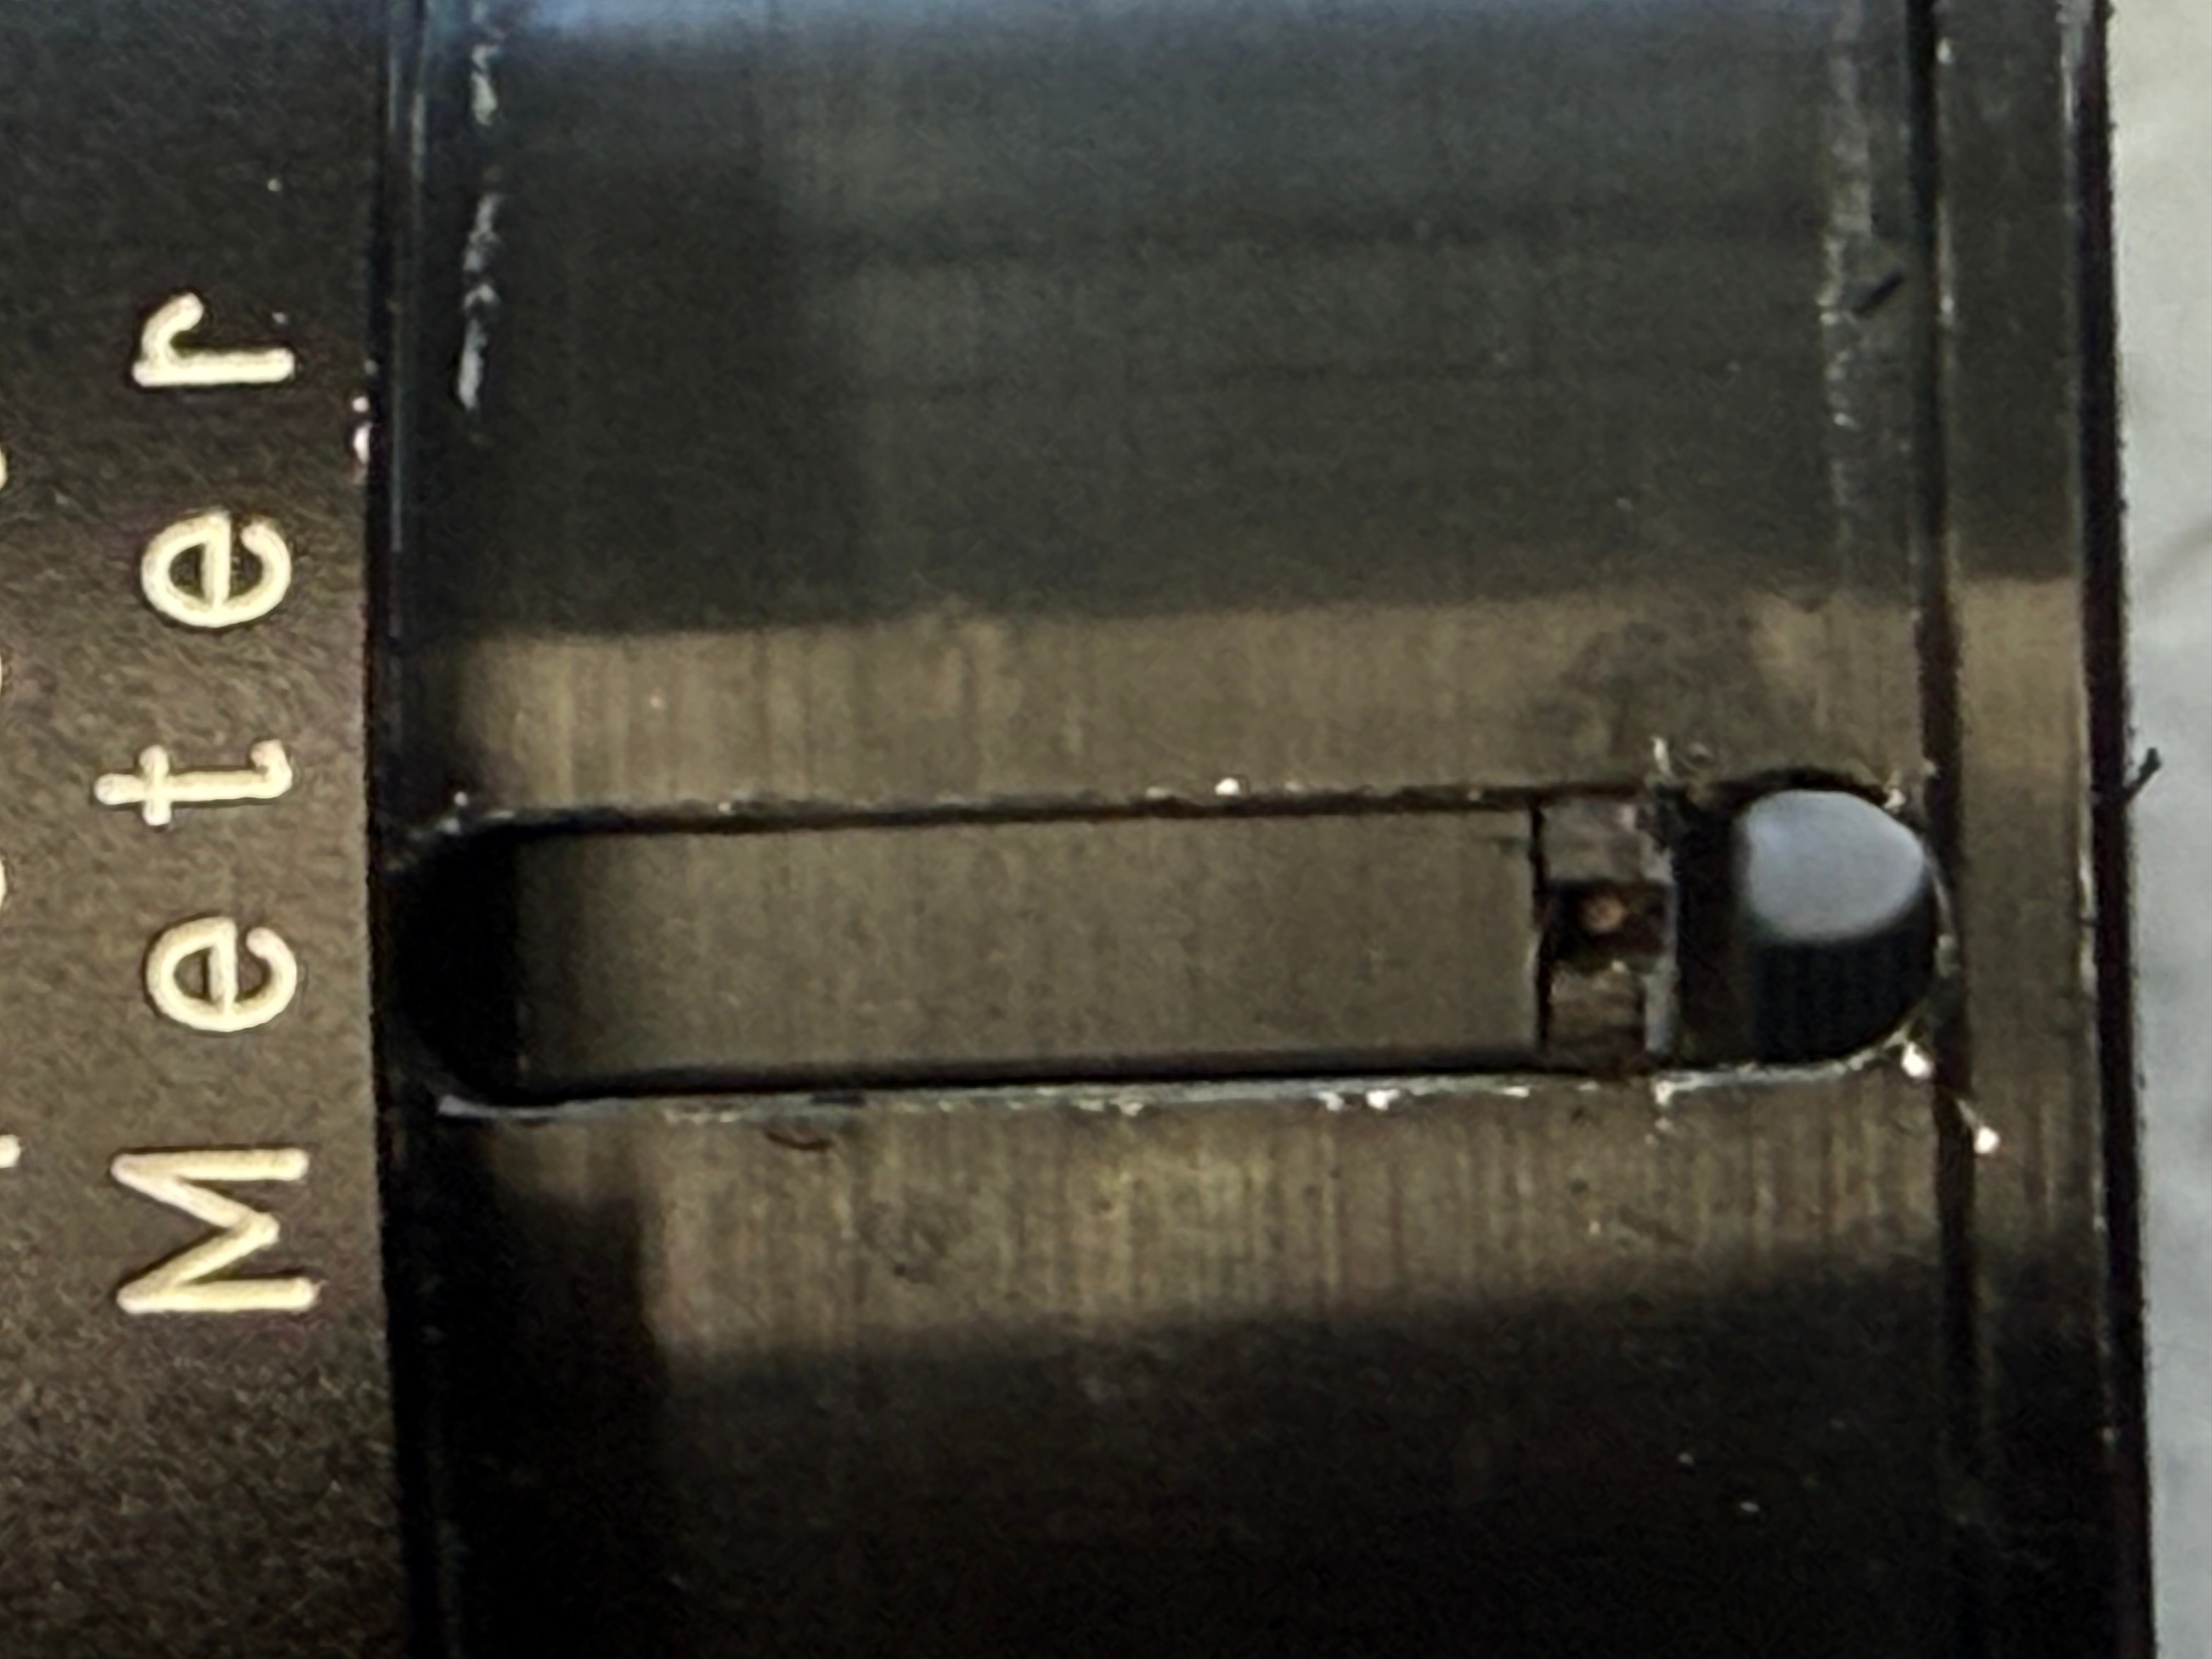
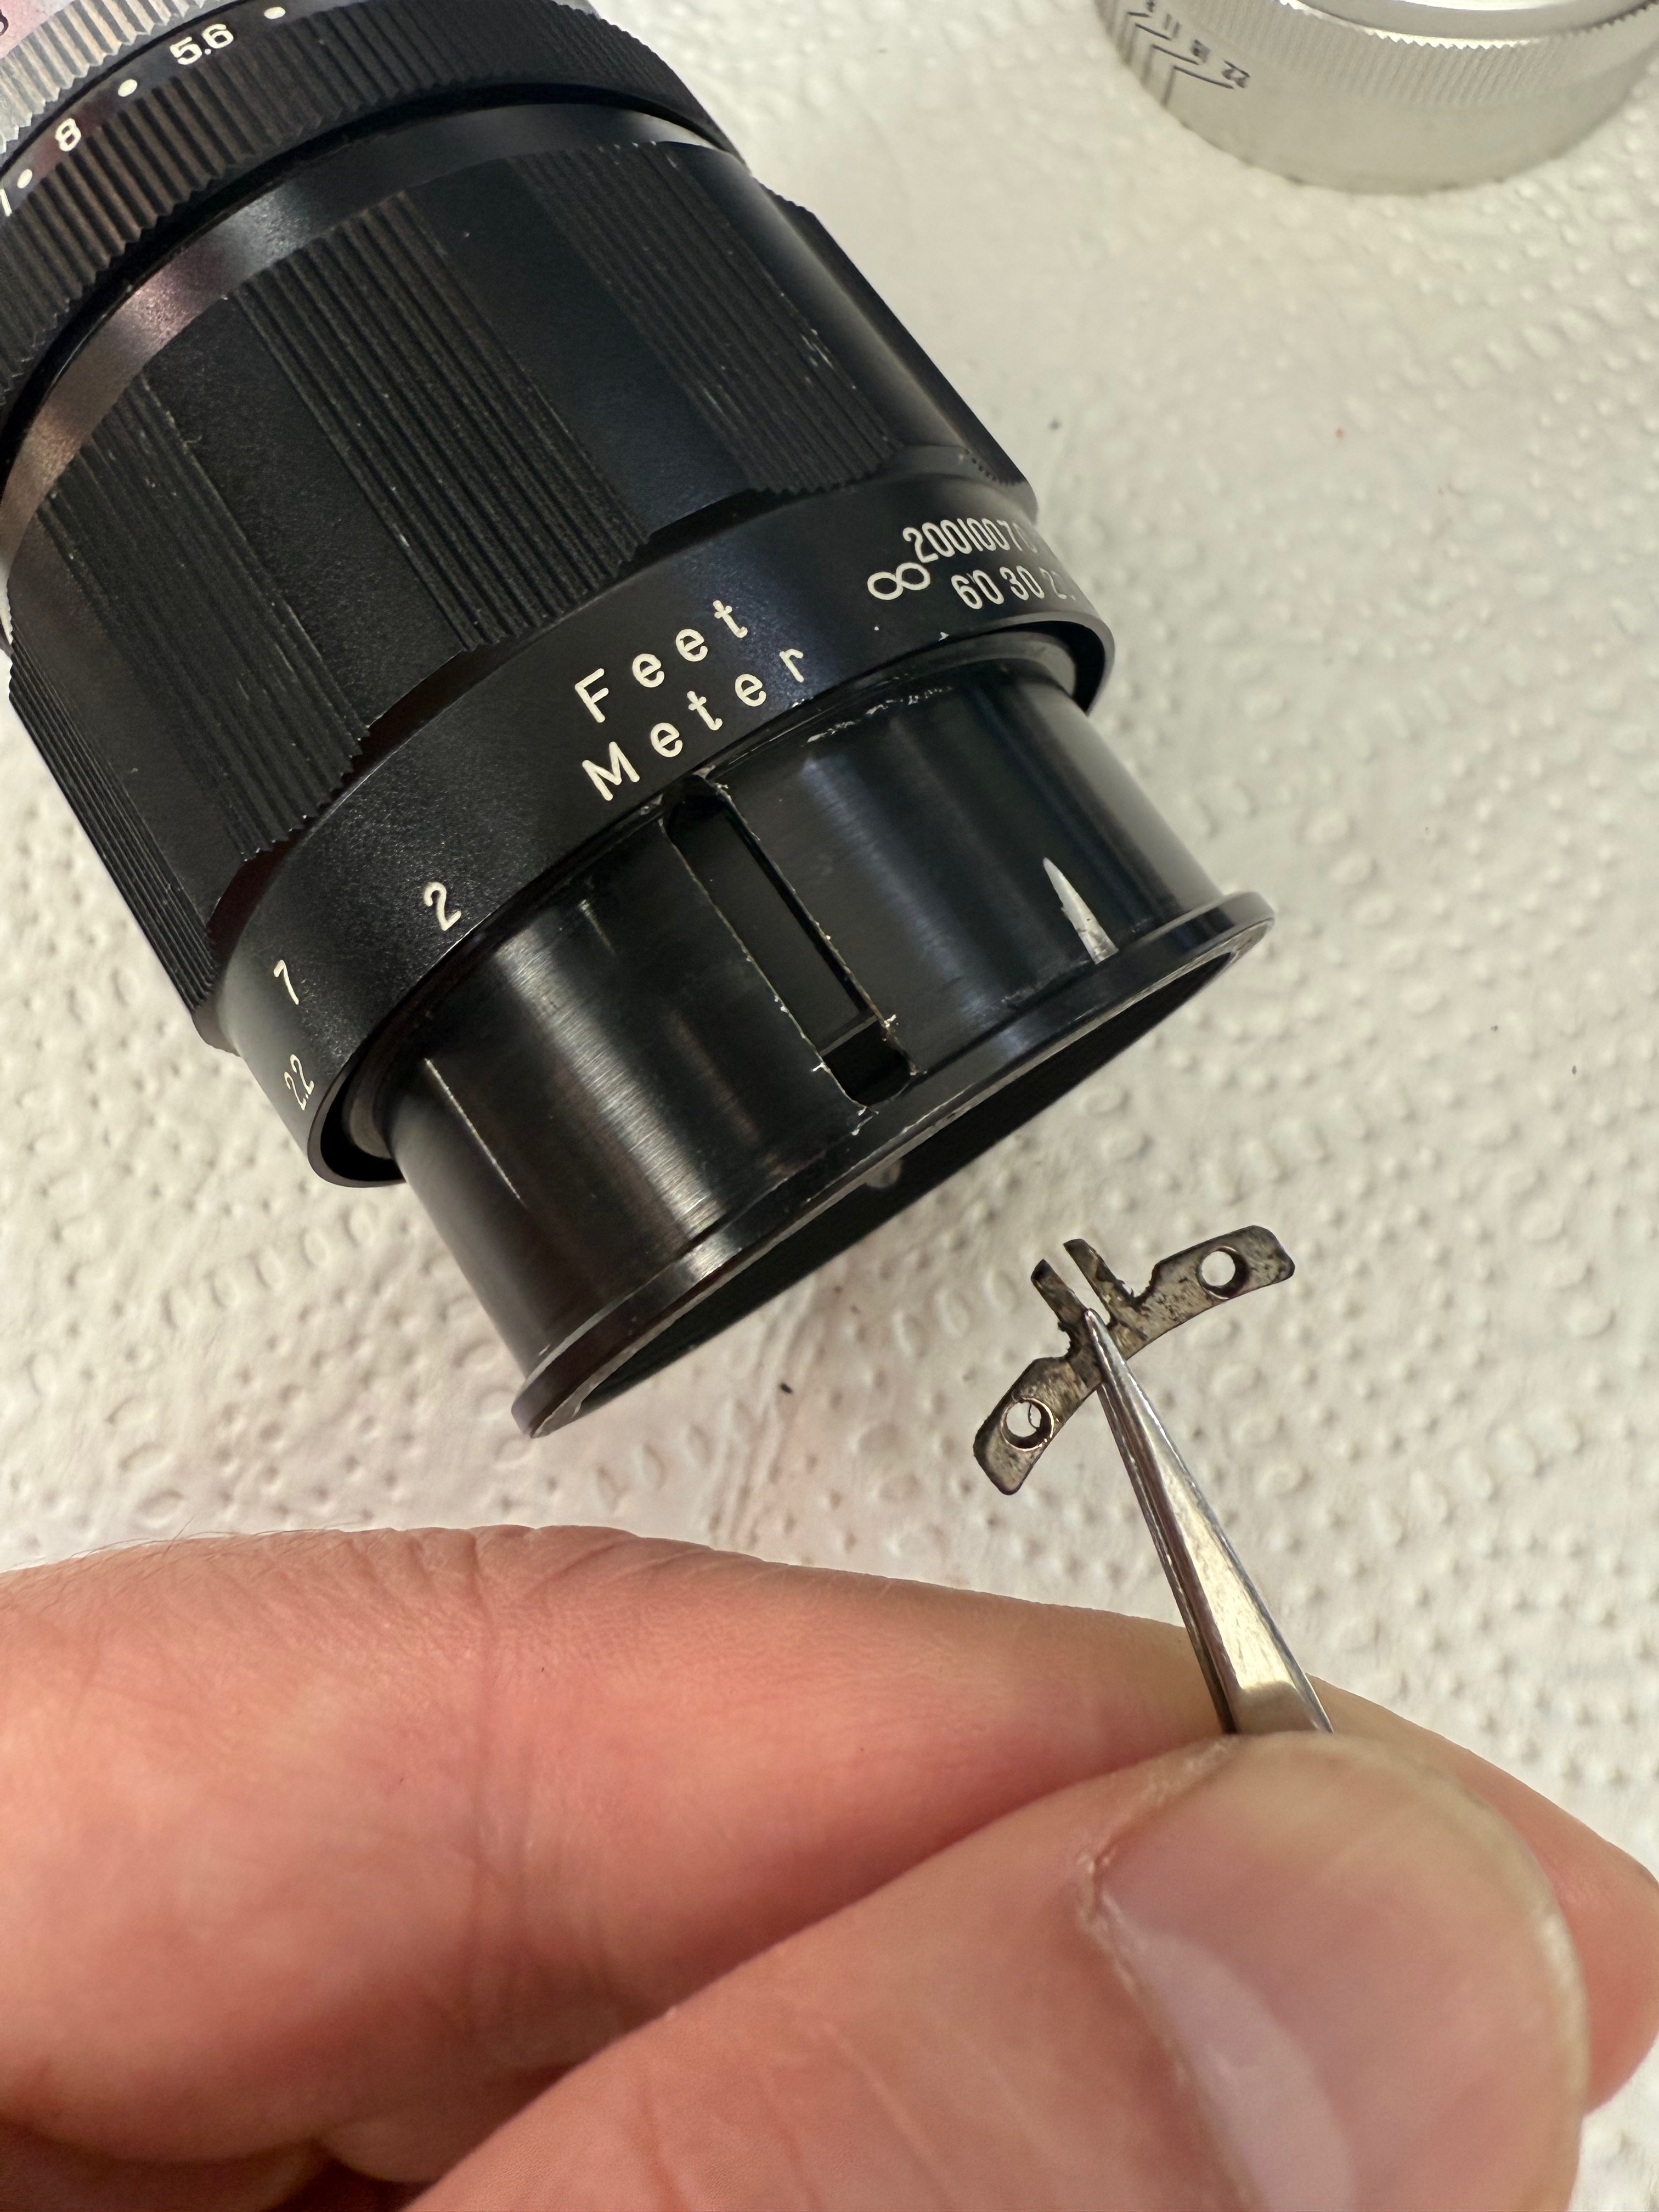
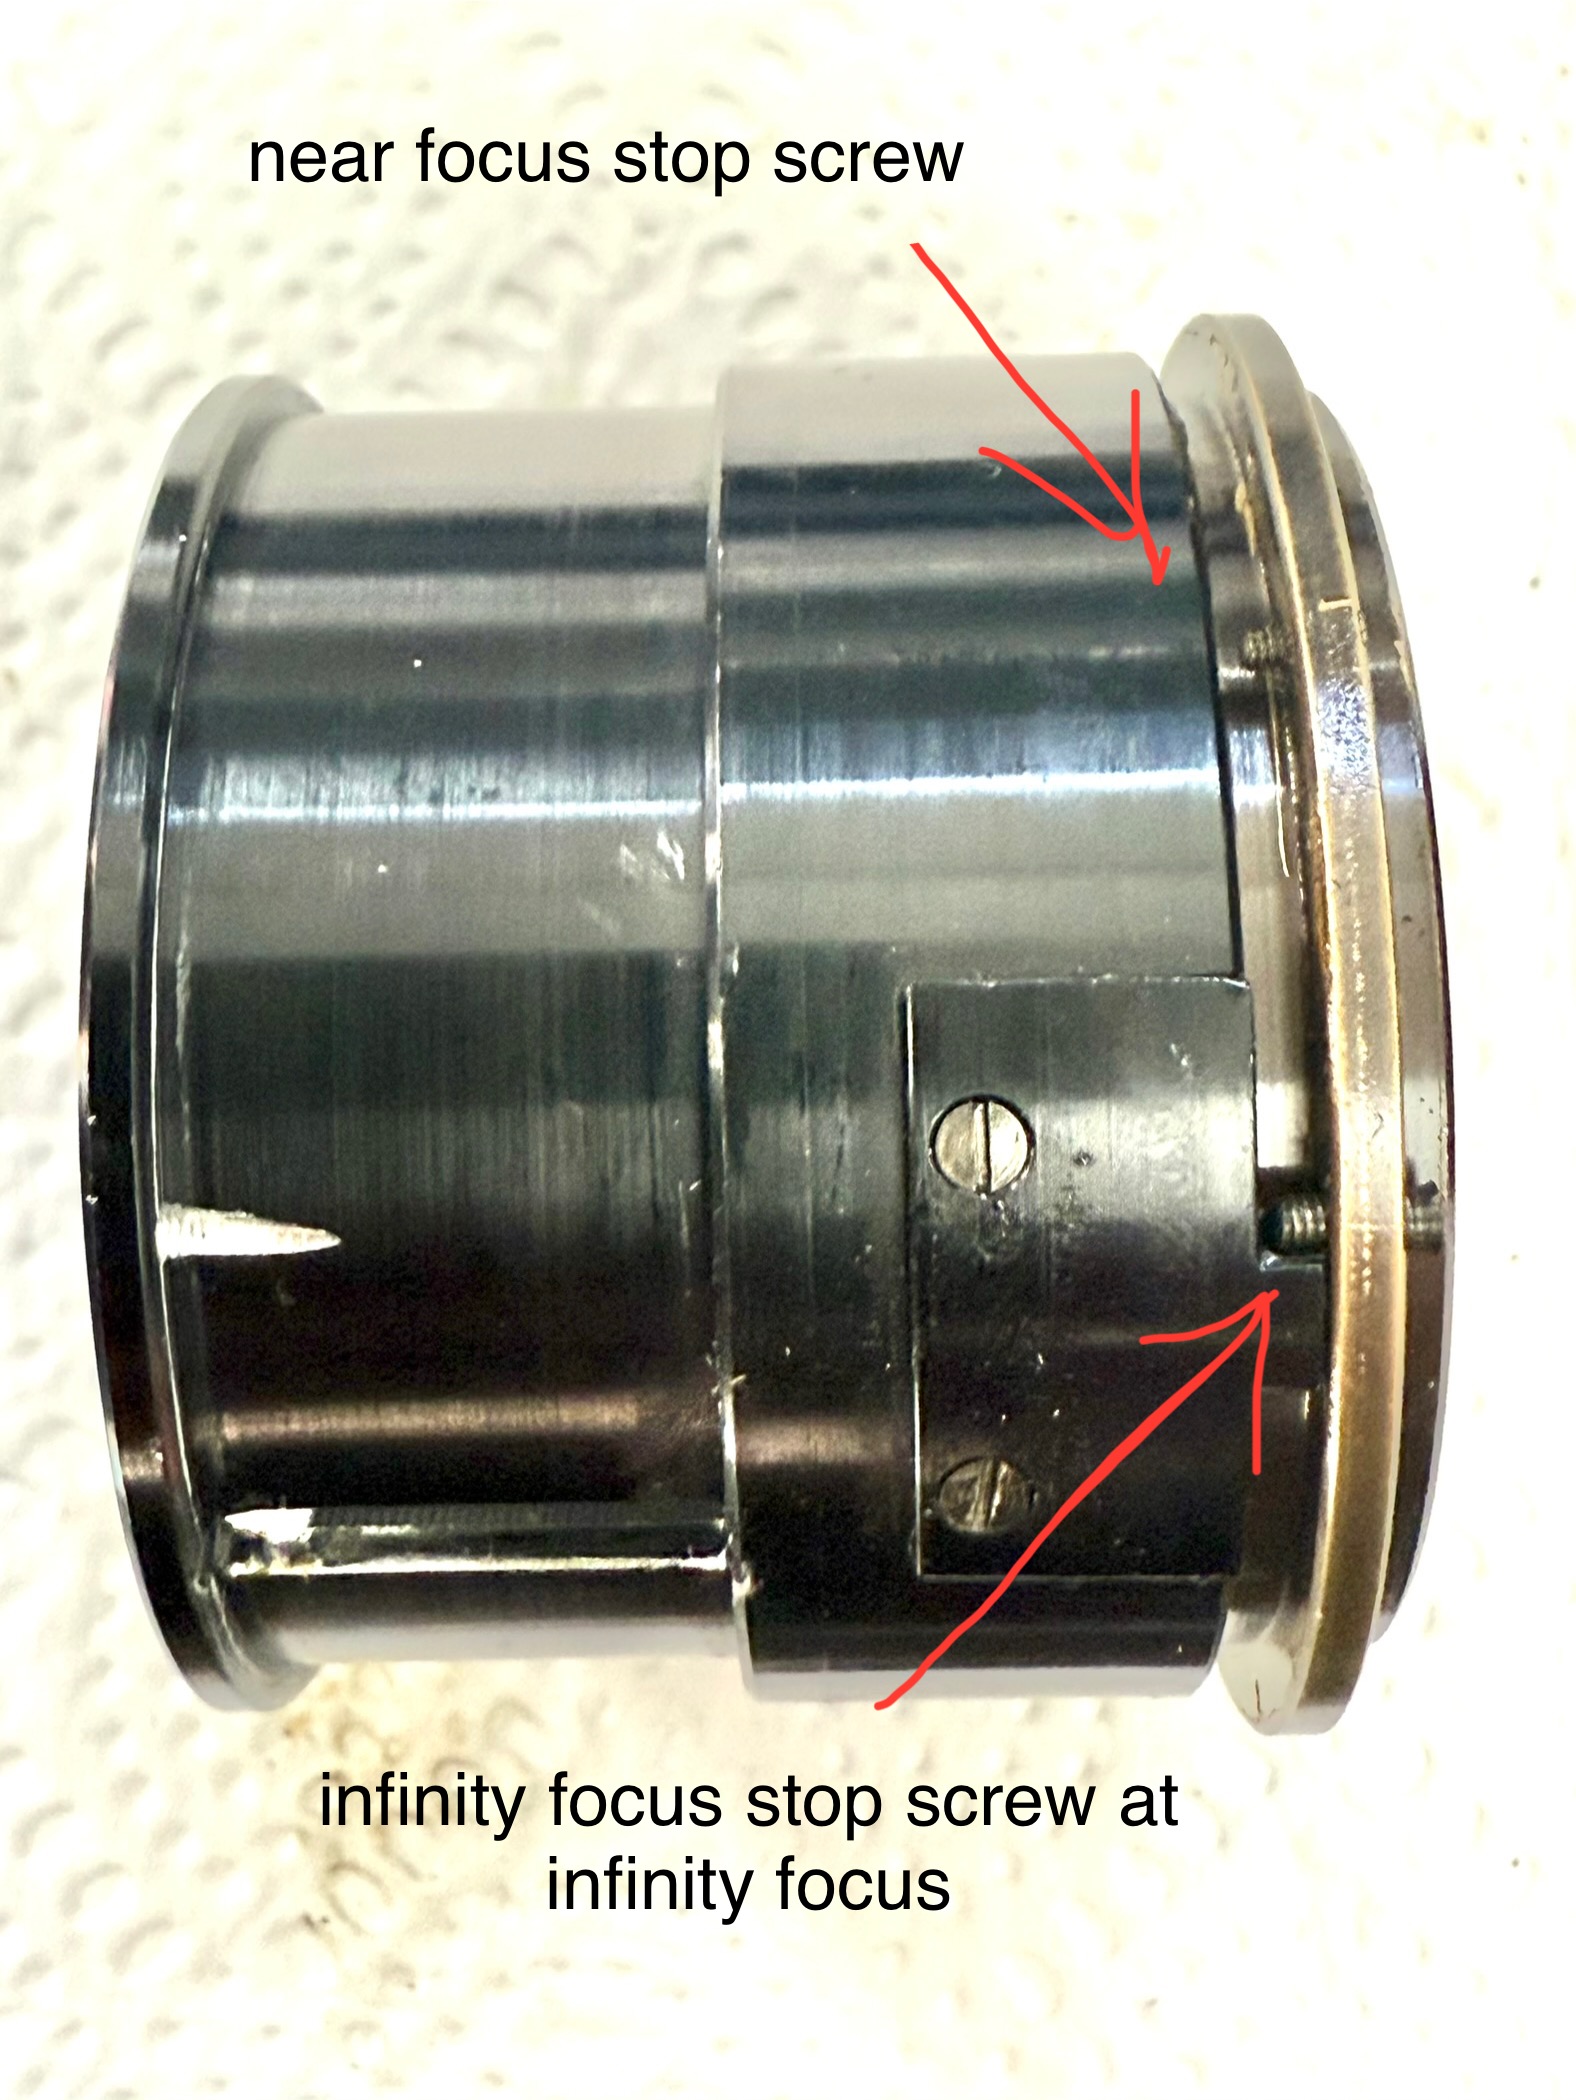
Next, you can remove the distance scale ring. It’s secured by five screws positioned on the inner side of the ring. Pay special attention to the middle screw—it’s longer than the others and also functions as the mechanical stop for infinity focus. Before removing it, make sure to note its exact position when the distance scale is set to infinity. This reference will be crucial for restoring accurate focus during reassembly.

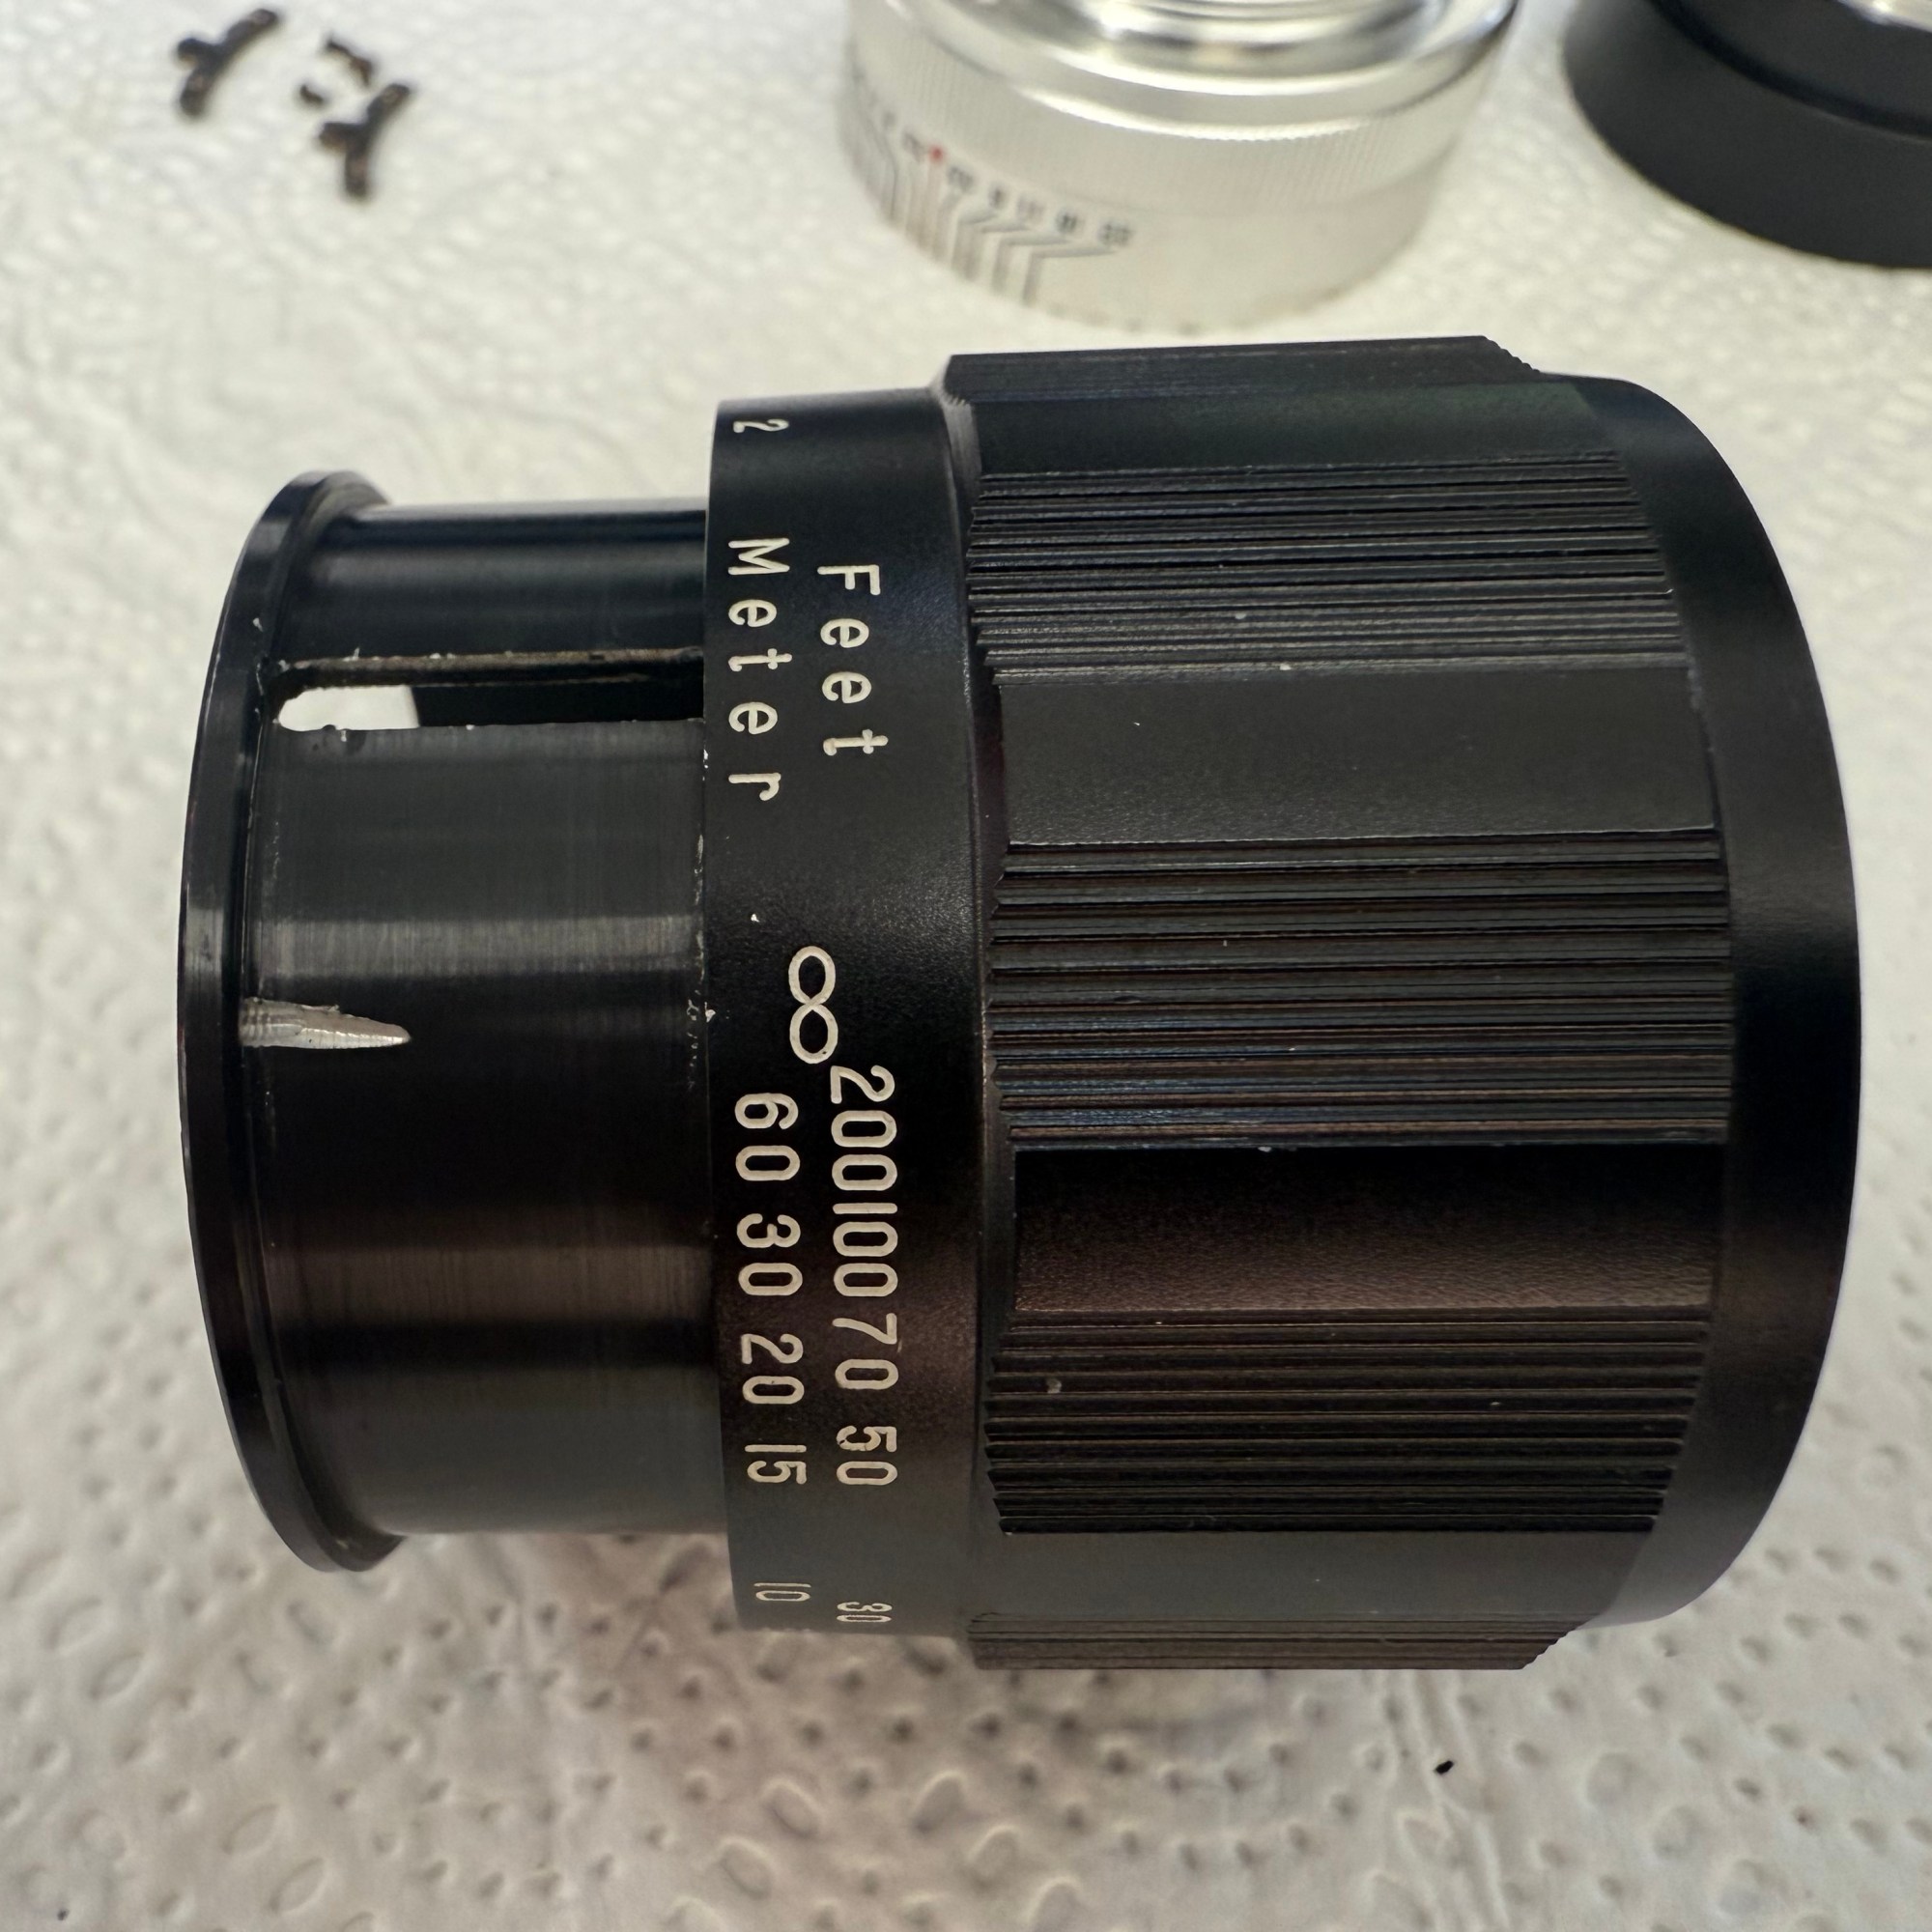
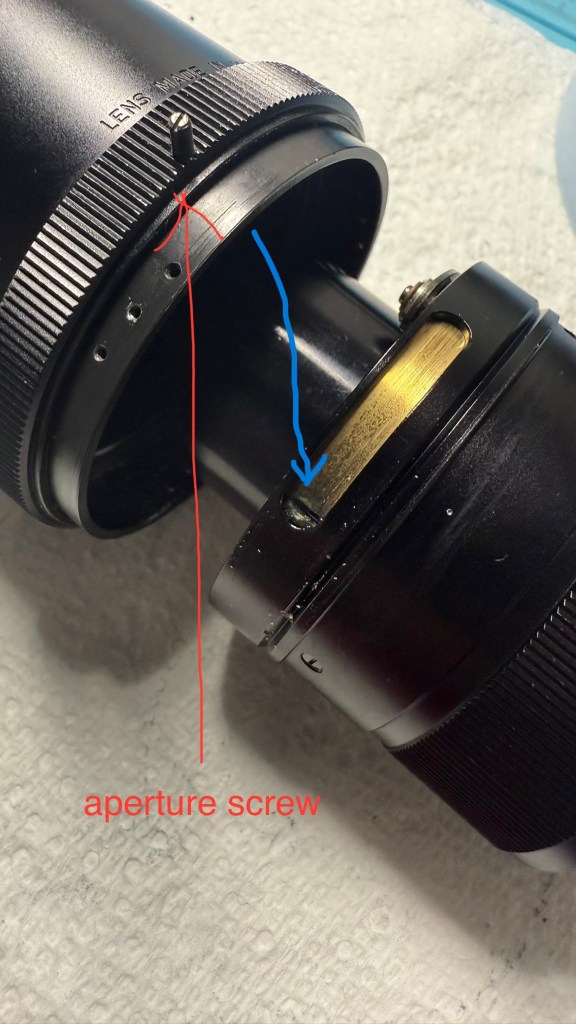
Once the distance scale ring is removed, the orientation of the screws becomes clearly visible. At this stage, you’ll also notice a sixth screw—the near-focus stop screw—revealed after the focusing ring is taken off. It’s important to carefully note its position relative to the infinity stop screw, as both play a crucial role in defining the lens’s focusing range. Marking or photographing their alignment before disassembly can save a lot of guesswork during reassembly and help maintain accurate focus calibration.

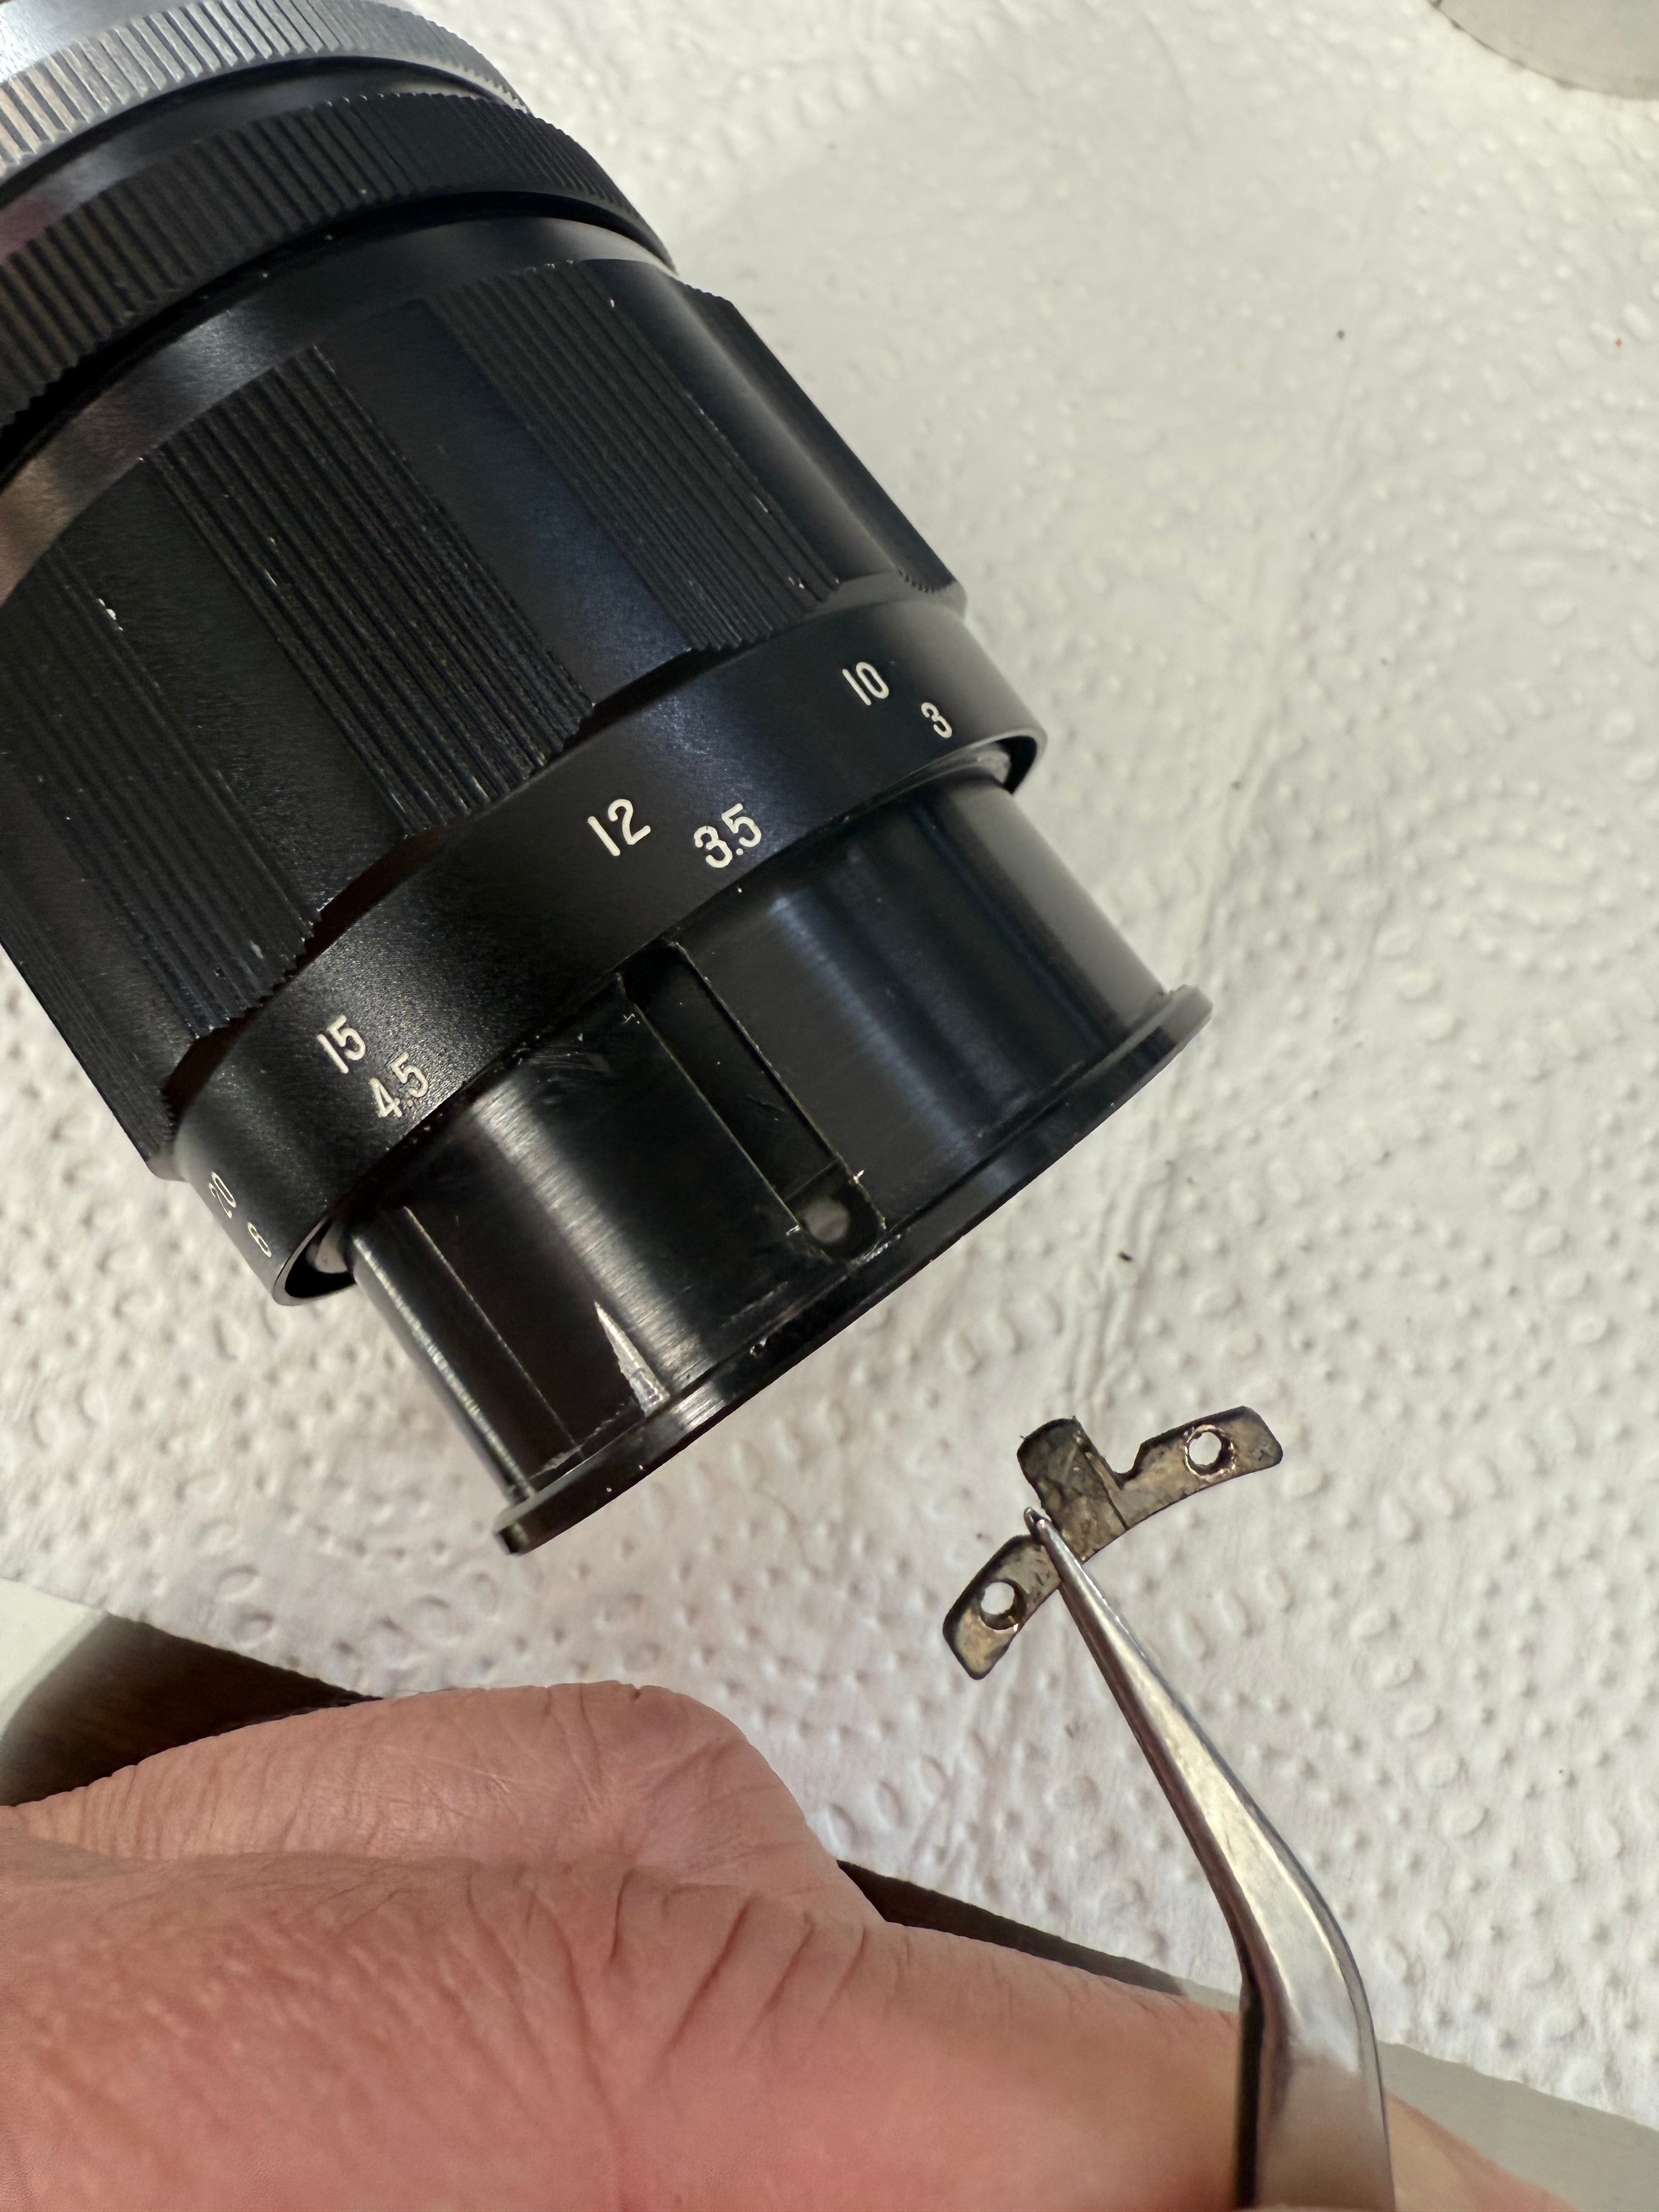
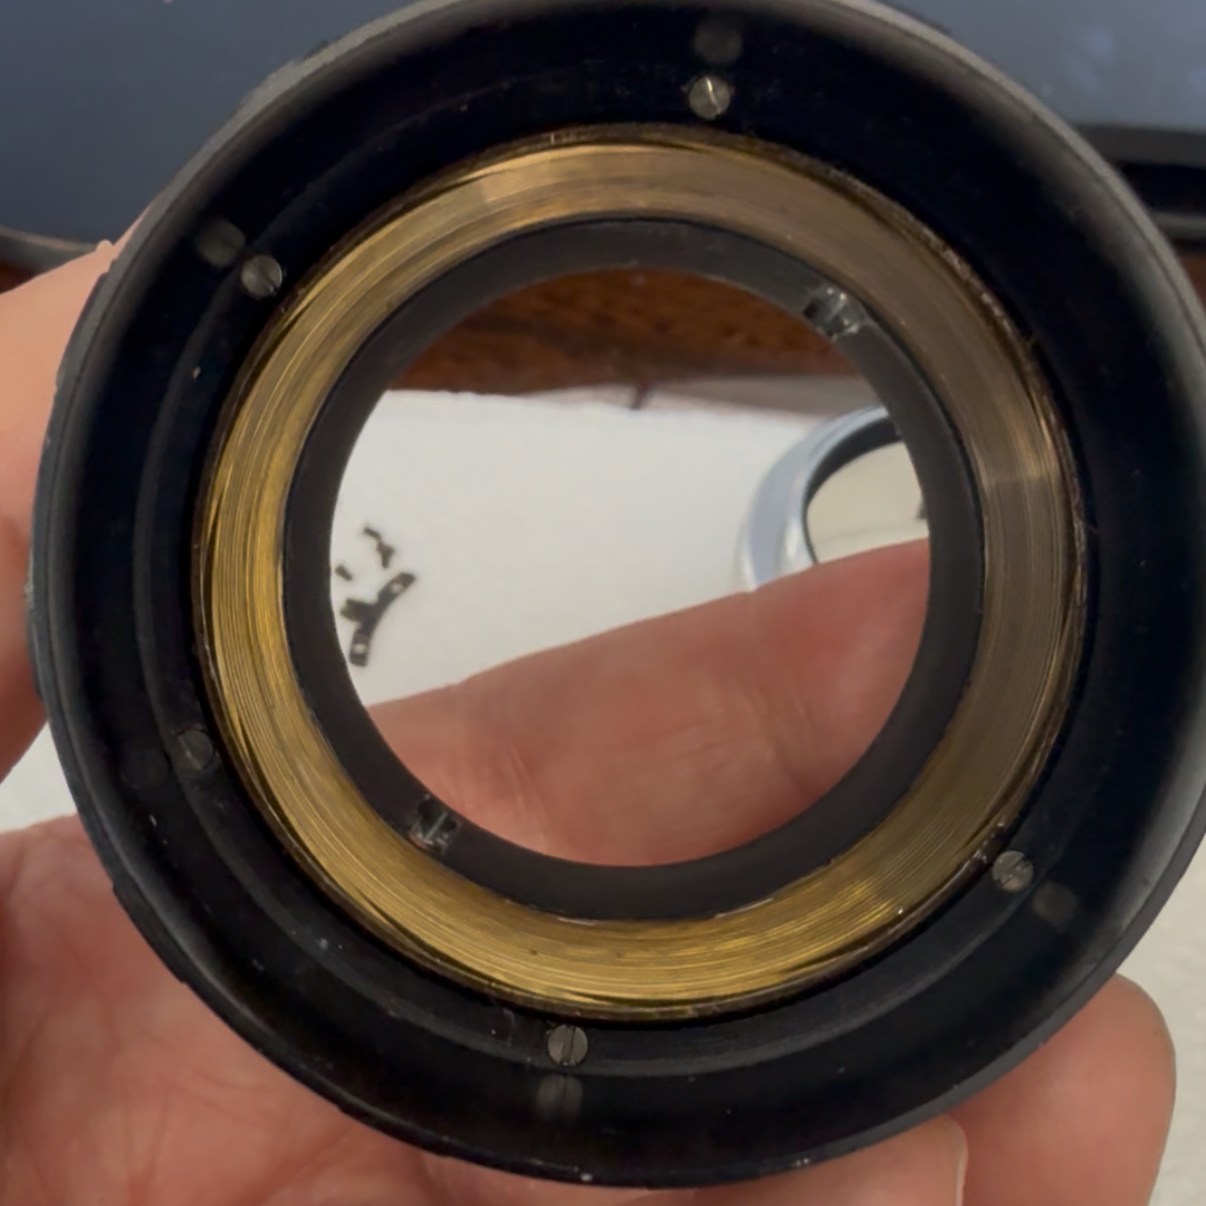
Remove the near focusing stop screw and the brass helicoid ring can be rotated out.

After thoroughly cleaning and relubricating the helicoids, reassembly was smooth and uneventful. Everything clicked back into place with satisfying precision—no surprises, no fuss.

Thanks for reading, and I hope this walkthrough helps fellow vintage lens enthusiasts breathe new life into their classic gear!

Disassembling and Cleaning the Pentax Takumar 85–210mm Zoom Lens

I picked up the Pentax Super-Multi-Coated Takumar 85–210mm f/4.5 zoom lens as part of a lot sale at a local antiques market. To my surprise, it was in pristine condition—barely a mark on it, as if it had spent most of its life tucked away rather than in use. The offer was too good to pass up, and the inclusion of this classic M42-mount lens felt like an unexpected bonus.

On closer inspection, though, I noticed a faint trace of fungus inside the lens elements. It wasn’t extensive and didn’t seem to affect image quality, but my inner perfectionist couldn’t let it slide. So, with a bit of free time over the holiday break, I decided to take on the challenge: disassemble the lens and give its optics a proper clean.

The only post I found online about disassembling this lens was a blog in Japanese. Thankfully, Google translated the webpage for me, although the instructions could use some improvement, especially regarding marking the lens for easy reassembly. Despite a few challenges during the disassembly process, I persevered, and after two tries, I finally managed to align the distance scale with the correct focus distances upon reassembly. This blog is here to help others with the same lens who wish to service it, sharing my journey and tips for a smoother experience!

To dis-assemble, first remove the rubber lens zoom/focusing grip which is glued on the barrel. Be careful to use a blunt tool that doesn’t scratch the lens. Remove the residual glue for later re-gluing.

Set the lens at infinity focus, zoom at 210mm and aperture at f4.5. These will be your settings for re-assembly.

Once the lens is set at infinity, remove the lens name ring using a rubber grip tool to twist it anticlockwise out. Once this is removed, you can see 3 screws inside securing the front lens elements to the zoom/focusing barrel. These screws have a brass washer each. Remove those too. You will later use these screws to secure infinity focus with the front lens element group during re-assembly.

Turning your attention back to the zoom/focusing barrel again, you’ll notice 6 screws, one set of 3 closer to the front of the lens at an upper level and another set of 3 closer to the base of the lens at a lower level. First remove the 3 upper level screws. Keep them aside together, they are longer than the lower level screws. Once you have removed the 3 upper level screws, you can remove the barrel around the front lens elements by slowly pulling on it and turning the barrel at the same time. The front barrel will come out once the focusing stop screw comes free through a groove in the inner zoom tube. How the barrel with the focusing stop screw is reinserted during reassembly will determine if you are able to have a full throw of the focusing barrel or a limited throw as there are 2 grooves in the inner zoom tube to insert the focusing stop screw through. Only inserting through the correct groove will give the full throw for focusing.

Once you remove the 3 lower zoom barrel screws, you will be able to separate the focusing distance scale barrel from the zoom/focusing barrel. At this stage you will be able to slide upwards and out the zoom/focusing barrel, revealing the inner zoom mechanism tubes (which are greased). To best work with the inner tubes, it is best to remove the grease and regrease later. Note the alignment of the focusing stop on the tube (red arrow) with the infinity mark. The stop should be aligned with infinity, otherwise you won’t be able to be able to get the distance scale aligned properly on re-assembly. I did not notice the focusing stop during initial dis-assembly because it was obscured by grease as in the picture on the left.

Note the alignment of the markings. This is the alignment for focus at infinity, zoom at 210mm and aperture at f4.5. Mark the position of the front element which was set for infinity focus. Note that the focus stop should be aligned. If it is not aligned, you won’t be able to get the distance scale correctly aligned properly once re-assembled. My mistake which I do not wish happen to anyone else.

At this stage you can remove the front lens element helicoid by twisting clockwise. Mark the point of separation from barrel. In my case, the Pentax factory had already marked it with 3 linear scratches. Much angst at reassembly if you forget to do this.

Also note the 2 shims (one brass and one plastic) on the distance scale barrel. These are easily deformed or broken.

Once the front lens element is removed, you can turn your attention to the rear of the lens. Loosen the 3 holding screws for the aperture manual/auto indicator ring and remove the ring.

Next remove the six screws (in 2 sets) holding the aperture setting mechanism barrel. Note that the screws are slightly different in lengths. I separated them out accordingly. Also remove the aperture screw before you can separate out the aperture setting mechanism barrel.

Note that the aperture screw should fit into the groove in the brass section (blue arrow). This will turn the aperture mechanism to set the aperture. Note how the aperture prongs link up with each other to work the aperture blades located in the rear element lens group.

When re-assembling, turning the aperture screw in too deeply will cause the aperture setting ring to be too tight. So, turn to the correct depth to ensure smooth aperture ring rotation and set the screw with some lacquer.

Next slowly ease out the aperture ring, making sure that the ball bearing does not fly into space. Remove the 3 screws to free the zoom index tube.

After moving the zoom index tube up, you will see another set of 3 screws which hold the rear element lens group and aperture housing in place. Note the alignment as you remove the rear element lens housing.

After the rear and front lens elements are removed, all the external lens tubes can be removed and you are left with the zoom mechanism tubes and zoom lens elements. Remove all the screws holding the zoom lens elements to separate out the pieces, taking care to note the lens orientation, where all the screws fit and how the tubes are aligned. This is where I made my mistake when re-assembling, as I secured the outer tube 180 degrees wrongly and the focusing stop screws were not aligned properly causing misalignment with the distance scale toward the end of re-assembly.

Re-assembly is just putting everything together methodically and carefully in reverse order, taking time to check alignment at each step.

The Pentax Super-Multi-Coated Takumar all nice and clean. This one came with its original case, lens hood, close-up filter, lens cap and rear cap. A good collector’s item.

Thanks for visiting.

Fruitful day at the Flea-Market

This weekend’s trip to the flea-market netted 4 nice little pieces of photographic equipment.

It was a fairly large flea market located in a multi-level car park. My wife seemed to be finding more things to her liking than I was with used cameras. I was almost resigned to going home without anything, when at the final level of the flea-market at the top of the carpark, someone was selling old photographic prints and mounted photographic slides. Other items strewn around the table included some really junky old cameras from the 70’s and 80’s.

Well, junky to most people but interesting to others. They were a plasticky Russian Zenit 122 SLR with a 58mm f2 lens mounted on it, a Pentax ME super SLR with a SMC Pentax-M 50mm f2 lens on it, a Chinese Seagull 4A-109 TLR and finally a super cheesy plastic Nishika N8000 camera. Lucky for me the other person rummaging through the stuff on the table was not interested in these Russian, Chinese cameras. The only camera there with some quality was the old Pentax ME. The Nishika sounded Japanese but it was made in China and marketed by a company based in Nevada!

Why were these interesting to me?

Let’s start with the Zenit 122. Really not a remarkable camera. Made mostly of brittle plastic, it will break the moment you drop it. Only 6 shutter speeds on the shutter dial: B, 1/30, 1/60, 1/125, 1/250 and, drum roll, a top speed of 1/500. At the bottom the words “Made in USSR” – the USSR was defunct since Dec 1991. However what made me pick this up was the lens. Yes, you guessed right, it was a Zenit Helios-44M-4 58mm f2 lens. This is a later version that was multi-coated (MC). Probably among one of the last to come out of production from the old Soviet Union – its serial number was 90xxxxxx. The first 2 numbers to my understanding denoted the year of manufacture. As noted in my previous blog, the Helios 58mm f2 lenses while not the most advanced of design and manufacture, had a most peculiar quirk that give the photos it took a swirly bokeh under the right conditions.

As for the Pentax ME super, it was to bundle the purchase to get a better price overall. Really didn’t need to have the camera but the price bundled up was too good to let go. Furthermore the camera and the SMC Pentax-M 50mm f2 lens were in good condition.

The Seagull TLR is trashed by many people in various chat groups, mostly comparing it to the Rollei and Yashica TLRs. I doubt a majority of these people have ever used a Seagull TLR. I had a Seagull 4A-103 TLR and it gave me pretty good quality 6×6 slide photos. At f8, it was pretty sharp edge to edge. The 4A-109 is the last 4A TLR model that the Shanghai based Seagull company was to make, as a consequence of declining sales from the digital revolution. Other than its collectible value, I will be sure to give this TLR a test run.

Finally, the Nishika. It is completely made of plastic except for the base. All the features like the pentaprism, powerwind handle, LCD screen and electronic hotshoe contacts are fake! Reminds me of toy cameras from the 80’s and 90’s. It also has a weird lens arrangement or lenses – four of them in fact. For most people this is junk. But for other people, including me, this is a unique quirky camera from the past. It is essentially a point and shoot camera with four plastic 30mm lenses. It has 3 apertures – indoors (f8), cloudy (f11) and sunny (f19). Only one shutter speed of 1/60 sec. No film ISO dial – you are advised to use ISO 100 or 200 film. But ISO 400 film could be used too, unofficially. The only control you have are the 3 apertures and a non-TTL flash can be attached for very low light shooting. The hotshoe is a hotshoe and nothing else. It doesn’t communicate with the camera. If the light is too low, the camera projects a big red dot in the viewfinder to tell you. But you can still take a photo despite this.

What the four lenses of the Nishika N8000 does is it takes 4 photos of the same scene at the same time from slightly different horizontal angles. It does this on 2 frames of 35mm film. So if you put in a 24 exposure roll of film, the Nishika will give you 12 “3-D” photos. When the company was still in existence, you could send your exposed roll of film to them and the company will produce lenticular 3-D image cards where you could view the “3-D” image as you tilt the card horizontally from side-to-side. Unfortunately the company went bankrupt and was investigated by US federal authorities for illegal marketing practices.

These days the Nishika still has a use for film enthusiasts. Taking the four images produced, one could superimpose them into 1 gif image and produce quirky moving 3-D images.

As a bonus to this bundled purchase, there was a roll of exposed Lomo-film in the Zenit. I exposed the last few frames of the undeveloped roll to sunlight when I opened the back thinking that the film chamber was empty. I don’t know how long it has been in there. After developing, it turns out these were photos of someone’s visit to the Naksansa temple in South Korea at dawn and early in the far east morning – with weird colors from the old film and me partially opening the back! Enjoy!